Get started with human task orchestration
Build a Camunda 8 process with a user task, then route the process based on user decision.
About
This guide is designed for users who prefer a low-code approach to process automation. You can follow this tutorial using either a local, Self-Managed lightweight setup, or Camunda 8 SaaS.
Camunda 8 allows you to orchestrate processes with human tasks of any complexity. Utilizing user tasks, you can create and assign tasks to users. Then, users can perform their work and enter the necessary data to drive the business process.
This guide introduces you to the basics of human task orchestration. You will create a simple process to decide on dinner, and drive the process flow according to that decision.
- Self-Managed
- SaaS
Have you installed Camunda yet?
Prerequisites
Install and start Camunda 8 Run
- Download the latest release of Camunda 8 Run for your operating system and architecture. Opening the .tgz file extracts the Camunda 8 Run script into a new directory.
- Navigate to the new
c8rundirectory. - Start Camunda 8 Run by running
./start.sh(or.\c8run.exe starton Windows) in your terminal.
When successful, a new Operate window automatically opens.
If Camunda 8 Run fails to start, run the shutdown script to end the current processes, then run the start script again.
Starting with 8.10.0-alpha2, Camunda 8 Run no longer requires Java to start.
Camunda 8 Run starts with H2 as the default secondary storage. Elasticsearch is still supported but must be explicitly enabled in c8run/configuration/application.yaml.
For more information and local configuration options, see the Camunda 8 Run installation guide.
Have you signed up for Camunda yet?
Sign Up
Visit signup.camunda.com/accounts to sign up.
Create an account
Fill out the form and click Create account.
When you fill out the form, you'll receive a confirmation email. Click on the link to verify your email address.
Log in to your Camunda 8 account
Log in with the email address and password you used in the previous form, or use the social login buttons. To access the login site directly, navigate to camunda.io.
After login, you're brought directly to Camunda Hub. From here, you can manage your clusters, workspaces, projects, and other organizational resources.
Take the following five steps to create and run your first process with a human in the loop:
Step 1: Create a new process
In this step, you will design a process that demonstrates how to route the process flow based on a user decision. In this example, you will create a process to decide what is for dinner.
Create a new file
- saas
- sm
- In Camunda Hub, navigate to your workspace.
- In the workspace, click Create project, and name your project.
- In your project, select Create new > BPMN diagram.
- In the top navigation, next to New BPMN diagram, click the vertical ellipsis menu, and rename the file
Decide on Dinner. - Make sure to name the process itself as well. Click the empty canvas, and specify the process name and technical ID in the properties panel on the right side of the screen. This specifies how the process will appear in other tools of Camunda 8.
Within Desktop Modeler:
- Under Create a new file, select BPMN diagram.
- Click the empty canvas, and specify the process name and technical ID in the properties panel on the right side of the screen. This specifies how the process will appear in other tools of Camunda 8.
Design the process
- saas
- sm
To run this guide, make sure to be in Implement mode to specify the technical details of the process.
-
A start event is automatically added to the canvas. Click it to display configuration and append options.
-
Click the rectangular Append Task icon to append a task.
-
In the right properties panel, enter a descriptive name for the task, such as
Decide what's for dinner. If the properties panel for your task doesn't open automatically, navigate to Window > Toggle Properties Panel to open it manually. -
Change the task type by clicking on the element and selecting the Change element menu icon. Select User Task.
-
Select the user task and click on the diamond-shaped icon to append an exclusive gateway. The gateway allows you to route the process flow differently, depending on conditions.
-
Select the gateway and append a task by clicking the task icon. Repeat it to create a second process flow. Name the tasks based on what the user decides to eat: in this case, we've named ours
Prepare chickenandPrepare salad. -
To route the user to the right task, add expressions to the sequence flows. Sequence flows are represented by arrows connecting the gateway to the tasks. To add an expression, click on a sequence flow to view the properties panel, and open the Condition section.
-
Verify the sequence flows have the following expressions:
meal="Chicken"on one side, andmeal="Salad"on the other. You will define the variablemeallater when designing a form for the user task.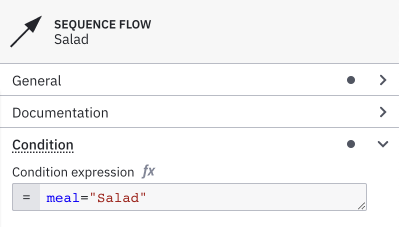
-
Connect the split process flows again. Append another exclusive gateway to one of the tasks. Select the other task and drag the arrow-shaped sequence flow tool to connect it to the gateway.
-
Select the gateway and add an end event to your process, denoted by the circle with the thick outline.
- saas
- sm
Don't worry about saving your process diagram. Every change you make is automatically saved.
- Save the process file.
New to BPMN or want to learn more? Visit our BPMN cheat sheet for an overview of all BPMN symbols. Variables are part of a process instance and represent the data of the instance. To learn more about these values, variable scope, and input/output mappings, visit our documentation on variables.
Step 2: Design a form
You have now designed the process. To allow the user to make the decision, you will now design a form. Forms can be added to user tasks and start events to capture user input, and the user input can be used to route the process flow, to make calls to APIs, or to orchestrate your services.
- saas
- sm
-
Select the user task you created in Step 1.
-
In the floating menu, click the link icon. A menu expands that allows you to create a new form.

-
Click Create new form. A form will be created and opened in the form editor. The form is automatically named.
-
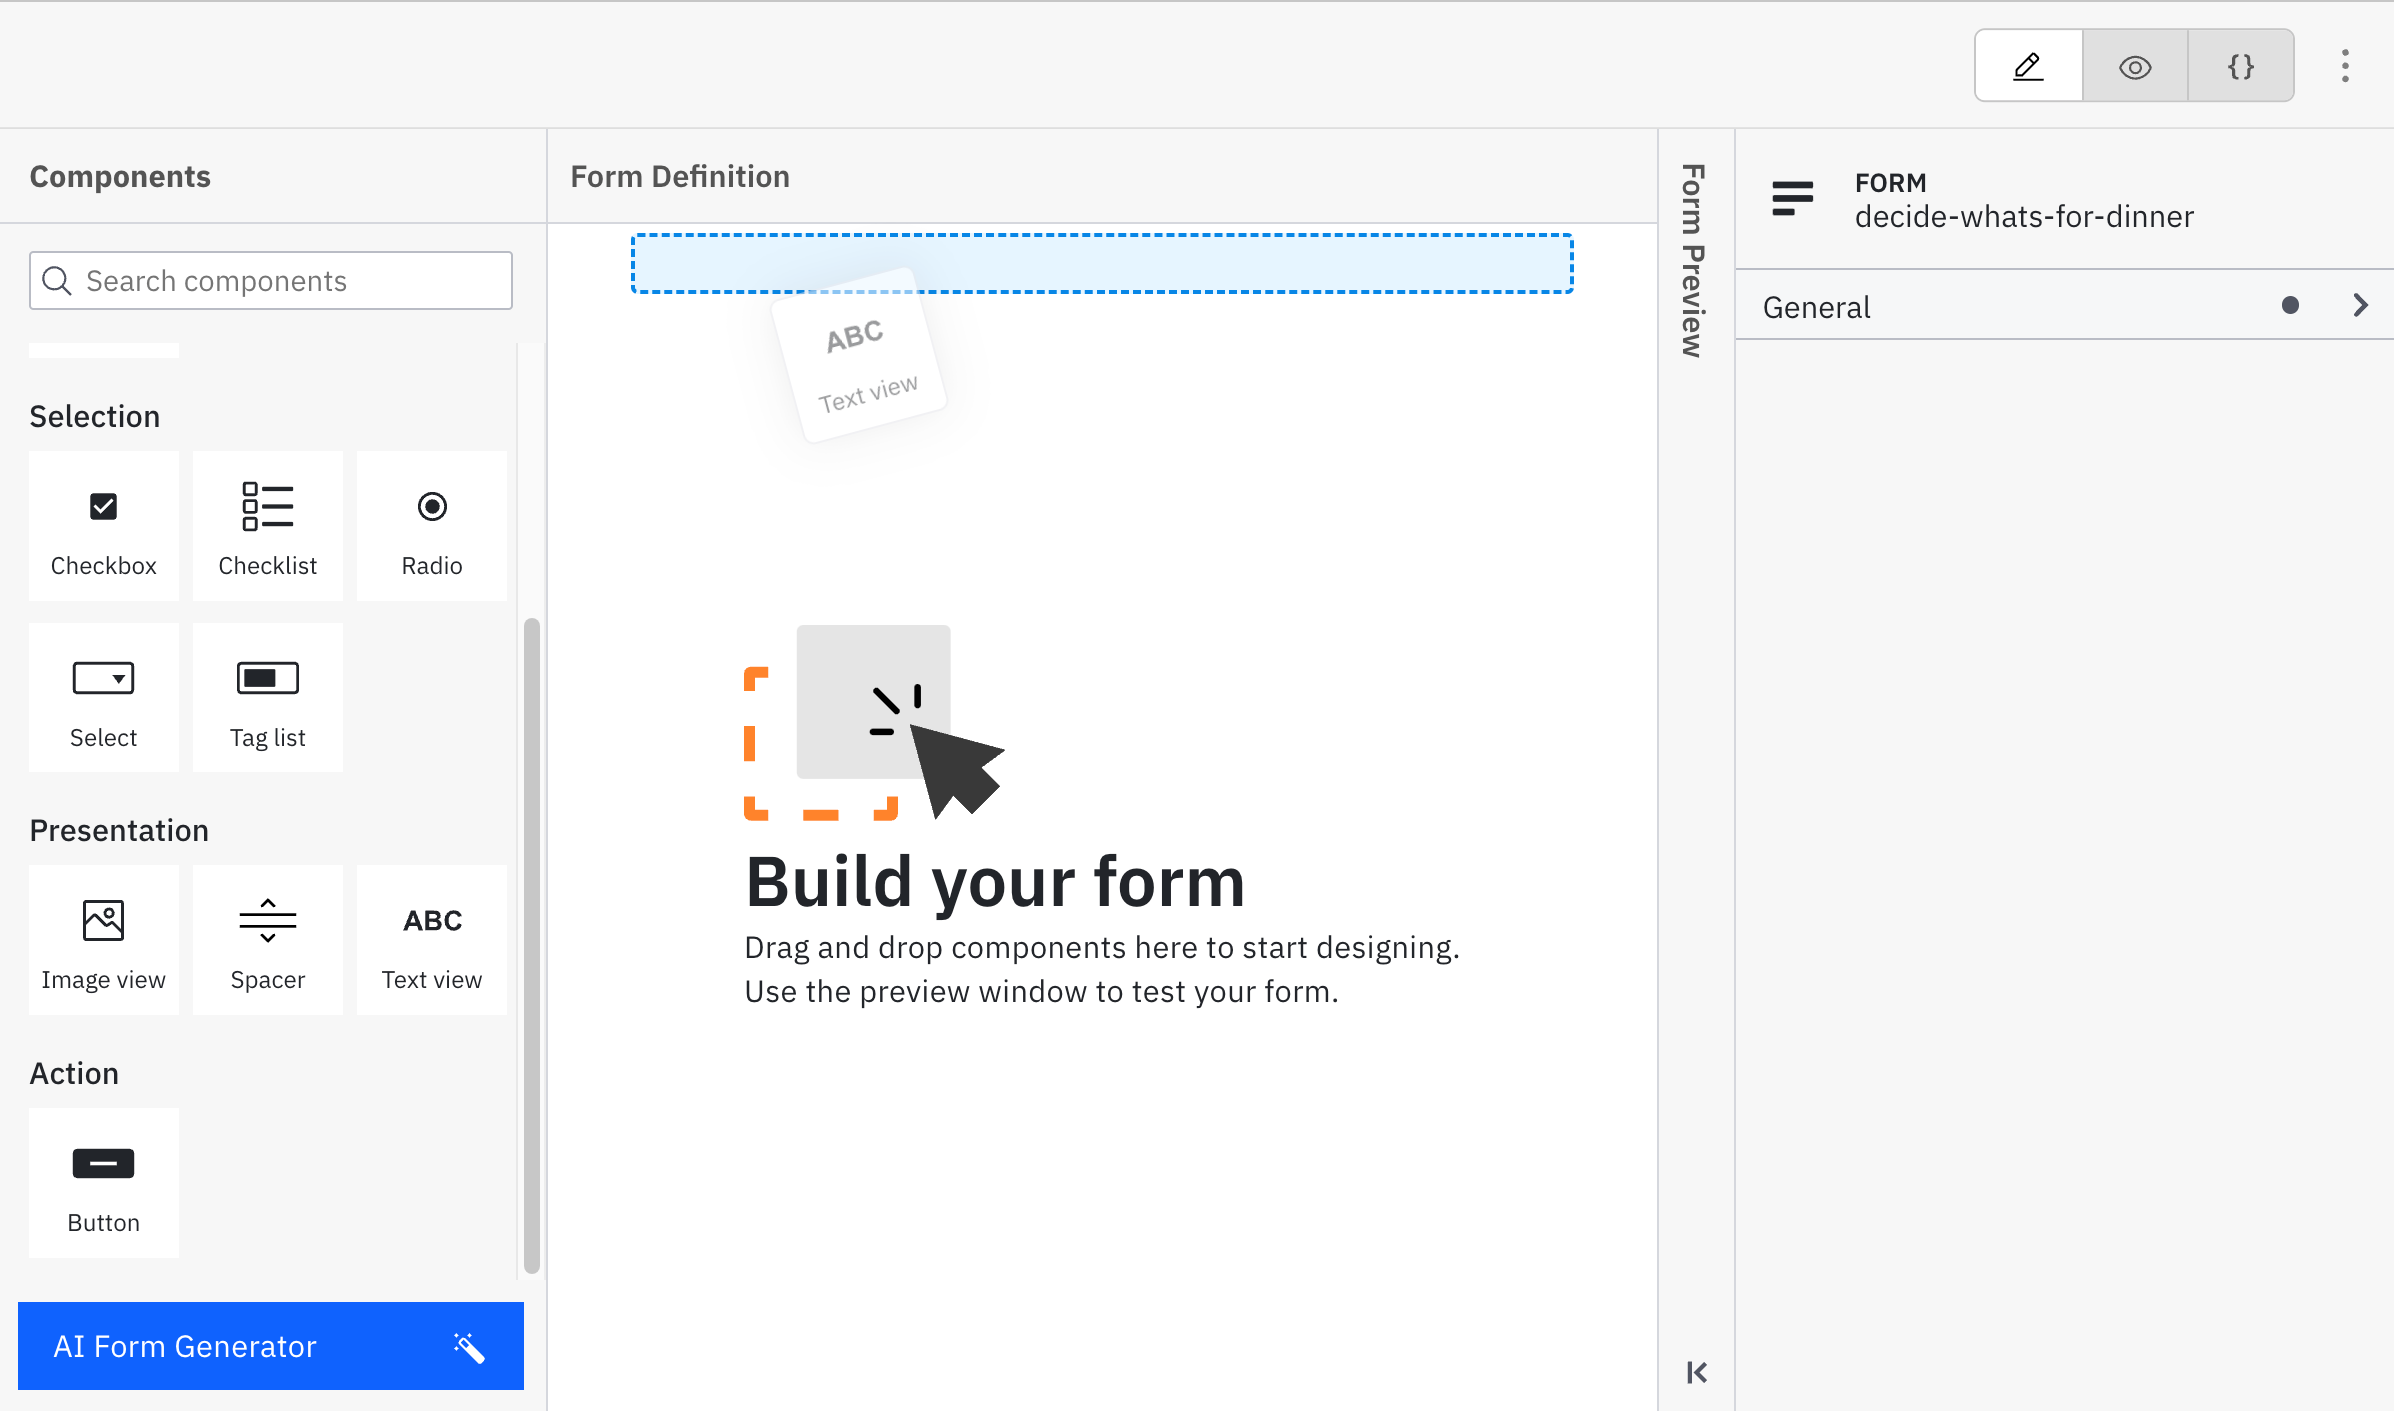
In the left Components pane, under Presentation, click and drag the Text view component to the empty form.
-
On the right side of the modeling interface, in the properties panel, open the General section, and enter a Text value, such as
What's for dinner?. -
In the left Components pane, under Selection, click and drag the Radio group component to the form. In the properties panel, enter the following:
- Field label:
Meal* - Key:
meal. The key maps to a process variable. The value of the component will be stored in this variable, and it can be read by the process that uses this form. You usemealhere because you already used this key for the conditions you set up in the process.

- Field label:
-
Scroll down to the Static options section of the properties panel to add radio options. Since there are two options for the dinner, add an extra value by clicking on the plus sign. Enter the value
Chickenwith the same label asChickenand enter the valueSaladwith the label asSaladin the other value. Themeal="<OPTION>"conditions you configured earlier are case-sensitive. Make sure the values you set here match those exactly.
-
Create a new form in Desktop Modeler by navigating to File > New File > Form (Camunda 8).
-
In the left Components pane, under Presentation, click and drag the Text view component to the empty form.
-
On the right side of the modeling interface, in the properties panel, open the General section, and enter a Text value, such as
What's for dinner?. -
In the left Components pane, under Selection, click and drag the Radio group component to the form. In the properties panel, enter the following:
- Field label:
Meal* - Key:
meal. The key maps to a process variable. The value of the component will be stored in this variable, and it can be read by the process that uses this form. You usemealhere because you already used this key for the conditions you set up in the process.
- Field label:
-
Scroll down to the Static options section of the properties panel to add radio options. Since there are two options for the dinner, add an extra value by clicking on the plus sign. Enter the value
Chickenwith the same label asChickenand enter the valueSaladwith the label asSaladin the other value. Themeal="<OPTION>"conditions you configured earlier are case-sensitive. Make sure the values you set here match those exactly.
-
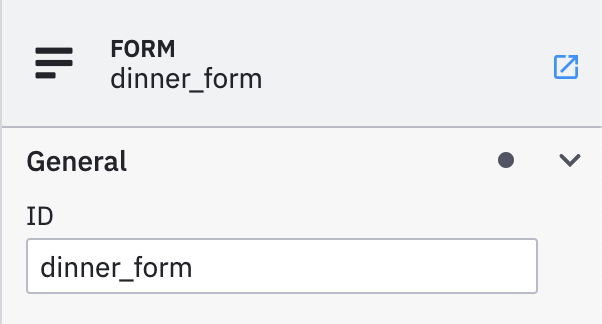
Click the canvas to reveal the form's properties panel. Copy the form's ID for use in your process.
-
Save the form.
Step 3: Link the form to your process
Once the form is designed, verify it's linked properly in your process:
- saas
- sm
- Navigate to the process you created in Step 1.
- Select the user task. Click the form link icon to open the form menu.
- Verify the task is linked to your new form.
- Open the process you created in Step 1 by clicking on the process file's name in the top bar.
- Select the user task, and open the Form section in the properties panel.
If the properties panel for your task doesn't open automatically, navigate to Window > Toggle Properties Panel to open it manually.
- In the form section, select Camunda Form, and enter the Form ID for the form you created in Step 2.
Step 4: Run your process
Your process is now ready to run. Given its human-centric nature, it is well suited to be run in Tasklist. In order to make it accessible from Tasklist, the process must be deployed first.
Human-centric processes involving user tasks seamlessly unfold within Tasklist, offering a cost-effective orchestration solution for human work with forms. However, the versatility of these processes extends beyond Tasklist, encompassing various alternative methods and applications. For instance, users can be redirected to external applications to fulfill tasks, bespoke task applications can be developed for any domain, or interactions with the physical world can be captured through event signals from sensors and IoT devices.
Deploy and test run
- saas
- sm
If no environment is assigned to your workspace, the deploy dialog tells you so. In SaaS, every cluster you create has one environment, which an organization admin must assign to your workspace before you move on.
- At the top right of the modeling interface, click Deploy & run to deploy the process to your cluster.
- Select a target environment.
- Under Resources, select All resources. Your project contains two files: the BPMN process diagram and the linked form. This option deploys both together. In other contexts, it might make sense to deploy Only this resource for individual files.
- Click Deploy & run.
This deploys both project resources and starts a process instance.
Other options to run a process are to start it via Tasklist, test it in the Test mode, or call it via the API or an inbound trigger. Read more about run options.
Ensure your installation of Camunda 8 Run is running prior to deploying your process.
You need to deploy both the form and process before running a process instance.
Deploy your form:
- Open your form.
- Using the c8run (local) connection, click the rocket-shaped Deploy icon to begin deploying your form.
- Click Deploy Form.
Deploy your process:
- Open your BPMN process.
- Using the c8run (local) connection, click the rocket-shaped Deploy icon to begin deploying your process.
- Click Deploy BPMN.
With both resources deployed, you can run a process instance. Click the play icon, then click Start BPMN process instance.
Check successful start in Operate
- saas
- sm
-
At the top right of the screen, a notification message confirms the instance started. Click View process instance. If you miss the notification message, next to Deploy & run, open the chevron menu, and click View process in Operate:

-
In Operate, you will see a visualization of the running process instance. Notice that a green token is waiting at the user task. This means that a task is waiting to be worked on in Tasklist.

In production, Operate is used to monitor both long-running and straight-through, high-throughput processes. In development environments, use Operate to confirm if the process flow works as expected. For faster in-place validation during development, use the Test mode.
-
Open Operate at
http://localhost:8080/operate, and select Processes from the left panel. -
In the Process panel, use the Name drop-down to select your process.
-
A visualization of your running process instance now displays in Operate, and your user task is marked with a green token icon. This means that a task is waiting to be worked on in Tasklist.

Step 5: Complete a user task
When the process instance arrives at the user task, a new user task instance is created at Zeebe. The process instance stops at this point and waits until the user task is completed. Applications like Tasklist can be used by humans to complete these tasks. In this last step, you will open Tasklist to run the user task you created.
While it may originally seem like the goal of automating a process is to remove humans entirely, efficiently allocating work through user tasks can be even more beneficial. Within this example, we've included a form to demonstrate the completion of a user task.
Using the Zeebe or Tasklist API, many other ways to complete a user task are possible, such as redirecting to another application to complete the task, or even listening to IoT devices to capture human interaction with the real world via job workers.
- saas
- sm
- In the top navigation, on the far left side next to Operate, click the Camunda components menu icon.
- Click Tasklist.
- Open Tasklist at
http://localhost:8080/tasklist.
In Tasklist:
-
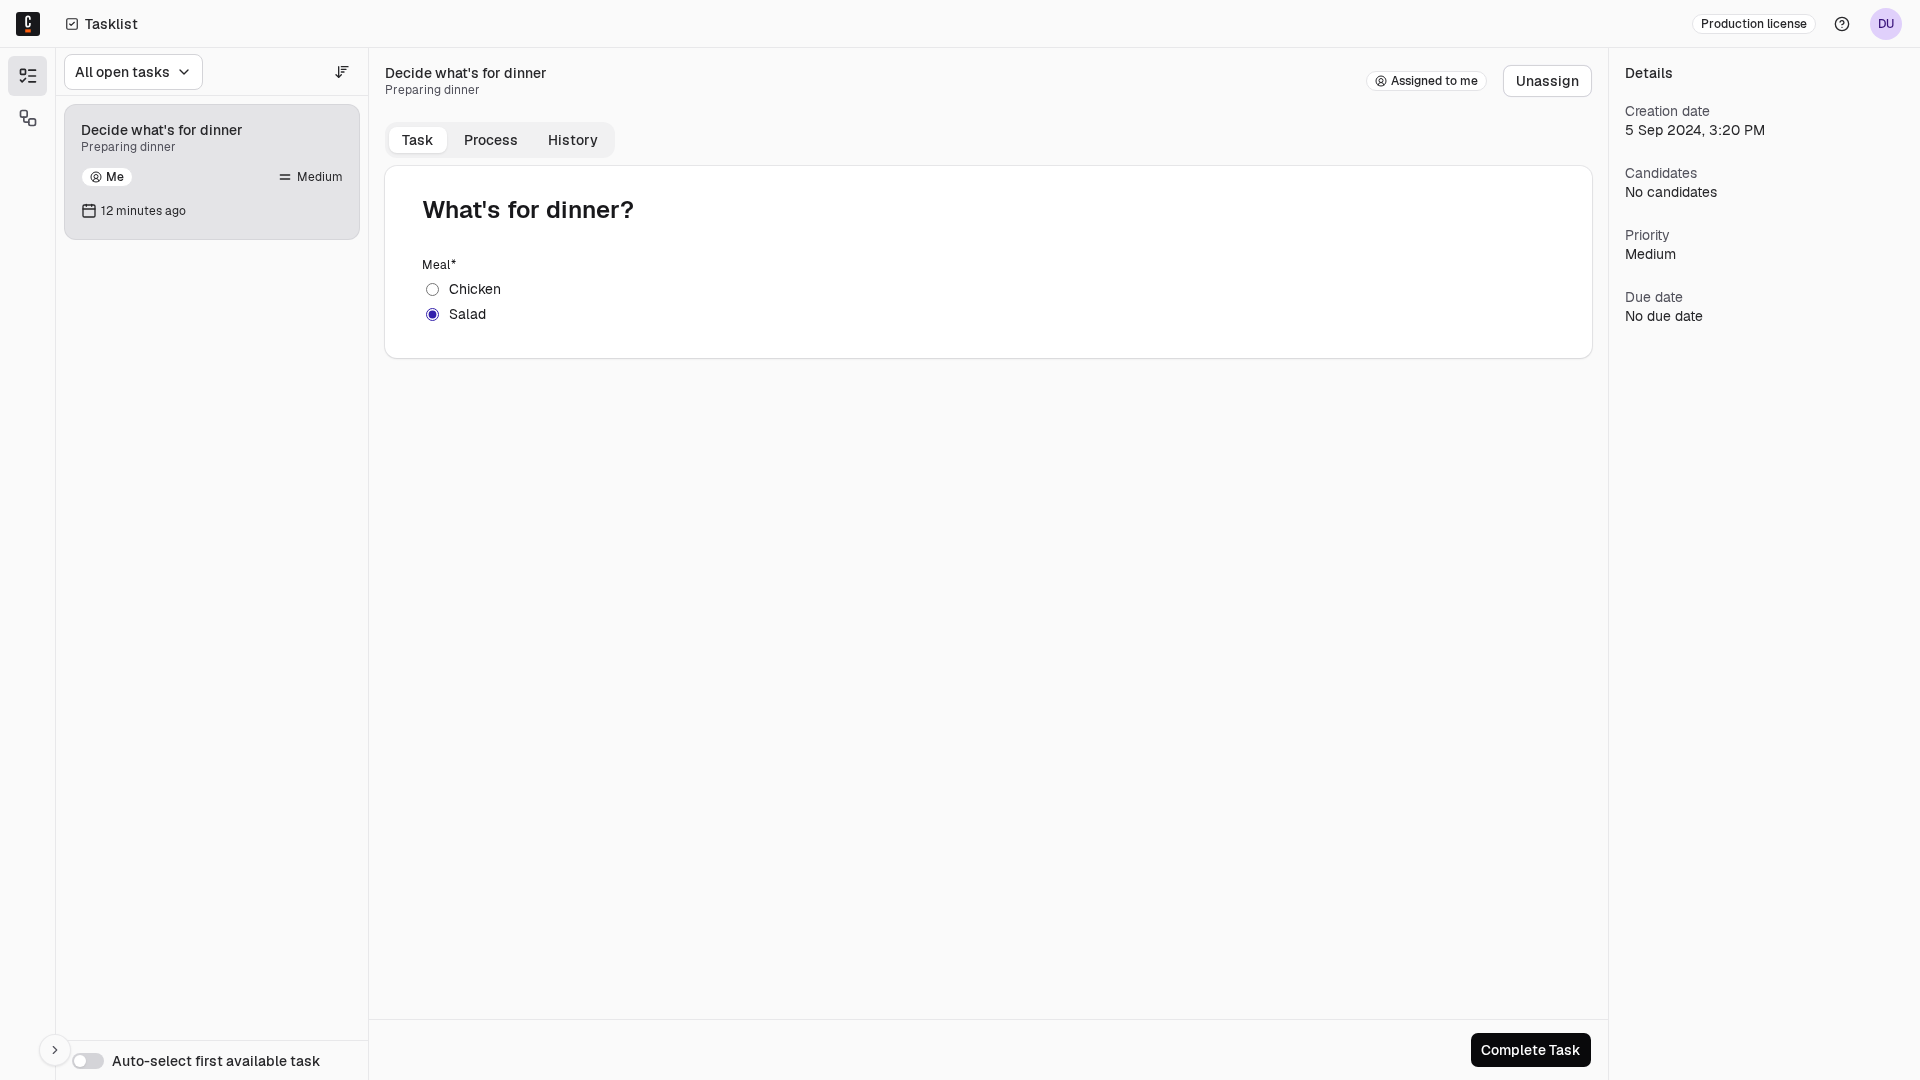
On the left, you will notice a list of tasks. There should be one open task
Decide what's for dinner. Click this task to open it in the detail view. -
In the detail view, the form you created in Step 2 appears. It is read only since this task is currently unassigned. You have to claim the task to work on it. Click Assign to me to claim the task.
-
Select one of the radio options.
-
Click Complete Task to submit the form.
-
To verify your task completion, you can filter by Completed tasks in the left task list panel.
You can now navigate back to Operate and notice the process instance has continued as the token has moved forward to the selected option.
The token moves through the exclusive gateway (also called the XOR gateway), and is used to model the decision in the process. When the execution arrives at this gateway, all outgoing sequence flows are evaluated in the order in which they have been defined. The sequence flow which condition evaluates to ‘true’ is selected for continuing the process.
In this case, the token will move through the gateway and (according to the conditional expressions we outlined earlier) to the selected dinner based on the Decide what's for dinner user task we completed. If we select Chicken, the token moves forward to Prepare chicken. If we select Salad, the token moves forward to Prepare salad.

Wrap up
At this point, you've successfully crafted a human-centered process that routes the process flow based on a decision made by a user.
A core value of Camunda 8 lies in the combination of automation and human interaction. The same pattern applies when an AI agent produces the result a person acts on: the user task, form, and gateway you built here work the same way, whichever kind of step supplied the data.
Continue with the following resources to learn about intelligent task assignments, flexible forms to capture data and decisions, operational insights to refine task efficiency, and pathways to publish your processes to users via Tasklist or even publicly.
Don't want to build the process yourself? Click this button to create it from a template in Camunda 8 SaaS, or sign up first.
Additional resources and next steps
- Learn how to use BPMN user tasks to route tasks to the right users.
- Learn how to build more complex forms using the form editor.
- Learn how to write powerful expressions and utilize variables to route complex process flows.
- Get an introduction to Operate.
- Learn how to set up Tasklist for efficient task management.
- Explore start forms and attach the form directly to the start event for authenticated starts in Tasklist.