Version: Next

Get started as a Java developer using Spring

Beginner1 hour

note

This tutorial is not intended for production purposes.

In this guide, we'll step through using Spring Boot and the Spring Zeebe SDK with Desktop Modeler to interact with your local Self-Managed Camunda 8 installation. While this guide focuses on Self-Managed, you can do something similar with SaaS.

note

This guide specifically uses Java and Spring because the two, in combination with Camunda 8, is our default technology stack recommendation. Learn more in the Java greenfield documentation.

By the end of this tutorial, you'll be able to use Spring and Java code with Zeebe to:

  • Deploy a process model.
  • Initiate a process instance.
  • Handle a service task.

For example, in this guide we will outline a BPMN model to receive a payment request, prepare a transaction, charge a credit card, and execute a payment:

example BPMN model to receive a payment request, prepare a transaction, charge a credit card, and execute a payment

note

While stepping through this guide, you can visit our sample repository with the completed code to check your work.

Prerequisites

Before getting started, ensure you:

Step 1: Install Camunda 8 Self-Managed

Starting in 8.6.0-alpha2, you can install Camunda 8 Self-Managed as an integrated plain Java application.

For this installation, you must have:

  • OpenJDK 21+ locally installed
  • Camunda 8.6.0-alpha2 or later

Download and configure Elasticsearch

danger

Disabling Elasticsearch's security packages is for non-production only!

  1. Download Elasticsearch 8.9.2 and follow the installation instructions.
  2. Navigate to the directory where you installed Elasticsearch, and open /config/elasticsearch.yml. Add the line xpack.security.enabled: false to the bottom of the configuration to disable Elasticsearch's security packages.
  3. Start Elasticsearch by running ELASTICSEARCH_HOME/bin/elasticsearch (or ELASTICSEARCH_HOME\bin\elasticsearch.bat on Windows).

Confirm Elasticsearch is running by visiting http://localhost:9200 in a browser. If the response doesn't include version information formatted as JSON, you will need to troubleshoot your installation.

Download and configure Camunda

  1. Download and extract the latest camunda-zeebe- release artifact in the Assets section of the release page, starting with 8.6.0-alpha2.
  2. Navigate to the directory where you installed Camunda, and open /config/application.yaml. Add the following Elasticsearch exporter as a child of the zeebe/broker configuration element:
zeebe:
broker:
...
exporters:
elasticsearch:
className: io.camunda.zeebe.exporter.ElasticsearchExporter
args:
url: http://localhost:9200
index:
prefix: zeebe-record
note

Spacing is important! Indent the exporters element four spaces to properly nest the configuration.

Still need help?

Here is the full application.yaml file:

zeebe:
broker:
gateway:
# Enable the embedded gateway to start on broker startup.
# This setting can also be overridden using the environment variable ZEEBE_BROKER_GATEWAY_ENABLE.
enable: true

network:
# Sets the port the embedded gateway binds to.
# This setting can also be overridden using the environment variable ZEEBE_BROKER_GATEWAY_NETWORK_PORT.
port: 26500

security:
# Enables TLS authentication between clients and the gateway
# This setting can also be overridden using the environment variable ZEEBE_BROKER_GATEWAY_SECURITY_ENABLED.
enabled: false
authentication:
# Controls which authentication mode is active, supported modes are 'none' and 'identity'.
# If 'identity' is set, authentication will be done using camunda-identity, which needs to
# be configured in the corresponding subsection. See also https://docs.camunda.io/docs/self-managed/identity/what-is-identity/ .
# This setting can also be overridden using the environment variable ZEEBE_BROKER_GATEWAY_SECURITY_AUTHENTICATION_MODE.
mode: none

network:
# Controls the default host the broker should bind to. Can be overwritten on a
# per-binding basis for client, management and replication
# This setting can also be overridden using the environment variable ZEEBE_BROKER_NETWORK_HOST.
host: 0.0.0.0

data:
# Specify a directory in which data is stored.
# This setting can also be overridden using the environment variable ZEEBE_BROKER_DATA_DIRECTORY.
directory: data
# The size of data log segment files.
# This setting can also be overridden using the environment variable ZEEBE_BROKER_DATA_LOGSEGMENTSIZE.
logSegmentSize: 128MB
# How often we take snapshots of streams (time unit)
# This setting can also be overridden using the environment variable ZEEBE_BROKER_DATA_SNAPSHOTPERIOD.
snapshotPeriod: 15m

cluster:
# Specifies the Zeebe cluster size.
# This can also be overridden using the environment variable ZEEBE_BROKER_CLUSTER_CLUSTERSIZE.
clusterSize: 1
# Controls the replication factor, which defines the count of replicas per partition.
# This can also be overridden using the environment variable ZEEBE_BROKER_CLUSTER_REPLICATIONFACTOR.
replicationFactor: 1
# Controls the number of partitions, which should exist in the cluster.
# This can also be overridden using the environment variable ZEEBE_BROKER_CLUSTER_PARTITIONSCOUNT.
partitionsCount: 1

threads:
# Controls the number of non-blocking CPU threads to be used.
# WARNING: You should never specify a value that is larger than the number of physical cores
# available. Good practice is to leave 1-2 cores for ioThreads and the operating
# system (it has to run somewhere). For example, when running Zeebe on a machine
# which has 4 cores, a good value would be 2.
# This setting can also be overridden using the environment variable ZEEBE_BROKER_THREADS_CPUTHREADCOUNT
cpuThreadCount: 2
# Controls the number of io threads to be used.
# This setting can also be overridden using the environment variable ZEEBE_BROKER_THREADS_IOTHREADCOUNT
ioThreadCount: 2

exporters:
elasticsearch:
className: io.camunda.zeebe.exporter.ElasticsearchExporter
args:
url: http://localhost:9200
index:
prefix: zeebe-record

camunda:
# Operate configuration properties
operate:
# Set operate username and password.
# If user with <username> does not exists it will be created.
# Default: demo/demo
#username:
#password:
# ELS instance to store Operate data
elasticsearch:
# Cluster name
clusterName: elasticsearch
# URL
url: http://localhost:9200
# Zeebe instance
zeebe:
# Gateway address
gatewayAddress: localhost:26500
# ELS instance to export Zeebe data to
zeebeElasticsearch:
# Cluster name
clusterName: elasticsearch
# URL
url: http://localhost:9200
# Index prefix, configured in Zeebe Elasticsearch exporter
prefix: zeebe-record
# Tasklist configuration properties
tasklist:
# Set Tasklist username and password.
# If user with <username> does not exists it will be created.
# Default: demo/demo
#username:
#password:
# ELS instance to store Tasklist data
elasticsearch:
# Cluster name
clusterName: elasticsearch
# URL
url: http://localhost:9200
# Zeebe instance
zeebe:
# Gateway address
gatewayAdress: localhost:26500
# ELS instance to export Zeebe data to
zeebeElasticsearch:
# Cluster name
clusterName: elasticsearch
# Url
url: http://localhost:9200
# Index prefix, configured in Zeebe Elasticsearch exporter
prefix: zeebe-record

Save the file. Without performing this step, no data will be visible in Operate or Tasklist.

  1. To start Camunda, run bin/camunda (or bin\camunda.bat on Windows).

It may take a few minutes for startup to complete. When the message Started StandaloneCamunda in ___ seconds is displayed, the application is ready to use.

tip

Operate can be found at http://localhost:8080/operate and Tasklist can be found at http://localhost:8080/tasklist. Both use a default username/password of demo/demo.

Step 2: Create a new Spring Boot project

Next, create a new Spring Boot project:

  1. Go to https://start.spring.io/ to get started.
  2. Under Project, select Maven. Under Language, select Java. Under Spring Boot, select the latest non-SNAPSHOT version (currently 3.3.0).
  3. Under Project Metadata, configure the following:
    1. Group: io.camunda.demo
    2. Artifact: process_payments
    3. Name: Process payments
    4. Description: Process payments with Camunda
    5. Package name: io.camunda.demo.process_payments
    6. Packaging: Jar
    7. Java: Select the Java version you have installed.
    8. For this tutorial, we will not install any dependencies.
  4. Click Generate.
  5. Download the project, extract the .zip file, and add the contents to your desired location.
  6. Open this project in your preferred code editor.
  7. Run mvn spring-boot:run in your terminal to confirm your Spring project builds.
  8. (Optional) Run git init if you'd like to commit milestones along the way, and add a .gitignore file containing target/ to ignore build artifacts.

Step 3: Create a new BPMN diagram

Next, we'll create a BPMN diagram to represent the transaction model shown at the beginning of this guide:

  1. Open Desktop Modeler.
  2. Click Create a new diagram in Camunda 8, and name your diagram Process payments with an id of process-payments.
  3. Add a start event, and name it Payment request received.
  4. Append a task named Prepare transaction.
  5. Click the wrench-shaped change type context menu icon to change the type of task to a script task, and configure the following properties:
    1. Implementation: FEEL expression
    2. Script/Result variable: totalWithTax
    3. Script/FEEL expression: total * 1.1 (this represents the tax applied to the transaction.)
  6. Append a task named Charge credit card.
  7. Click on the task and click the wrench-shaped icon to change the type of task to a service task. In the properties panel, change the Task definition/Type to charge-credit-card.
  8. Append an end event named Payment executed.
  9. Save this BPMN file to your Spring project in src/main/resources, and name it process-payments.bpmn.

Step 4: Deploy your process

To deploy your process, take the following steps:

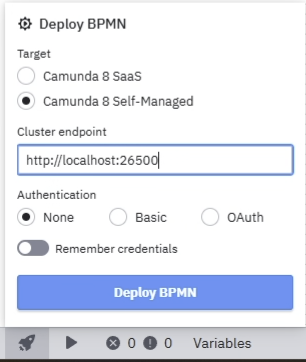
  1. Open Desktop Modeler and click the rocket icon in the bottom left corner.
  2. Change the Deployment name to process-payments, and ensure the Target is Camunda 8 Self-Managed.
  3. Change the Cluster endpoint to http://localhost:26500/, with no authentication.
  4. Click Deploy.

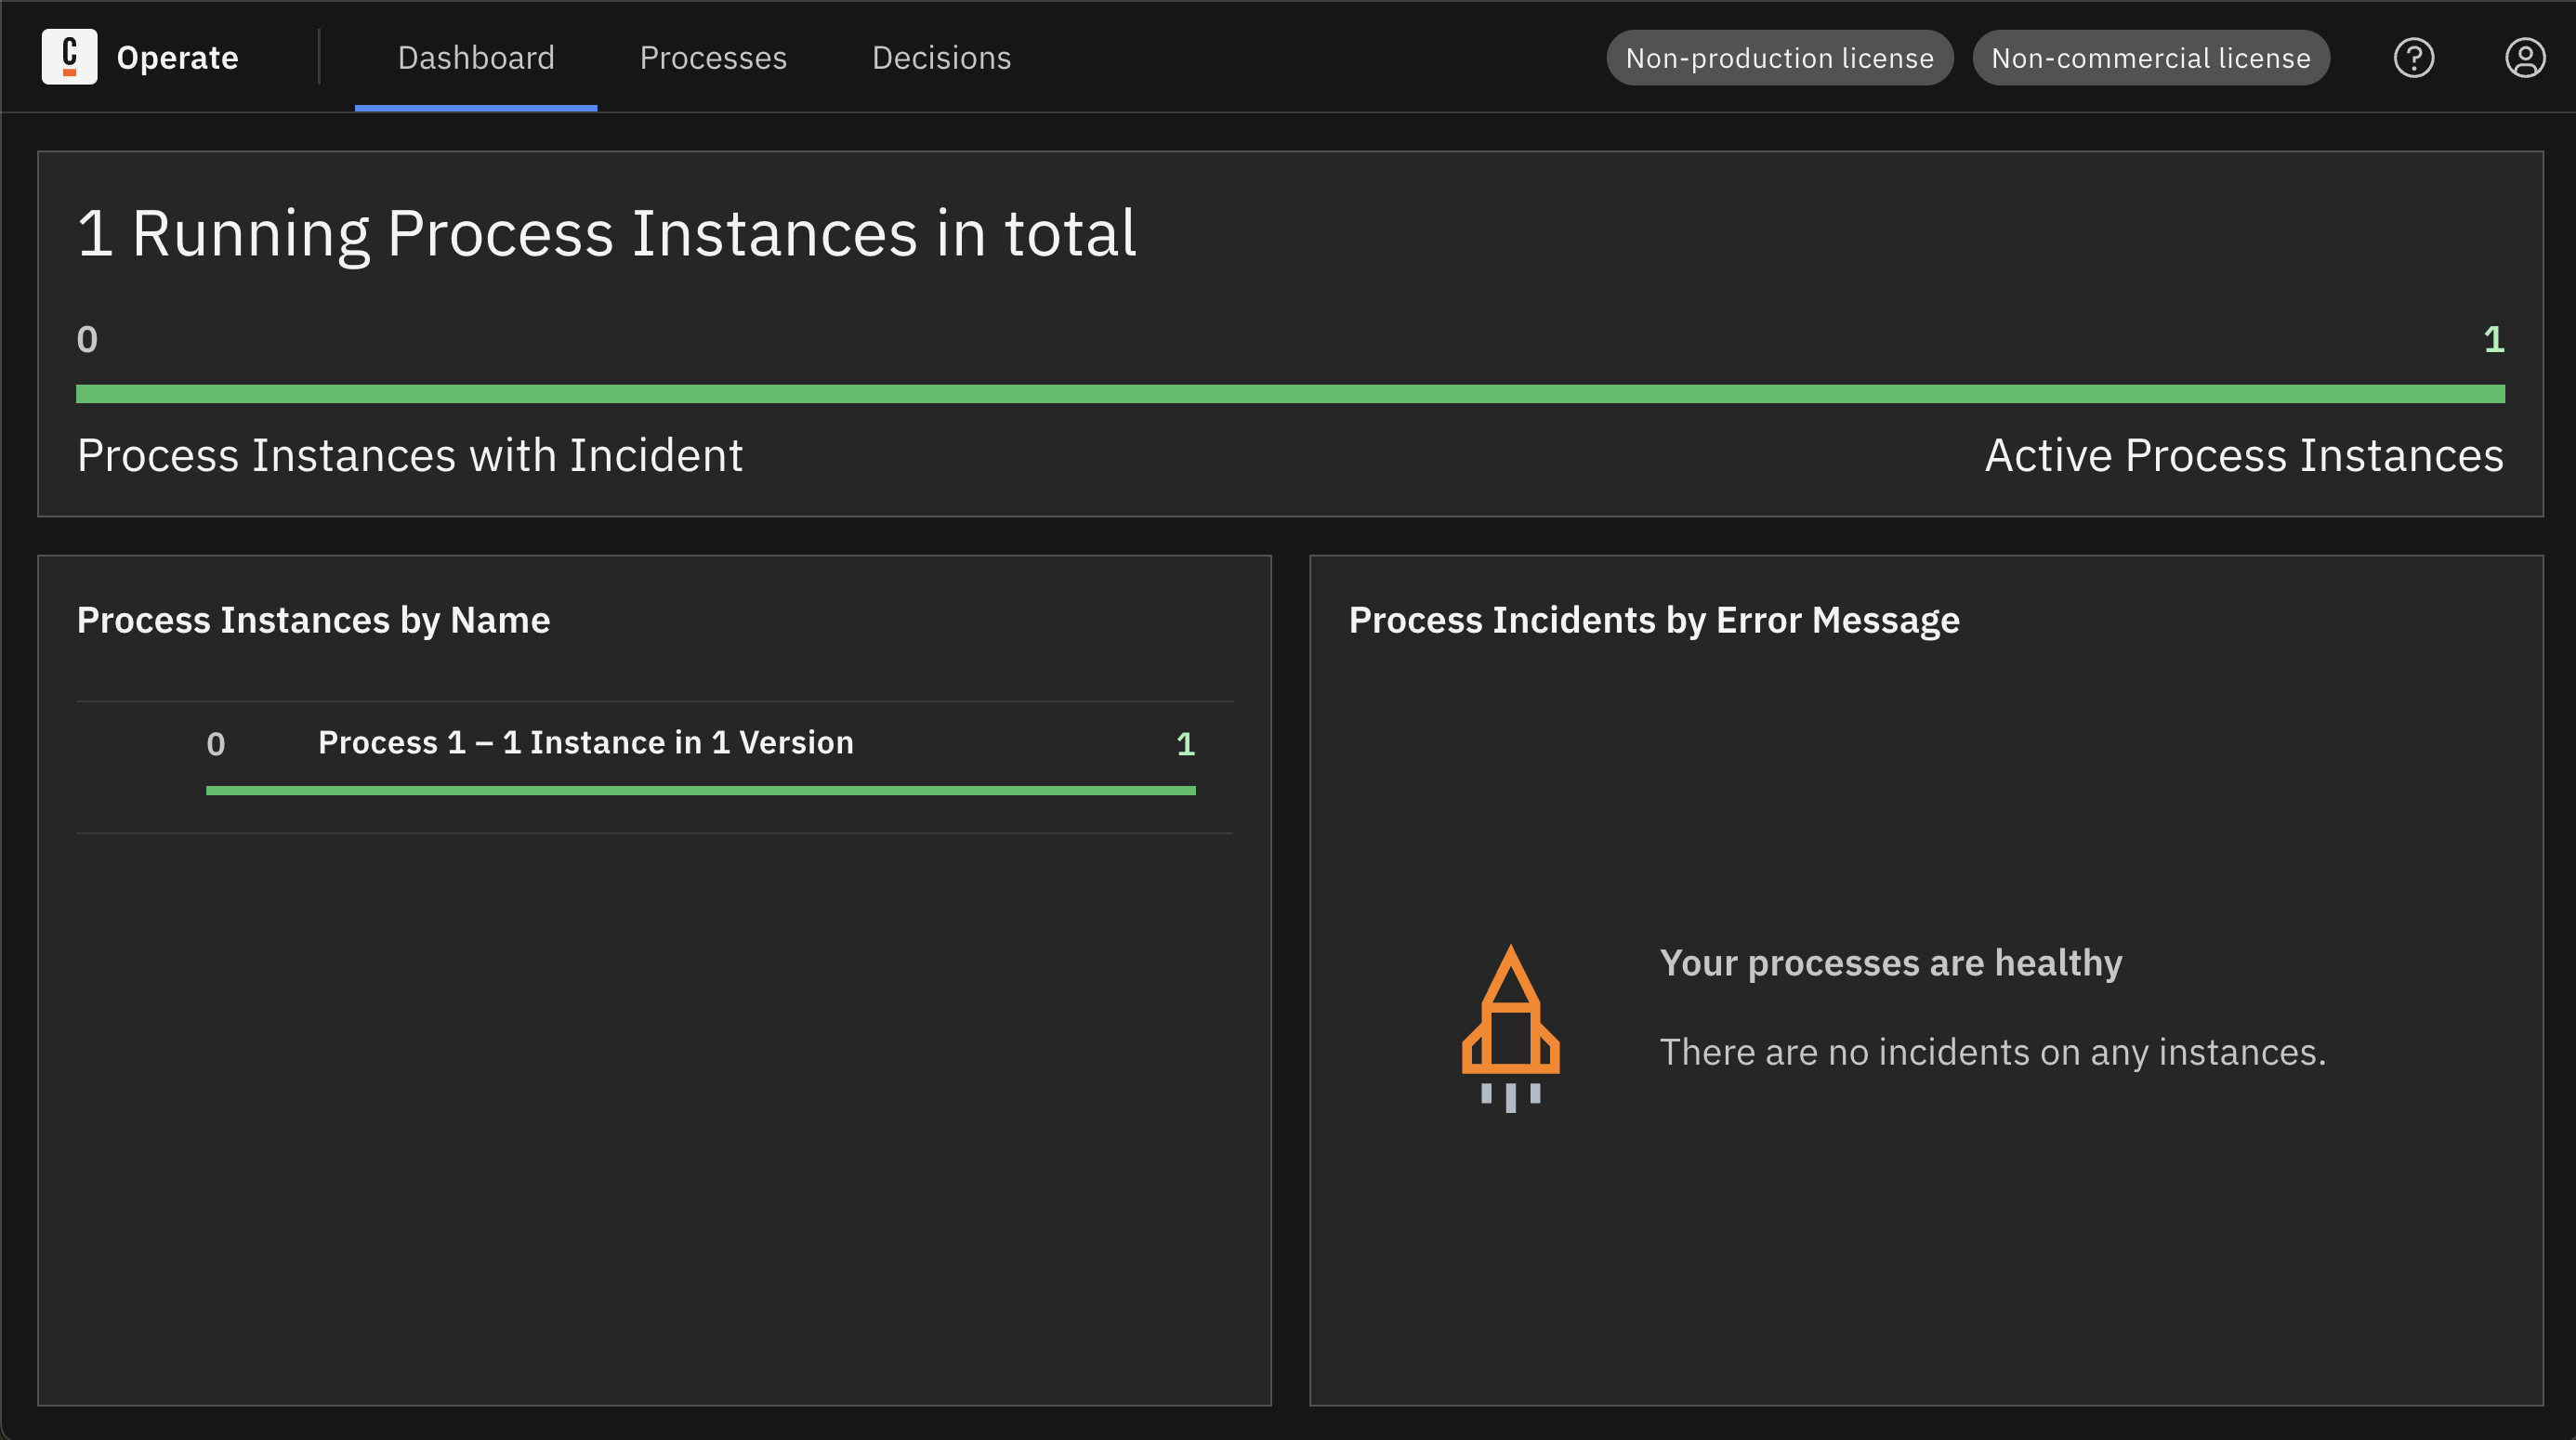
When you open Operate at http://localhost:8080/operate/, you should now note the process deployed to your local Self-Managed setup.

Step 5: Run your process from Modeler

To run your process, take the following steps:

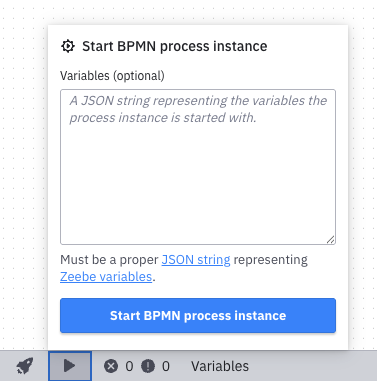
  1. From Desktop Modeler, click the "play" icon (next to the rocket icon to deploy) in the bottom left corner.
  2. In Variables, insert the JSON object {"total": 100}.
  3. Click Start.

From Operate, you should now notice a process instance running. You'll notice the process instance is waiting at Charge credit card, because we'll need to configure a job worker.

Step 6: Implement a service task

To implement a service task, take the following steps:

Configure Spring Boot Starter

See our documentation on adding the Spring Zeebe SDK to your project for more details, also described below:

  1. Copy the following code snippet into the pom.xml file of your Spring project, below properties and above dependencies:
<repositories>
<repository>
<releases>
<enabled>true</enabled>
</releases>
<snapshots>
<enabled>false</enabled>
</snapshots>
<id>identity</id>
<name>Camunda Identity</name>
<url>https://artifacts.camunda.com/artifactory/camunda-identity/</url>
</repository>
</repositories>
  1. Add the following dependency your pom.xml file, as a child of the <dependencies> element:
<dependency>
<groupId>io.camunda</groupId>
<artifactId>spring-boot-starter-camunda-sdk</artifactId>
<version>8.5.0</version>
</dependency>

Configure the Zeebe client

Open your src/main/resources/application.properties file, and paste the following snippet to connect to the Self-Managed Zeebe broker:

zeebe.client.broker.grpcAddress=http://127.0.0.1:26500
zeebe.client.broker.restAddress=http://127.0.0.1:8080
zeebe.client.security.plaintext=true

Create a worker

  1. In src/main/java/io/camunda/demo/process_payments/, create a file called ChargeCreditCardWorker.java.
  2. In the file created above, paste the following dependencies and package package io.camunda.demo.process_payments:
package io.camunda.demo.process_payments;

import java.util.Map;

import org.slf4j.Logger;
import org.slf4j.LoggerFactory;
import org.springframework.stereotype.Component;

import io.camunda.zeebe.spring.client.annotation.JobWorker;
import io.camunda.zeebe.spring.client.annotation.Variable;
  1. Next, we can add a ChargeCreditCardWorker class decorated with @Component and instantiate a logger. Additionally, we will add a chargeCreditCard method and decorate it with @JobWorker, specifying the type of service tasks it will handle. The method takes a @Variable(name = "totalWithTax") Double totalWithTax argument to indicate which variables it needs from the task. The implementation of the method will log the totalWithTax, and return a map, to indicate to Zeebe that the task has been handled:
@Component
public class ChargeCreditCardWorker {
private final static Logger LOG = LoggerFactory.getLogger(ChargeCreditCardWorker.class);
@JobWorker(type = "charge-credit-card")
public Map<String, Double> chargeCreditCard(@Variable(name = "totalWithTax") Double totalWithTax) {
LOG.info("charging credit card: {}", totalWithTax);
return Map.of("amountCharged", totalWithTax);
}
}
note

To check your work, visit our sample repository with the completed code.

In your terminal, run mvn spring-boot:run, where you should see the charging credit card output. In Operate, refresh if needed, and note the payment has executed.

Step 7: Start a process instance

To start a process instance programmatically, take the following steps:

  1. In ProcessPaymentsApplication.java, add the following dependencies after the package definition:
package io.camunda.demo.process_payments;

import java.util.Map;
import org.slf4j.Logger;
import org.slf4j.LoggerFactory;
import org.springframework.beans.factory.annotation.Autowired;
import org.springframework.boot.CommandLineRunner;
import org.springframework.boot.SpringApplication;
import org.springframework.boot.autoconfigure.SpringBootApplication;

import io.camunda.zeebe.client.ZeebeClient;
import io.camunda.zeebe.spring.client.annotation.Deployment;
  1. Convert the application to a CommandLineRunner, by adding implements CommandLineRunner to the ProcessPaymentsApplication class declaration. Instantiate a static Logger variable, and an instance variable named zeebeClient with the @Autowired annotation.
@SpringBootApplication
public class ProcessPaymentsApplication implements CommandLineRunner {

private static final Logger LOG = LoggerFactory.getLogger(ProcessPaymentsApplication.class);

@Autowired
private ZeebeClient zeebeClient;

public static void main(String[] args) {
SpringApplication.run(ProcessPaymentsApplication.class, args);
}
}
  1. Implement an overriding run method in ProcessPaymentsApplication. When the application runs, it will create a new process-payments process instance, of the latest version, with specified variables, and send it to our local Self-Managed instance:
    @Override
public void run(final String... args) {
var bpmnProcessId = "process-payments";
var event = zeebeClient.newCreateInstanceCommand()
.bpmnProcessId(bpmnProcessId)
.latestVersion()
.variables(Map.of("total", 100))
.send()
.join();
LOG.info("started a process instance: {}", event.getProcessInstanceKey());
}
note

To check your work, visit our sample repository with the completed code.

Re-run the application in your terminal with mvn spring-boot:run to see the process run, and note the instance history in Operate.

Step 8: Deploy the process

To deploy your process, take the following steps:

  1. Decorate the ProcessPaymentsApplication class with @Deployment(resources = "classpath:process-payments.bpmn") in ProcessPaymentsApplication.java:
@SpringBootApplication
@Deployment(resources = "classpath:process-payments.bpmn")
  1. In Desktop Modeler, change the tax amount calculated to total * 1.2 under FEEL expression and save your changes.

Re-run the application in your terminal with mvn spring-boot:run to see the process run. In Operate, note the new version 2 when filtering process instances, and the tax amount has increased for the most recent process instance.