Extract structured data
Use this extraction method to extract data from structured documents.
About structured data extraction
Use this extraction method for documents with a consistent layout, such as invoices, tax forms (for example, W-2s, VAT declarations), and loan or insurance applications.
Structured extraction allows you to:
- Upload a sample document.
- Automatically discover fields and tables.
- Configure the fields and tables you want included in your template.
- Receive confidence scores for each extracted value.
- Build reusable templates.
- Integrate extracted data into BPMN processes via variables.
Structured extraction uses Optical Character Recognition (OCR) technology.
Data extraction steps
Complete the following steps to configure and publish a structured data extraction template:
- Create template and upload sample document: Create a new extraction template, add a name and description, select a provider, and upload a sample document.
- Configure template: Review the extracted results, select which fields and tables to include, and adjust field names if necessary.
- Test data extraction: (Optional) Test the configuration of your template against other documents to evaluate how well it performs.
- Publish: Publish the template to make it available for use in your BPMN diagrams, processes, and document automation projects.
Step 1: Create template and upload sample document
In the IDP application, click Create document template, select Structured form extraction, and enter a name, description, and select the provider.
After publishing, the template name and description is shown in the element selector when used in a process diagram. Use a clear name and concise description to help other users find and understand when to use the template.
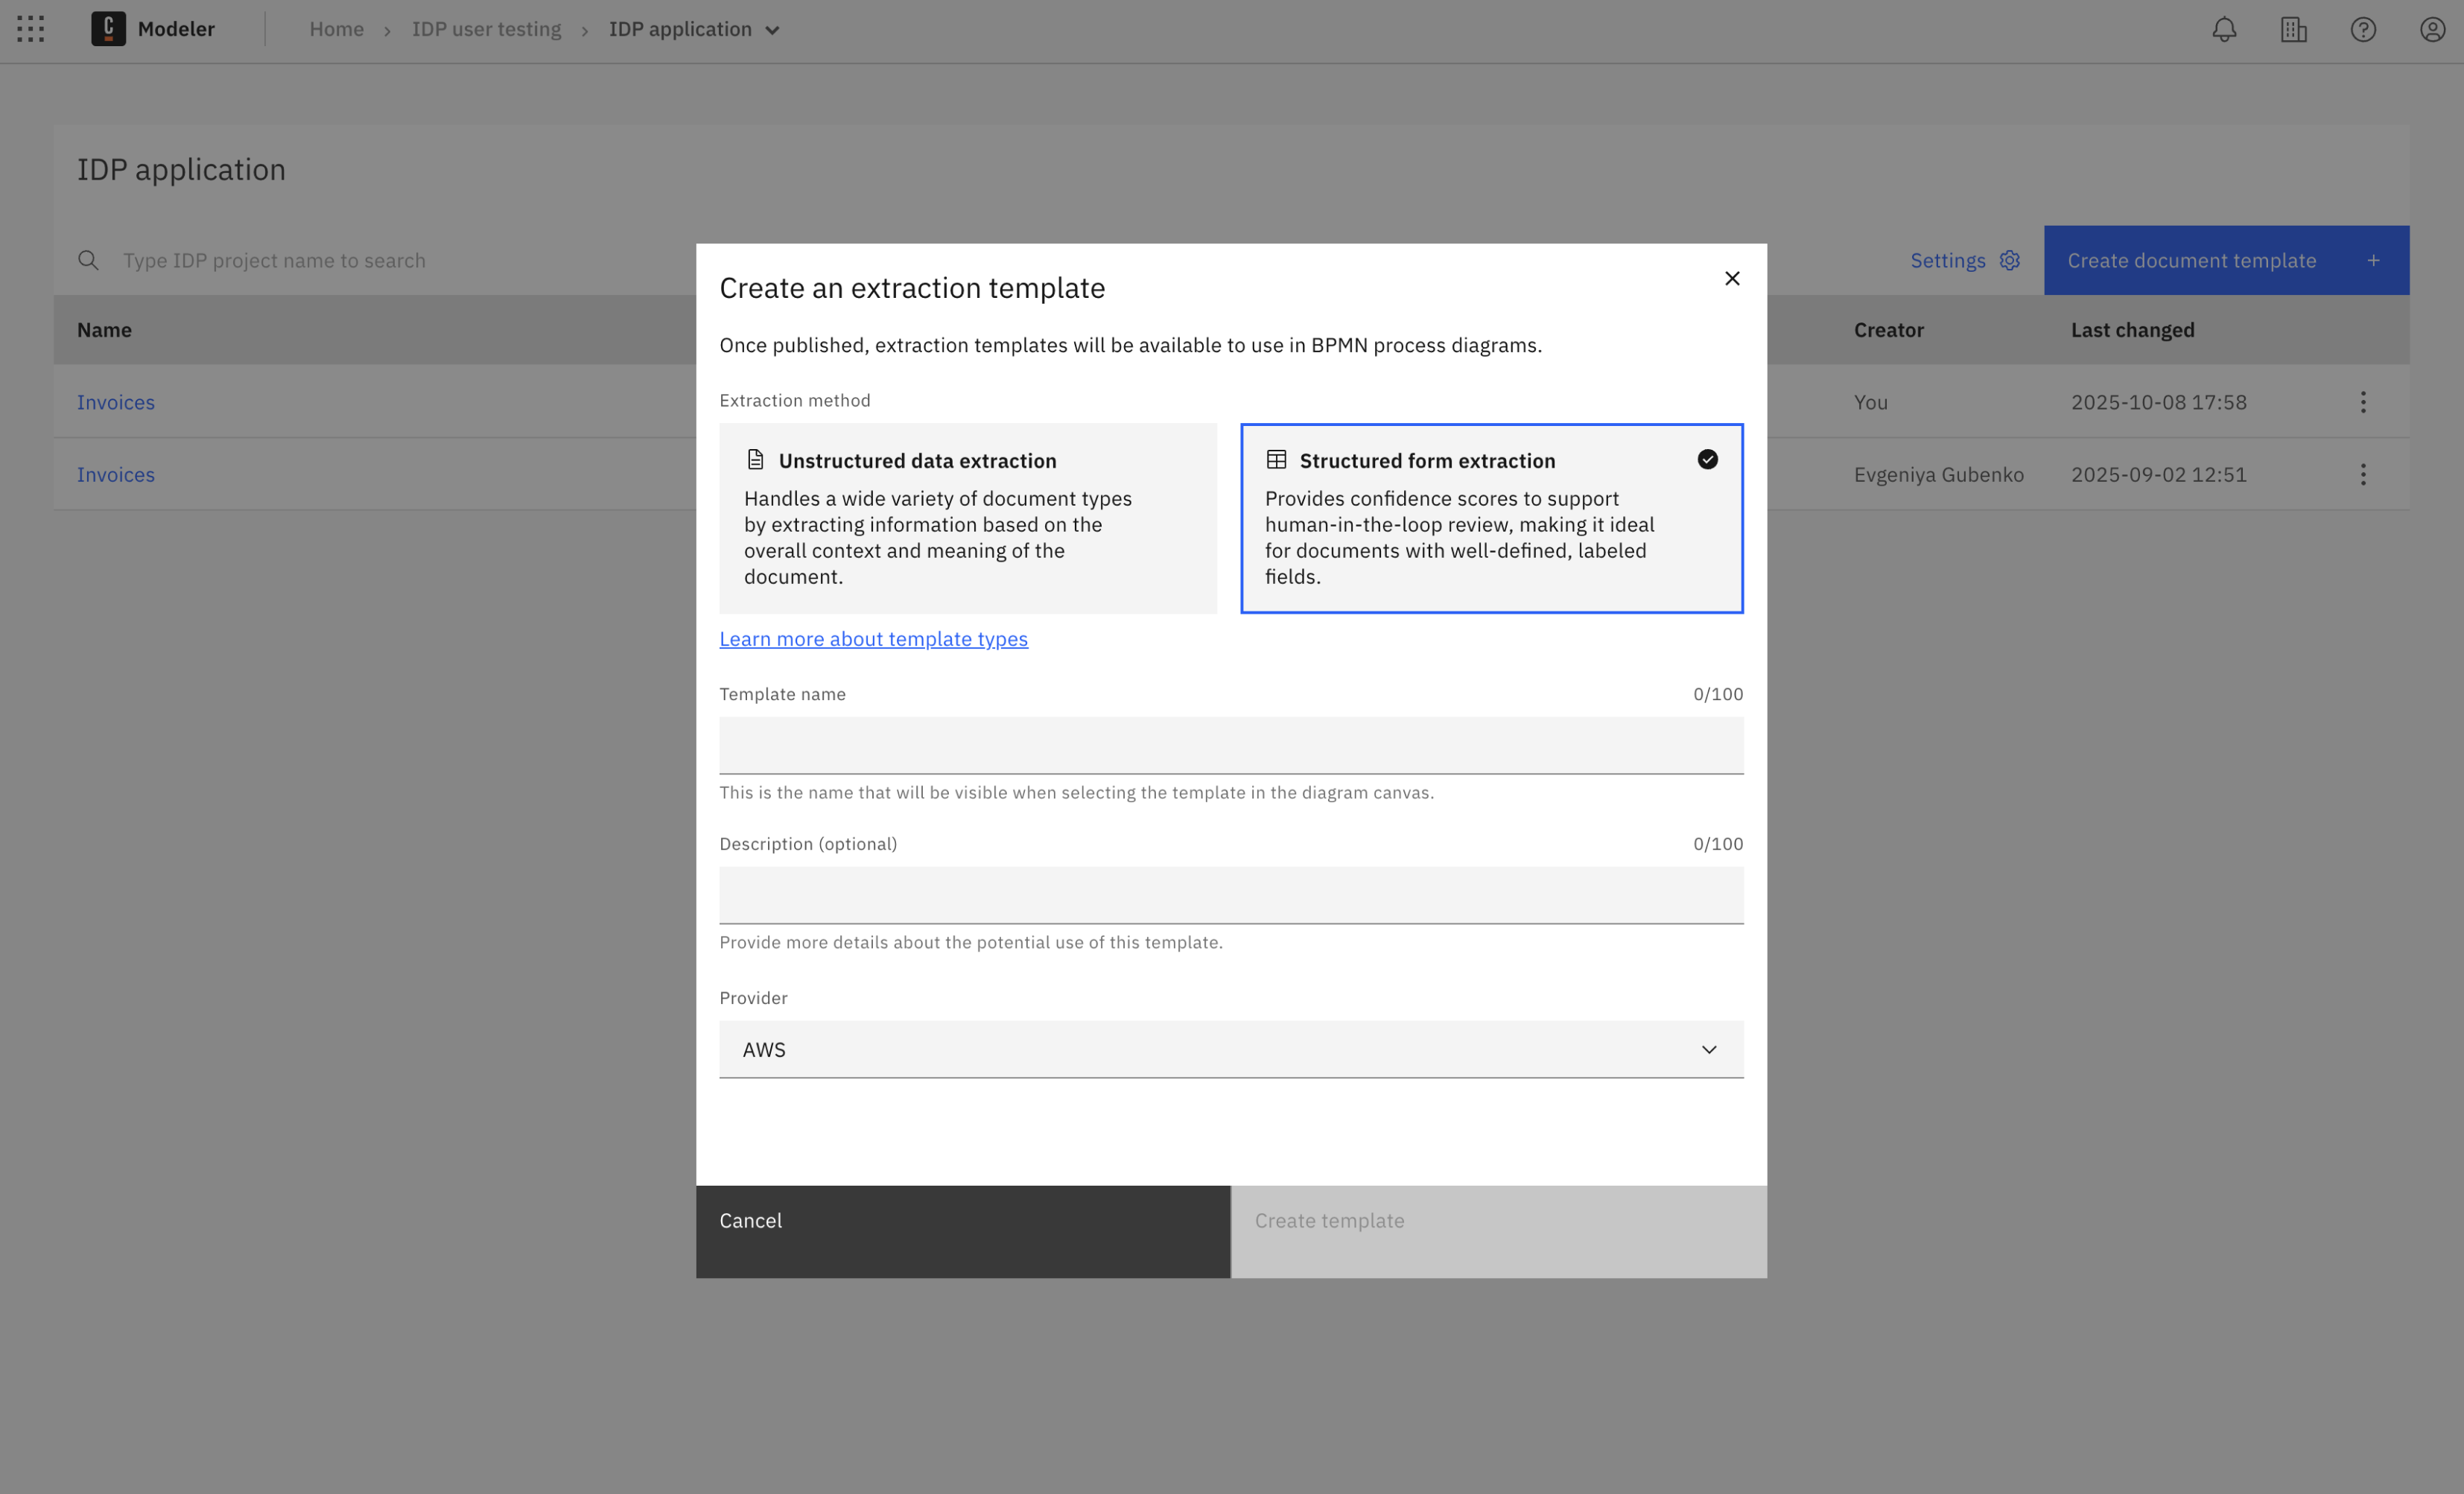
You can edit the description and provider later via the menu button, but changes to the template are only applied after republishing.
After creating the template, the new template screen opens. You can upload a sample document that represents the type of document you want to extract data from.
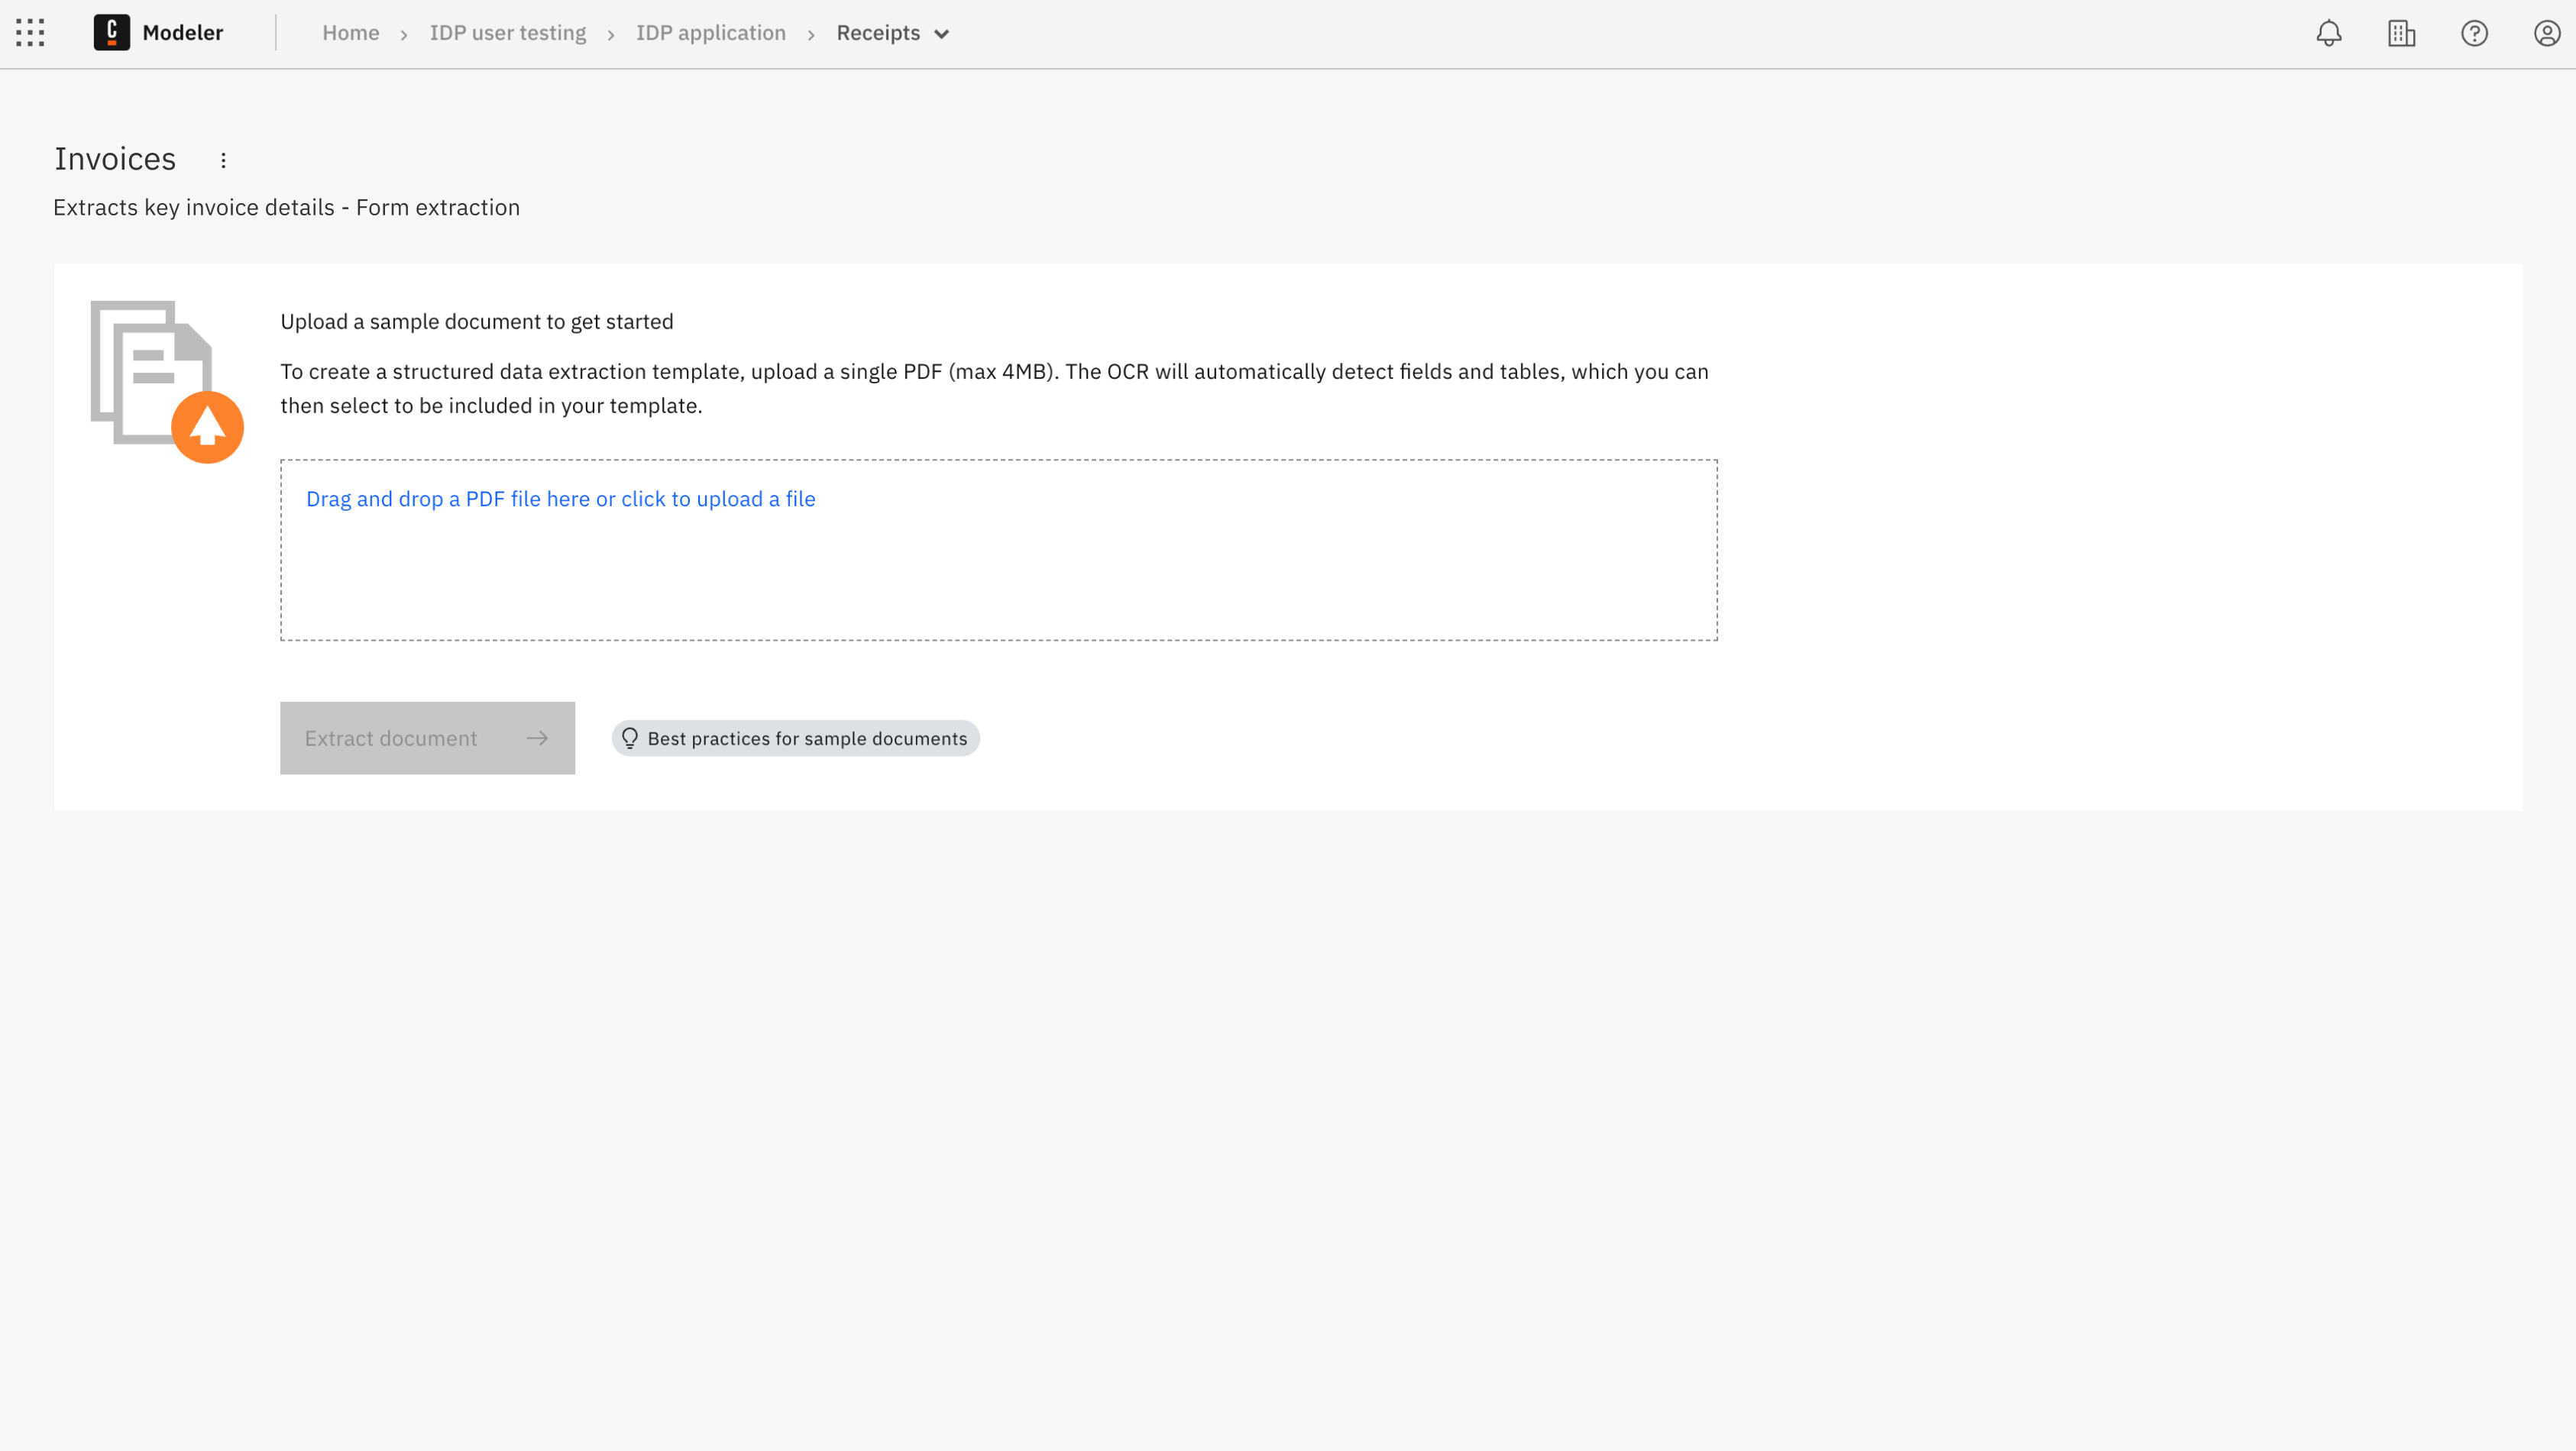
To upload your sample document:
-
Drag your sample document into the box or click Drag and drop a PDF file here or click to upload a file to browse and upload your sample document.
-
Once you have finished uploading your sample document, the extraction process starts automatically.
- The extraction process retrieves the fields and tables from the document.
- The extracted fields and tables are displayed in the Fields and Tables tabs.
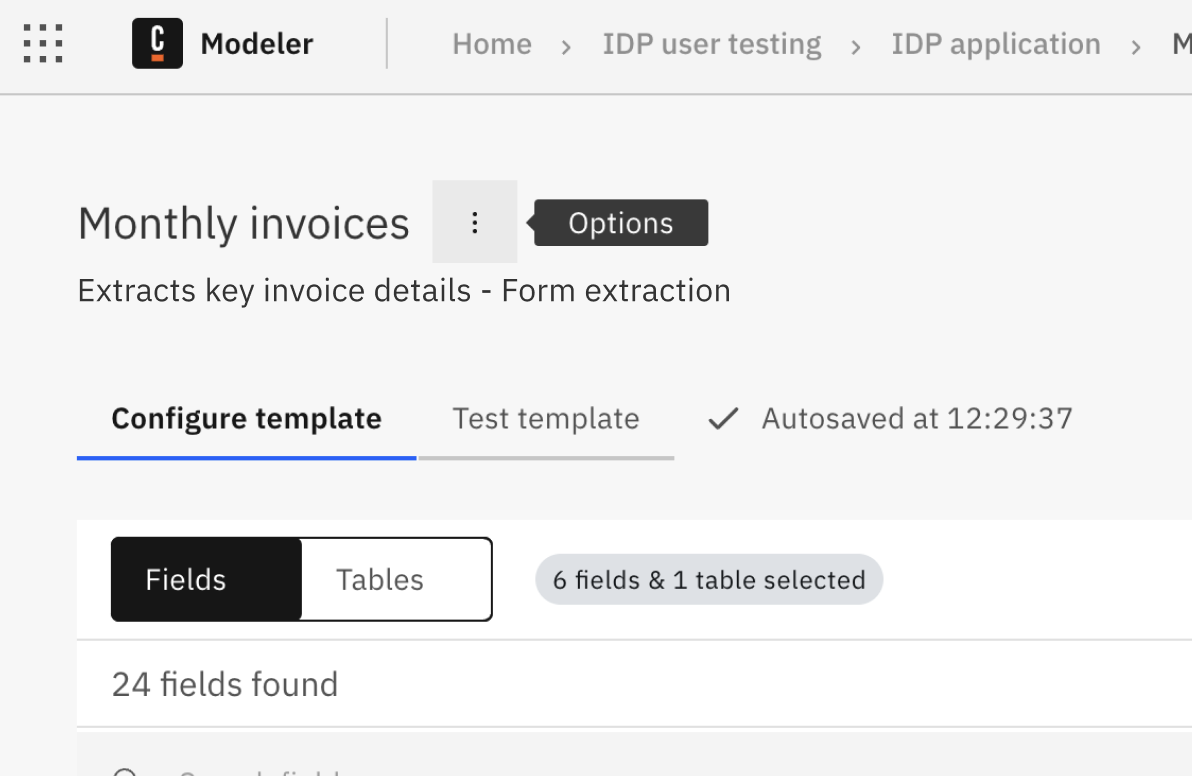
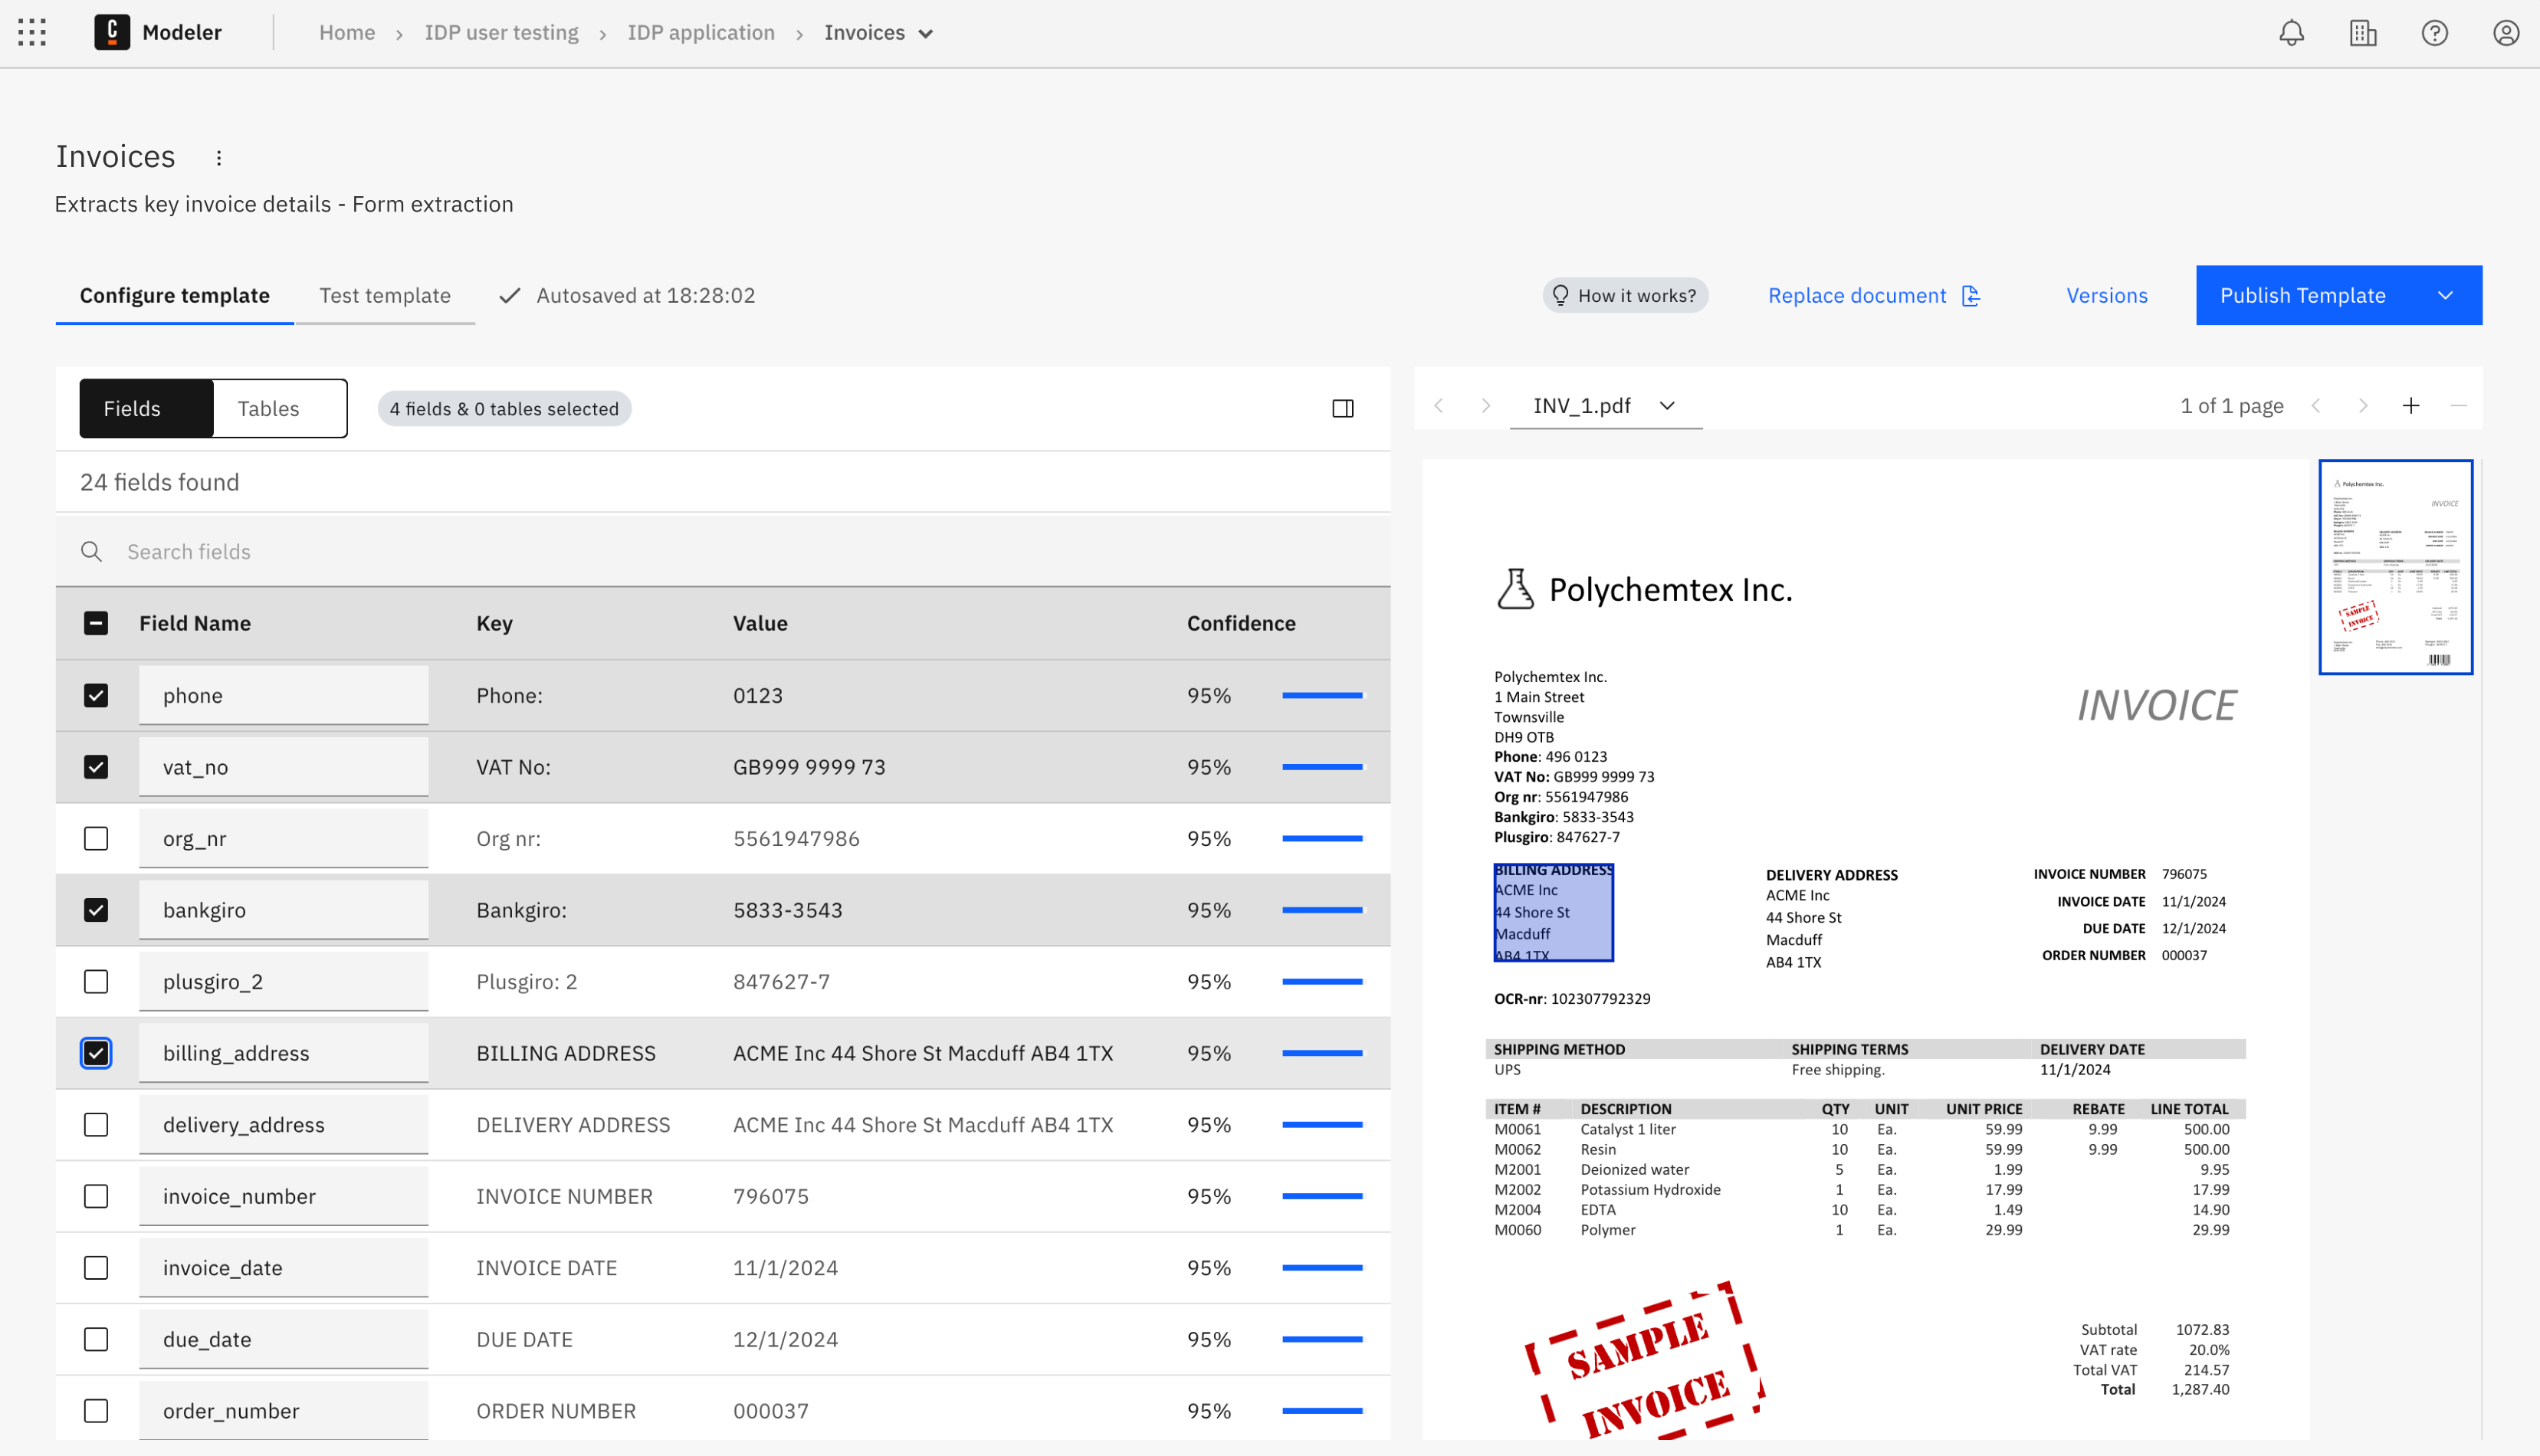
Step 2: Configure template
After the extraction process of the sample document is complete, you can configure the template to include only the fields and tables you want to be part of your template.
-
Select the fields you want to include in your template by clicking the checkbox next to each field.
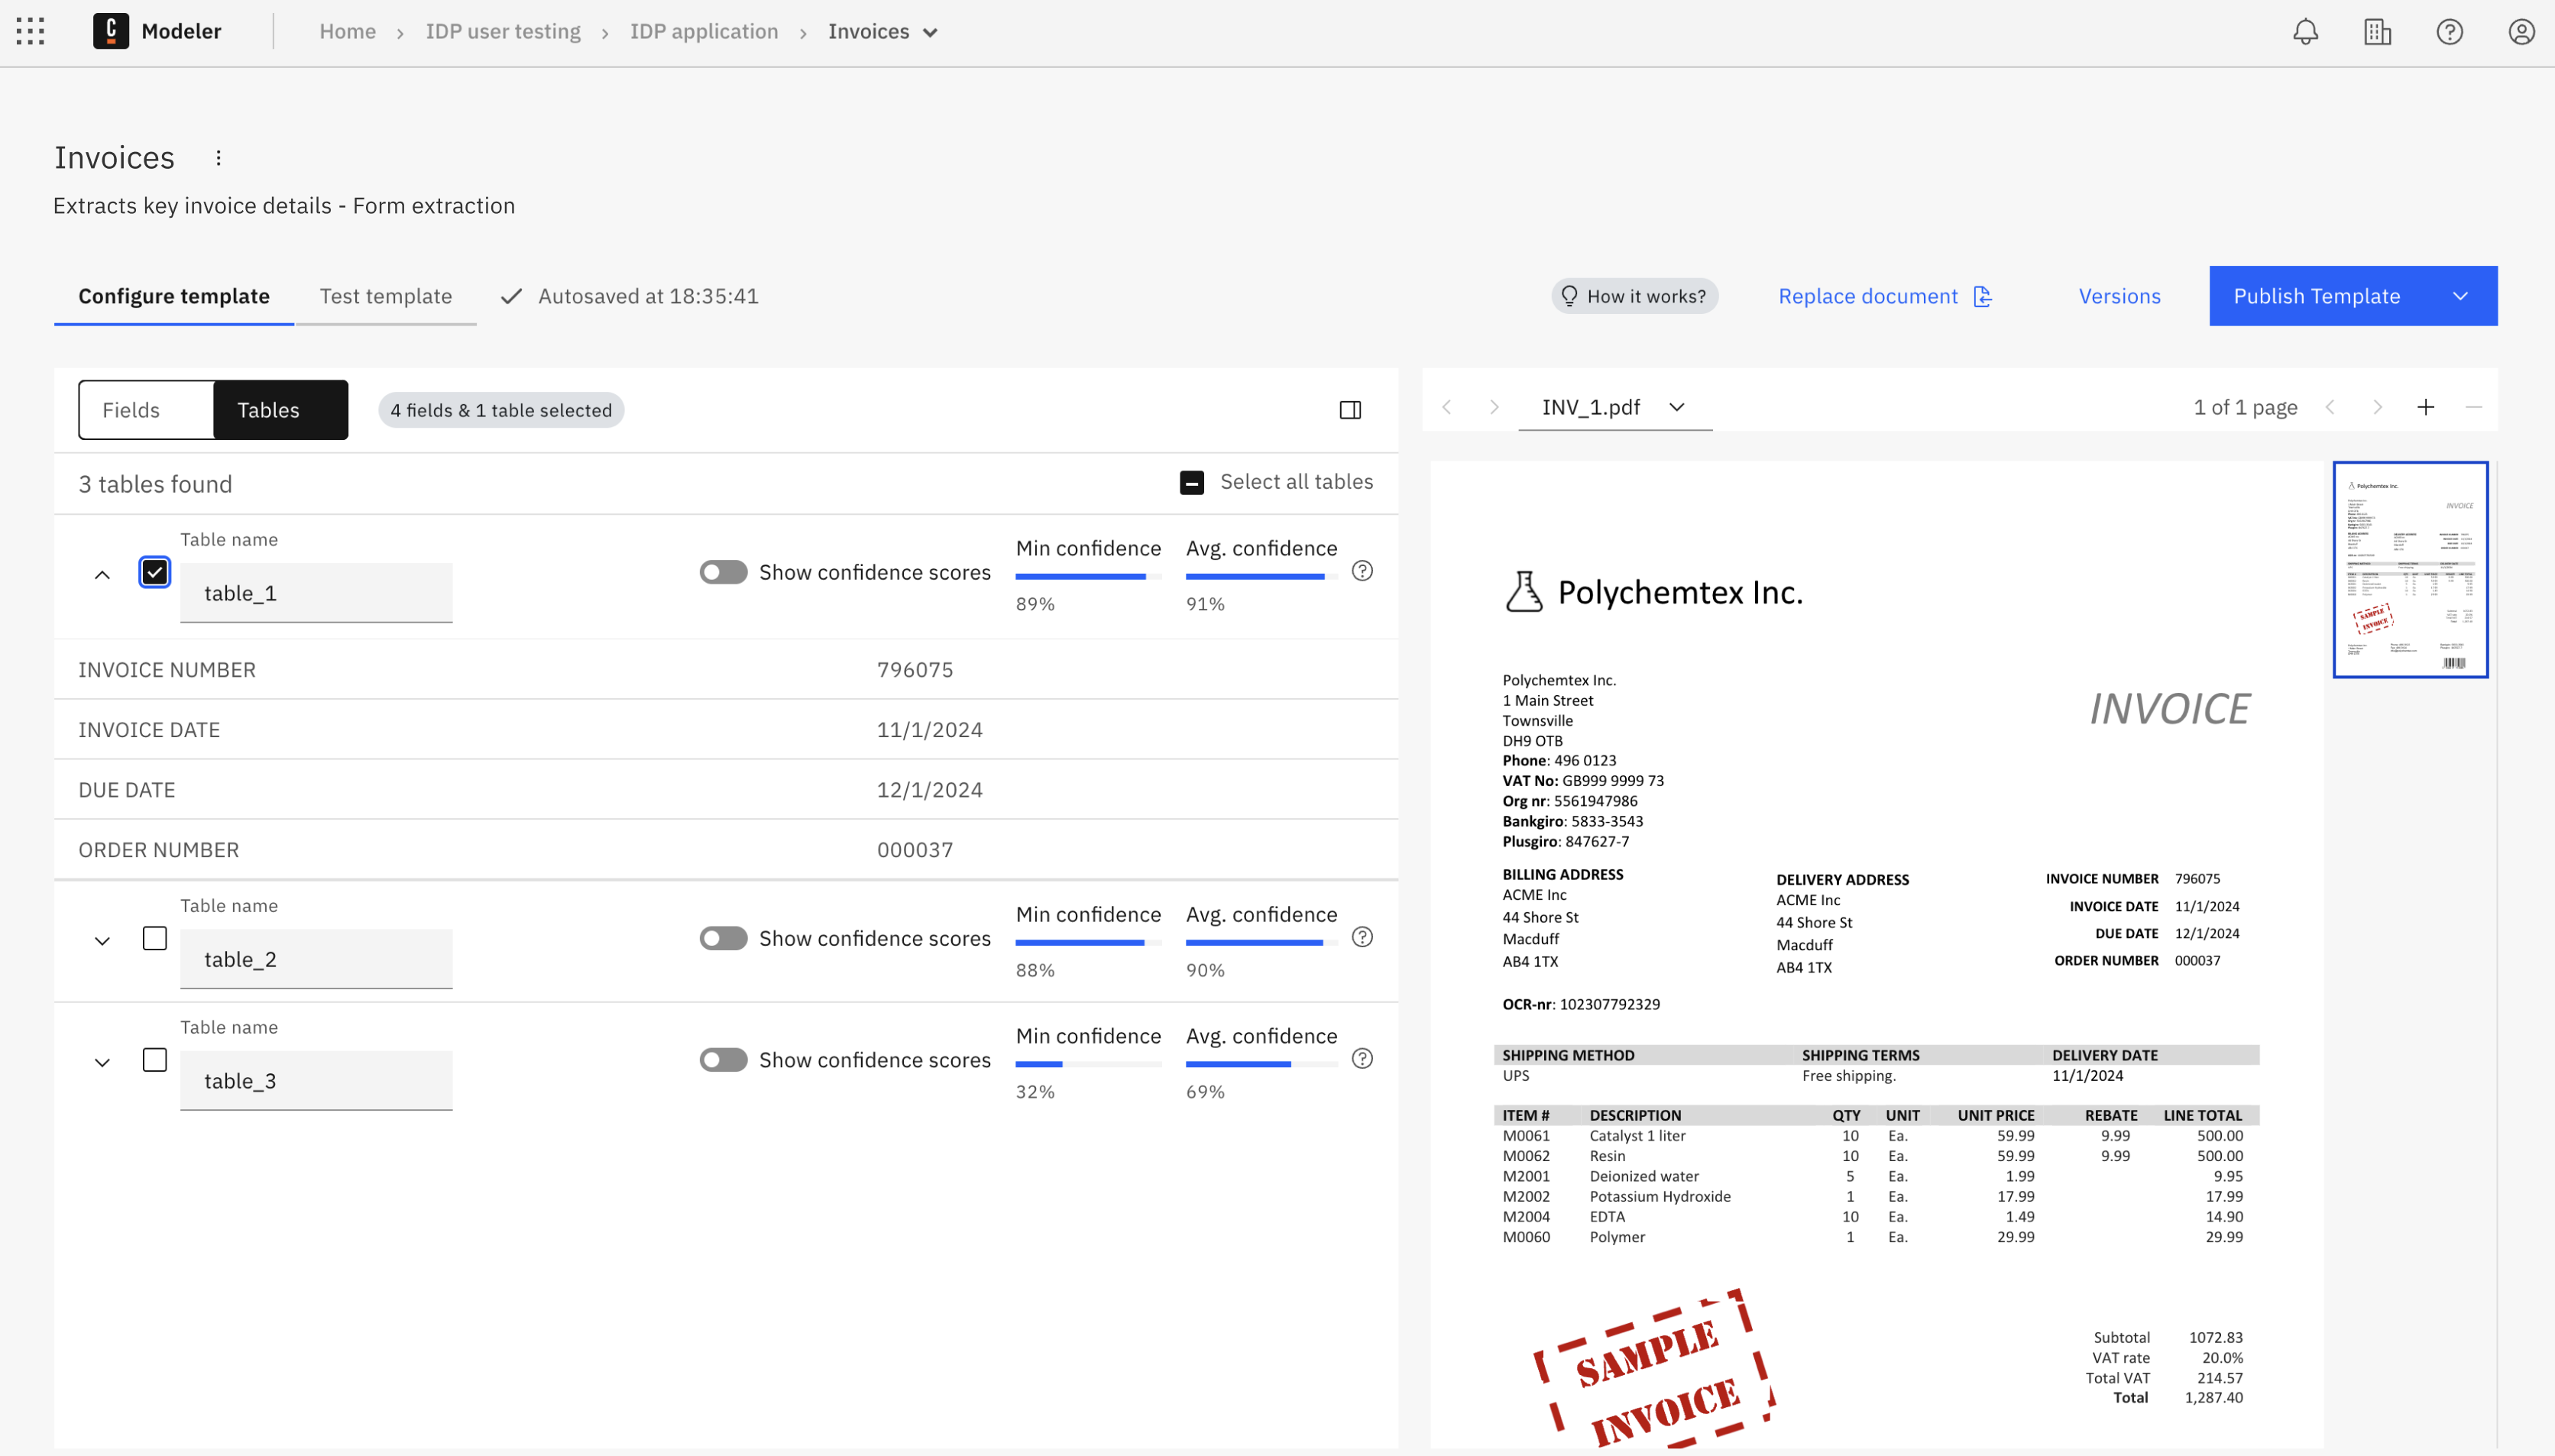
-
Select the tables you want to include in your template by clicking the checkbox next to each table.
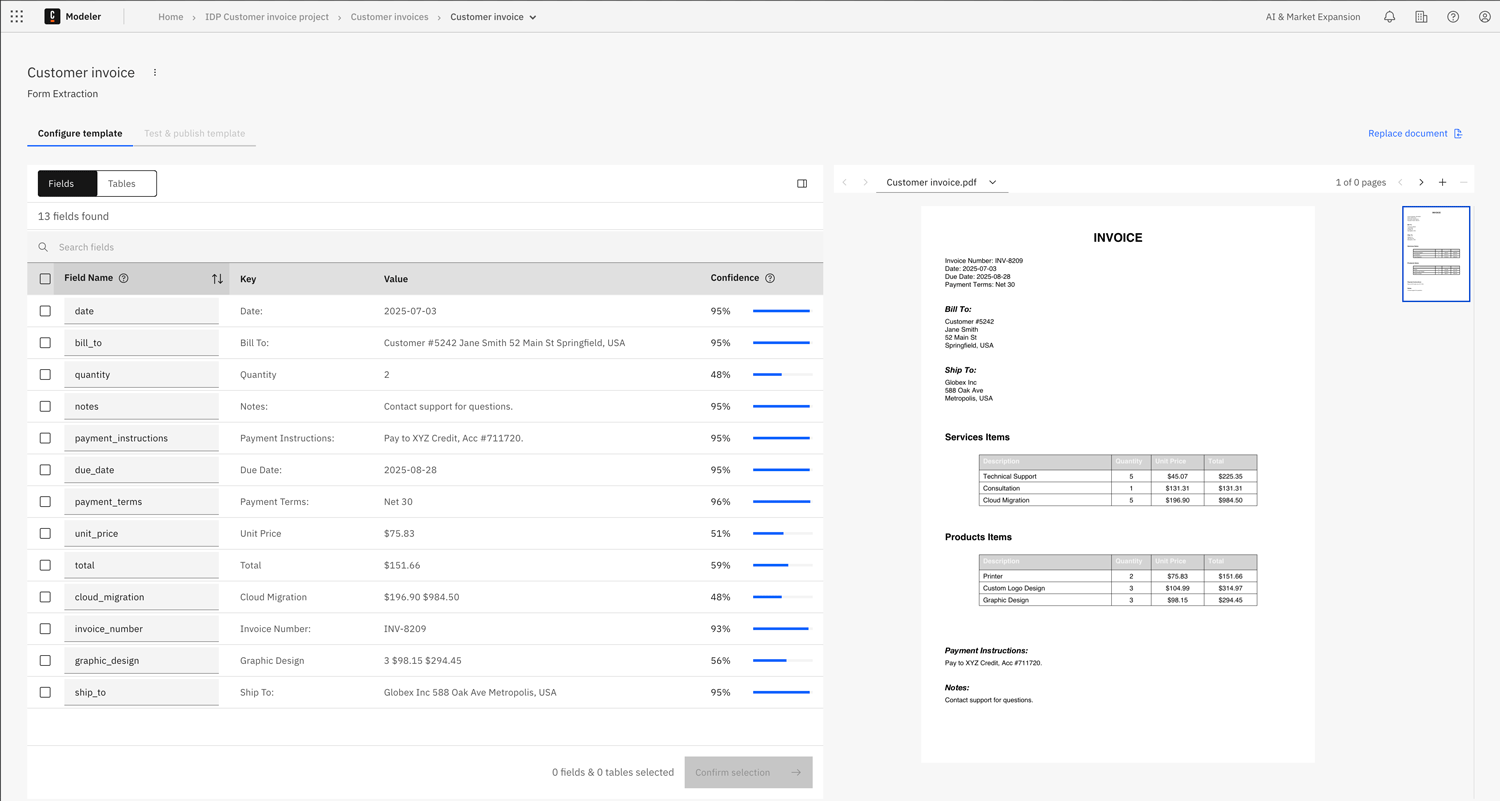
Extracted Fields
- Field name: Enter a descriptive name for the field, used to identify the field in your template. You can change the name as required.
- Key: The field key. This matches the key of the extracted field from the uploaded document.
- Value: The extracted value.
- Confidence score: How confident the model is in the extracted value.
Extracted Tables
- Table name: Enter a descriptive name for the table, used to identify the table in your template. You can change the name as required.
- Min confidence score: The minimum confidence score of a field in the table.
- Average confidence score: The average confidence score of all fields in the table.
Once you are satisfied with your template configuration, you can test it to validate how well it performs on other documents, or you can publish it directly from this tab.
Step 3: Test data extraction (optional)
Testing is optional but recommended, as you can evaluate the performance of the extraction template before publishing.
testing allows you to see how accurately the template extracts data from other documents of the same type. This ensures better results when using the template in your processes.
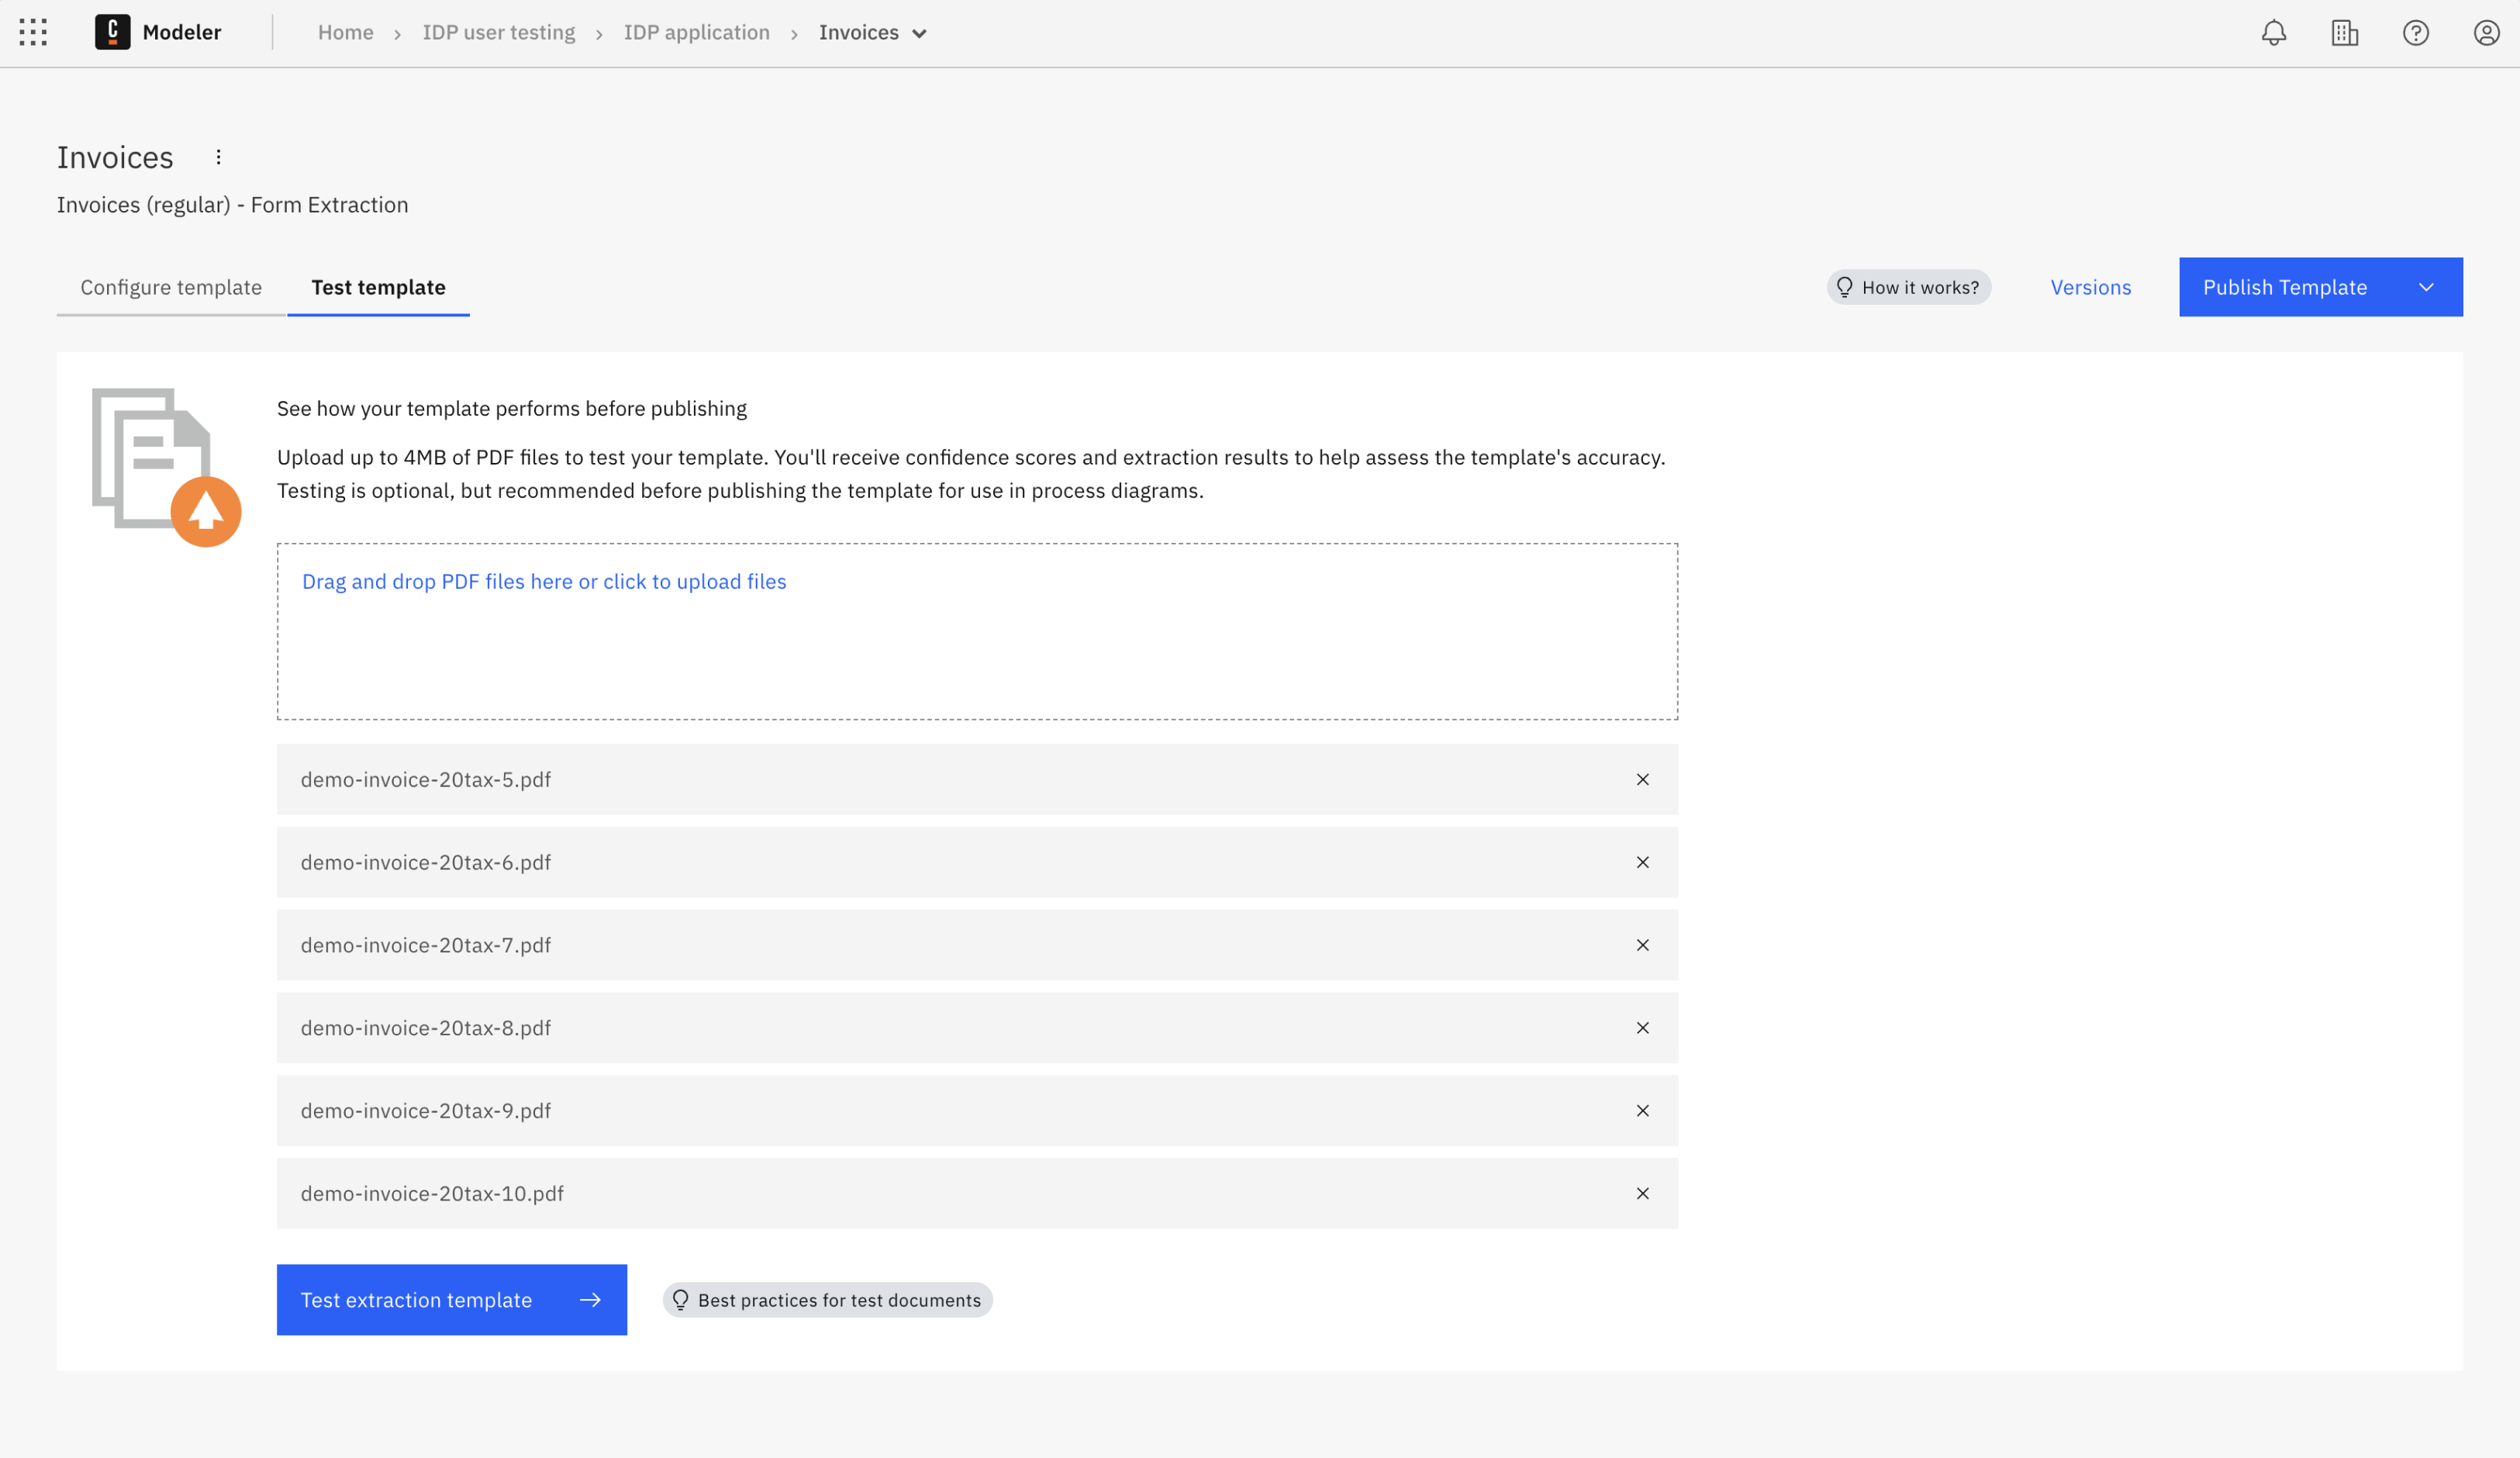
To test the data extraction:
- Drag your test document in the box or click Drag and drop a PDF file here or click to upload a file to browse and upload your test document.
- Once you have finished uploading your test document, click Test extraction template.
- The extraction process starts looking for the fields and tables you have selected in your template.
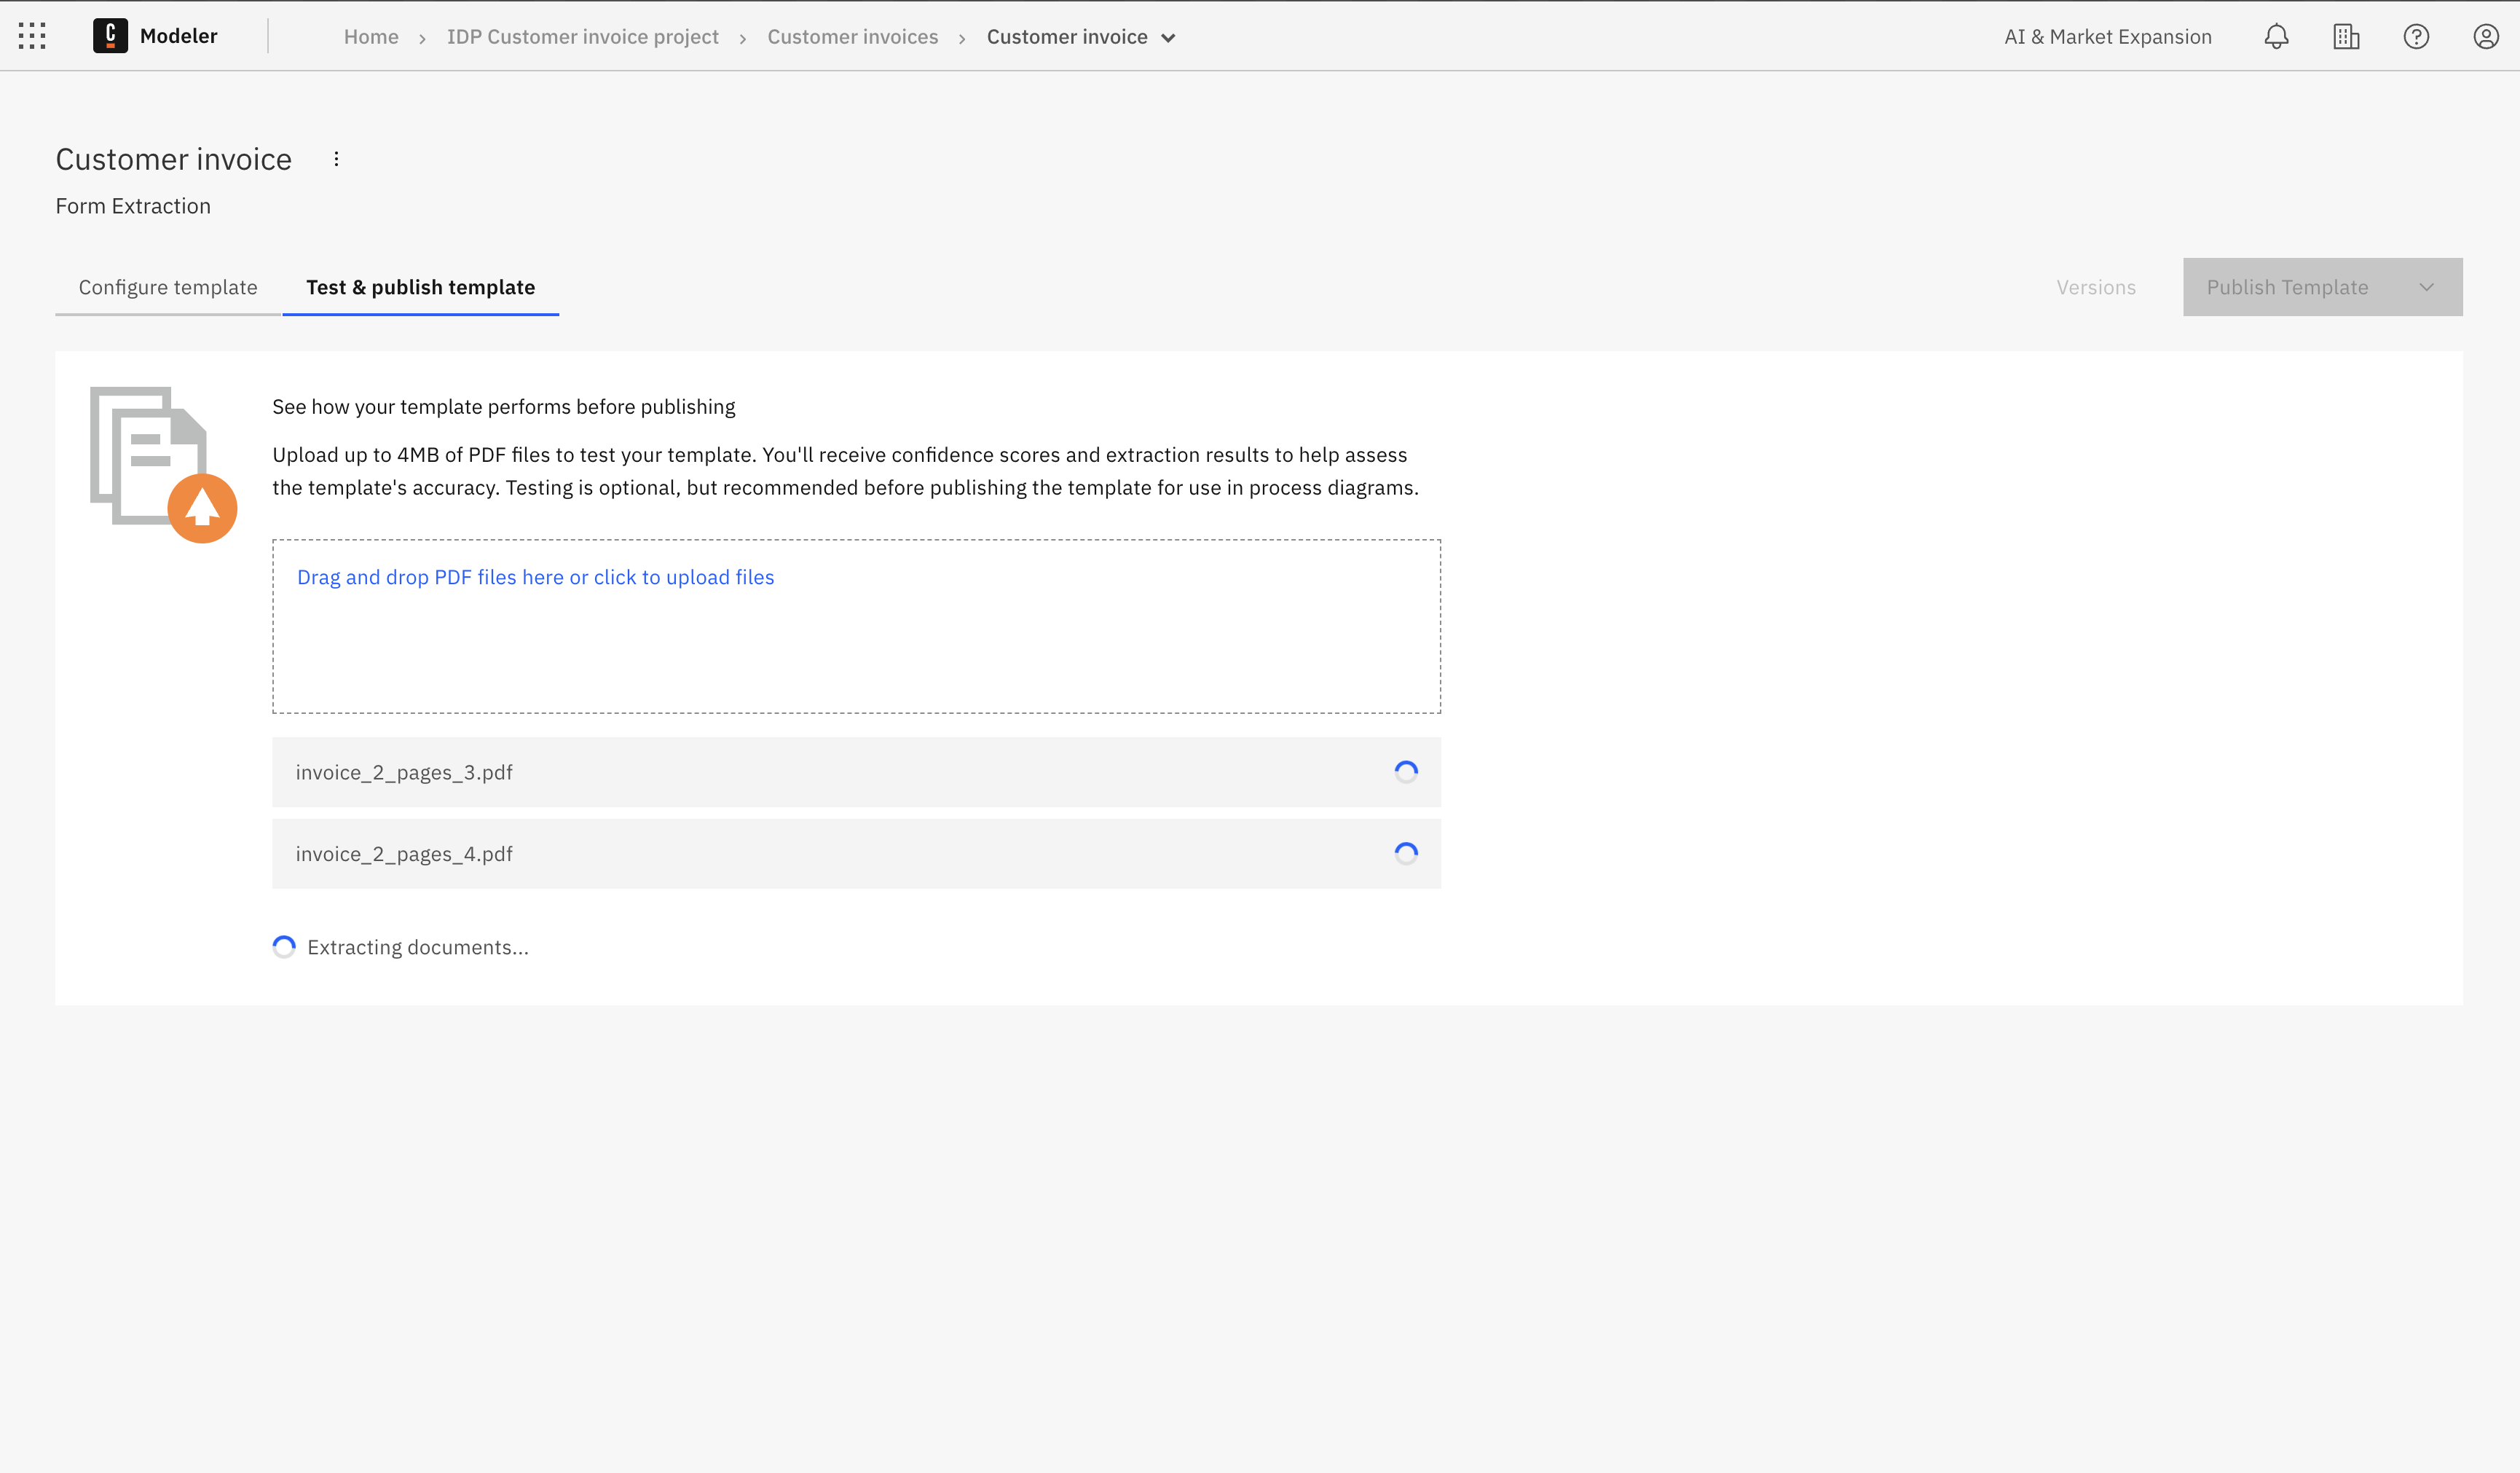
Test summary results
After the extraction is complete, a summary of the test results is shown.
- Average confidence: The overall confidence score (as a percentage) for all extracted data.
- Average number of fields extracted: Number of fields successfully extracted compared to the total expected (for example, "3 / 3").
- Average number of tables extracted: Number of tables successfully extracted compared to the total expected (for example, "0 / 1").
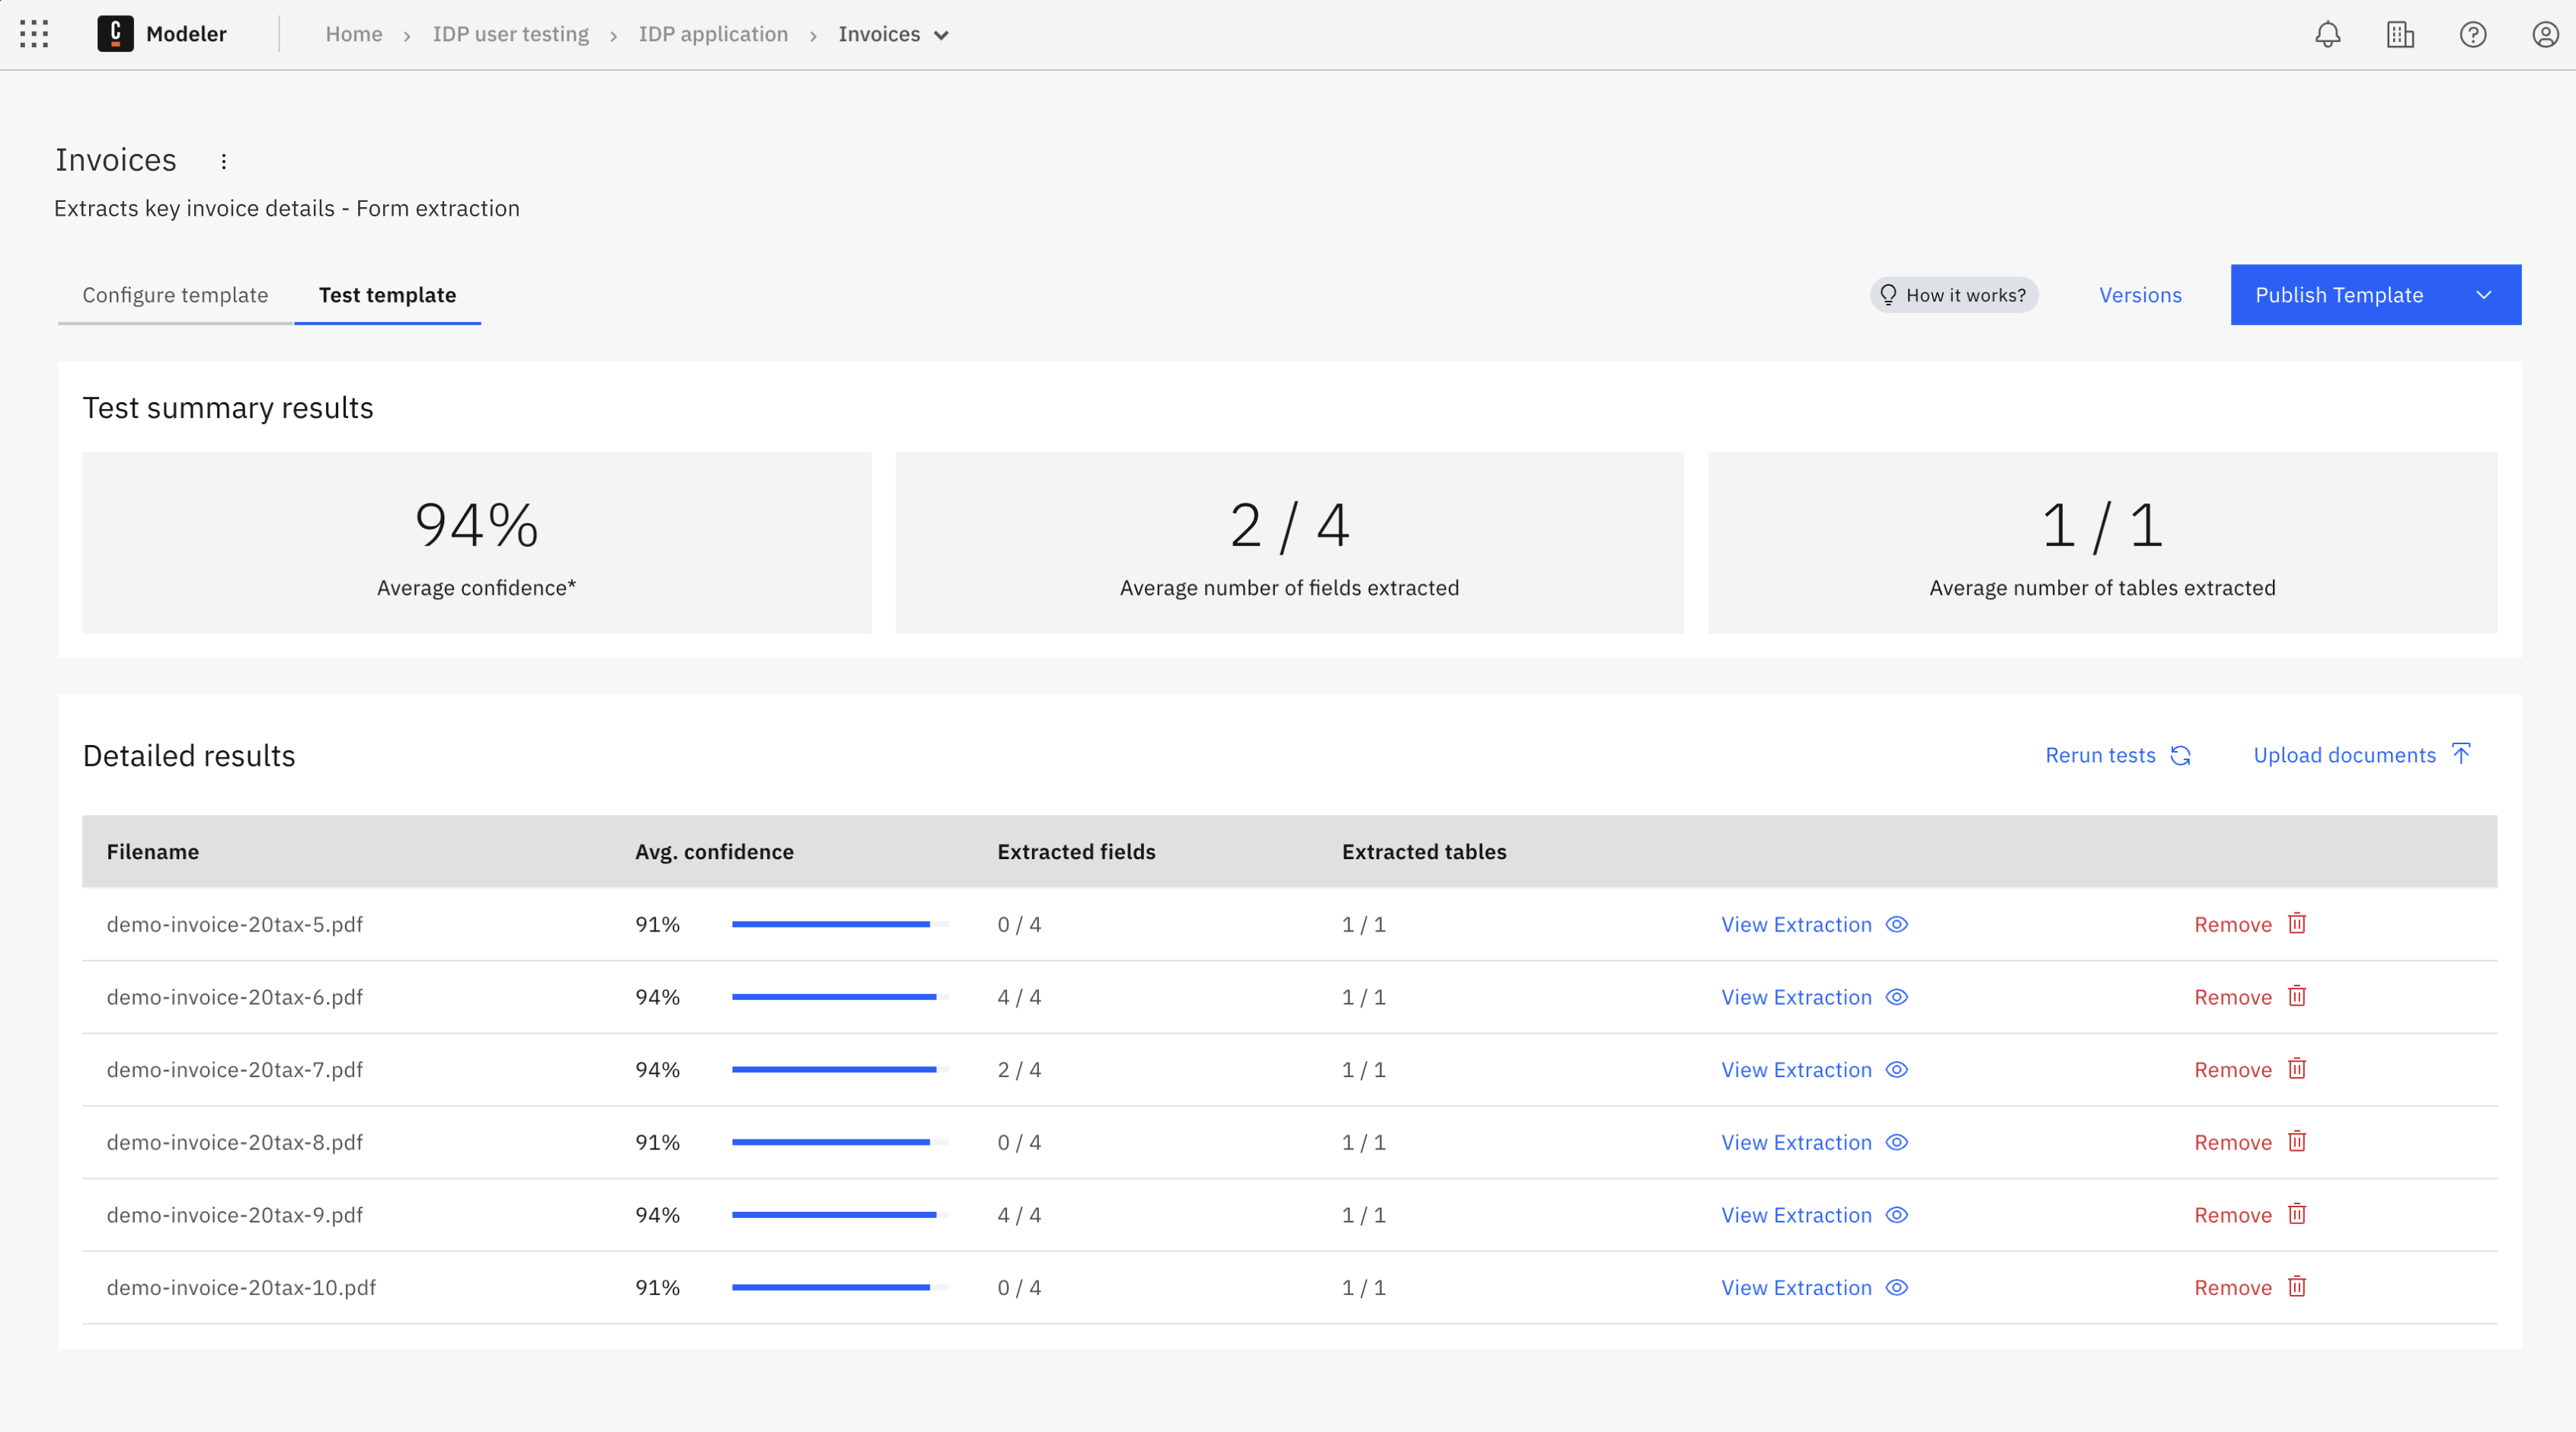
Detailed results
The detailed results section provides a comprehensive view of each tested document:
- Filename: The name of the uploaded test document.
- Avg. confidence: A visual confidence bar showing the extraction confidence as a percentage.
- Extracted fields: Number of successfully extracted fields out of the total.
- Extracted tables: Number of successfully extracted tables out of the total.
- Actions:
- View Extraction: Click to see the detailed extraction results for each field and table.
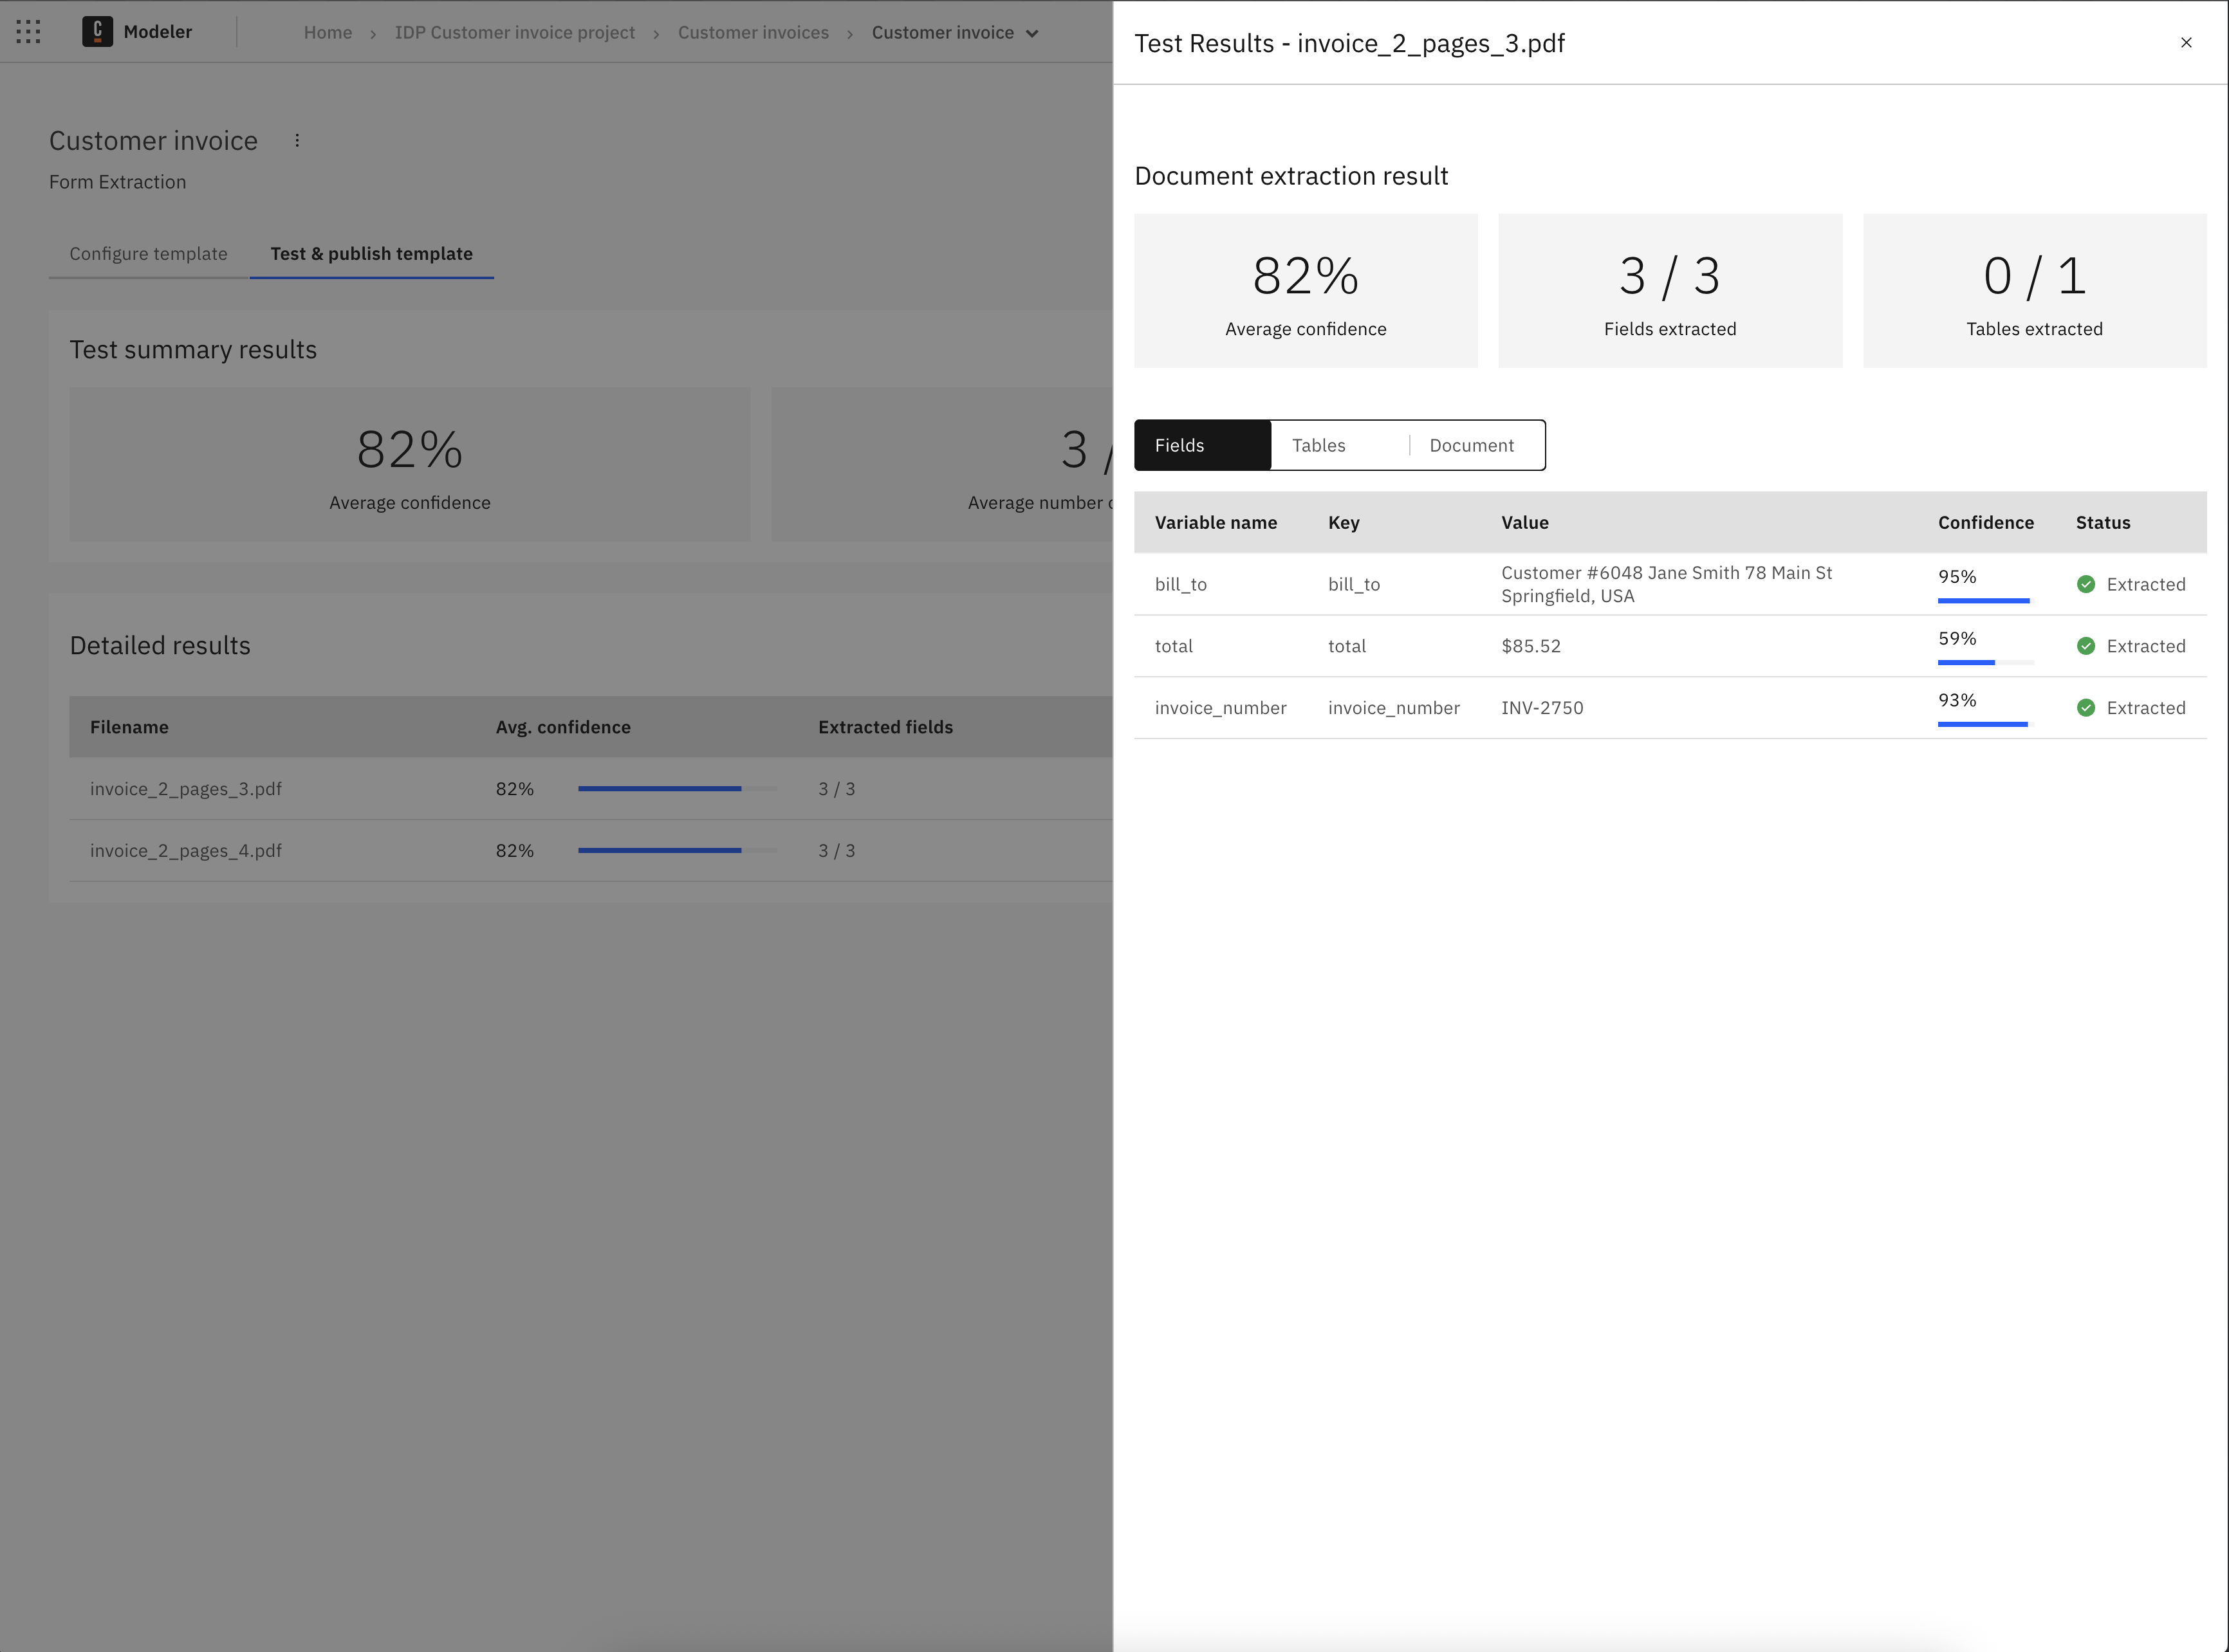
- Remove: Delete the test document from the results.
- View Extraction: Click to see the detailed extraction results for each field and table.
You can test multiple documents by:
- Clicking Upload documents to add more test files.
- Clicking Rerun tests to test additional documents.
 ****
****
Step 4: Publish
Publish the document extraction template to make it available for integration into your processes.
-
Click Publish and select either:
- Publish to project: Only users in the Web Modeler project can access the document extraction template.
- Publish to organization: The document extraction template is made available as a shared resource within your organization. This option is only available for organization owners or users with the Admin role.
-
On the Publish Extraction Project dialog, configure the publish settings.
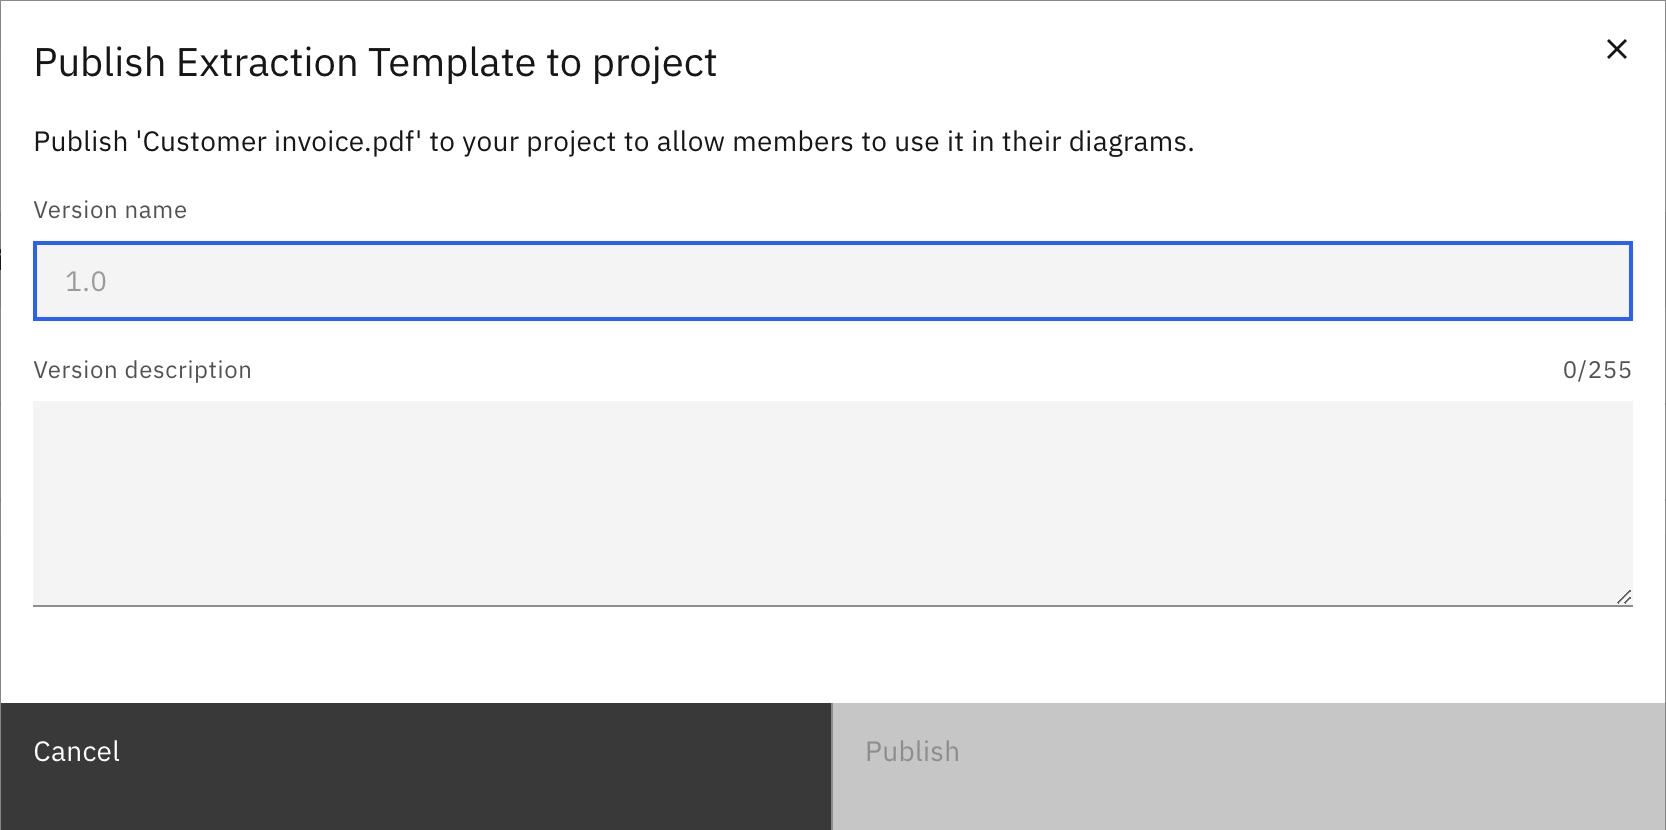
- Version name: Enter a version for the published document extraction template.
- Version description: Enter a description for the published document extraction template version.
-
Click Publish to make the document extraction template available for integration into your processes.

Versions
Click Versions to view and manage your published document extraction template versions.
Compare versions
You can compare the change history between two template versions as JSON code in the diff layout.
- Ensure that the sidebar Show changes toggle is turned on.
- Select the version that you want to compare. The previous version is automatically selected for comparison.
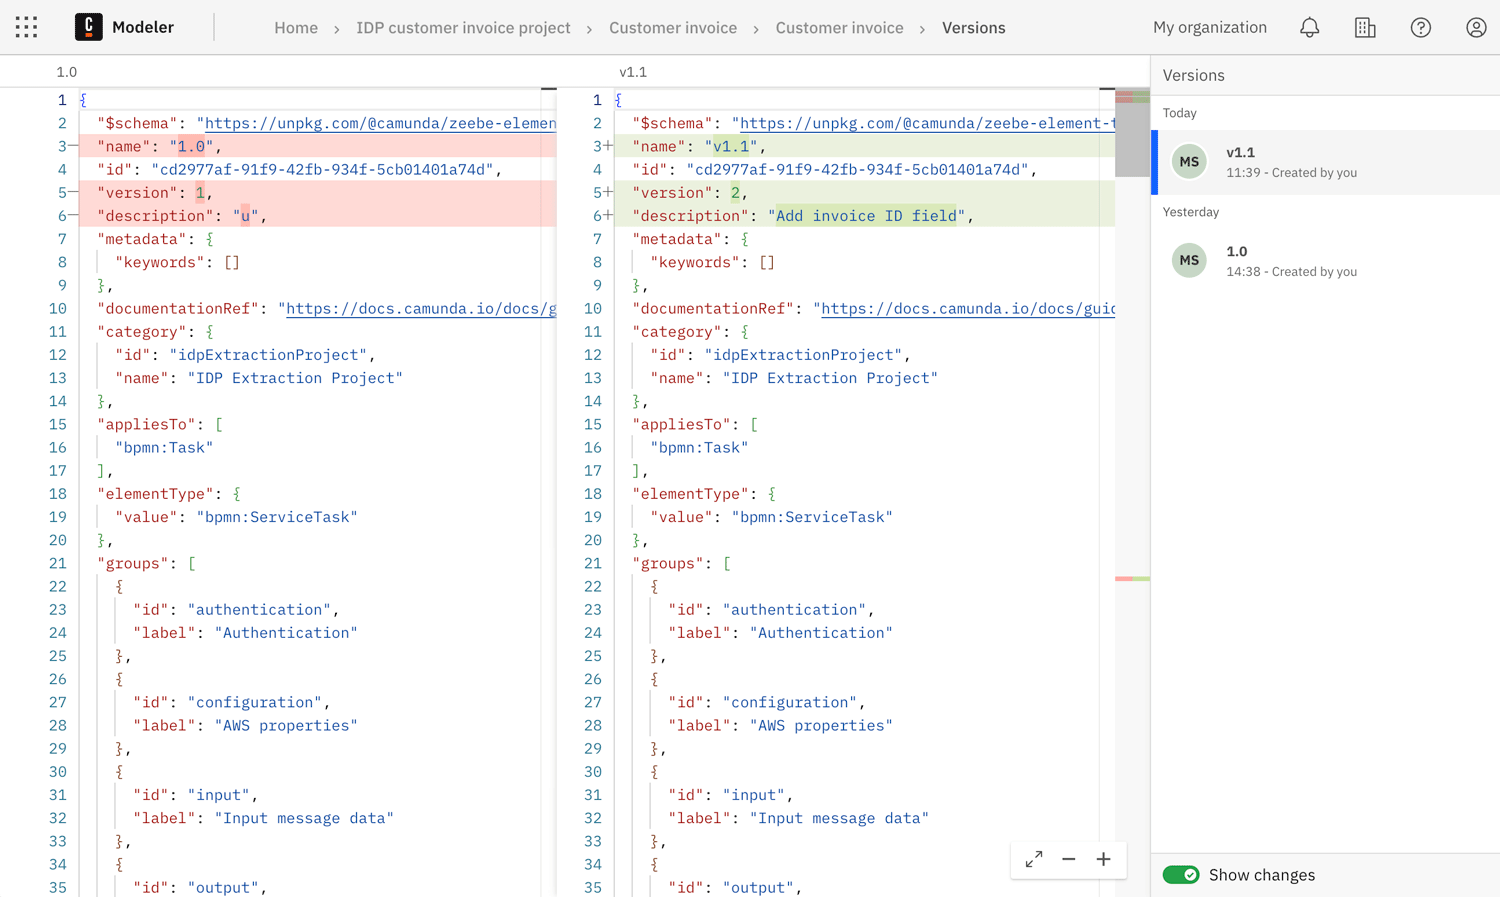
The JSON for the previous version is shown on the left, with the currently selected version shown on the right.
- Differences between the versions are highlighted in the JSON.
- For example, if an extraction field was added, this change is highlighted in green.
Restore a version
You can restore a version to revert to a previous snapshot of a document extraction template.
- In the sidebar Versions list, hover over the version you want to restore.
- Select the three vertical dots to open the actions menu.
- Select Restore as latest.
Update a version
You can update a version name and description at any time.
- In the sidebar Versions list, hover over the version you want to rename.
- Select the three vertical dots to open the actions menu.
- Select Edit and enter a new name and/or description for the version.
Delete a version
You can permanently delete a document extraction template version.
- In the sidebar Versions list, hover over the version you want to rename.
- Select the three vertical dots to open the actions menu.
- Select Delete.
- You are prompted to confirm the deletion.
- Select Delete version to permanently delete the version.
- Select Cancel to cancel the deletion and return to the versions list.
Deleting a document extraction template version is permanent.