Groups
A user group is a way to organize multiple users in one unit. Groups simplify access management by allowing you to assign permissions to a collection of users at once, rather than individually. You can grant permissions to a group by assigning roles to it or creating direct authorizations.
Create a group
To create a group:
- Log in to Identity in your cluster, and click on the Groups tab.
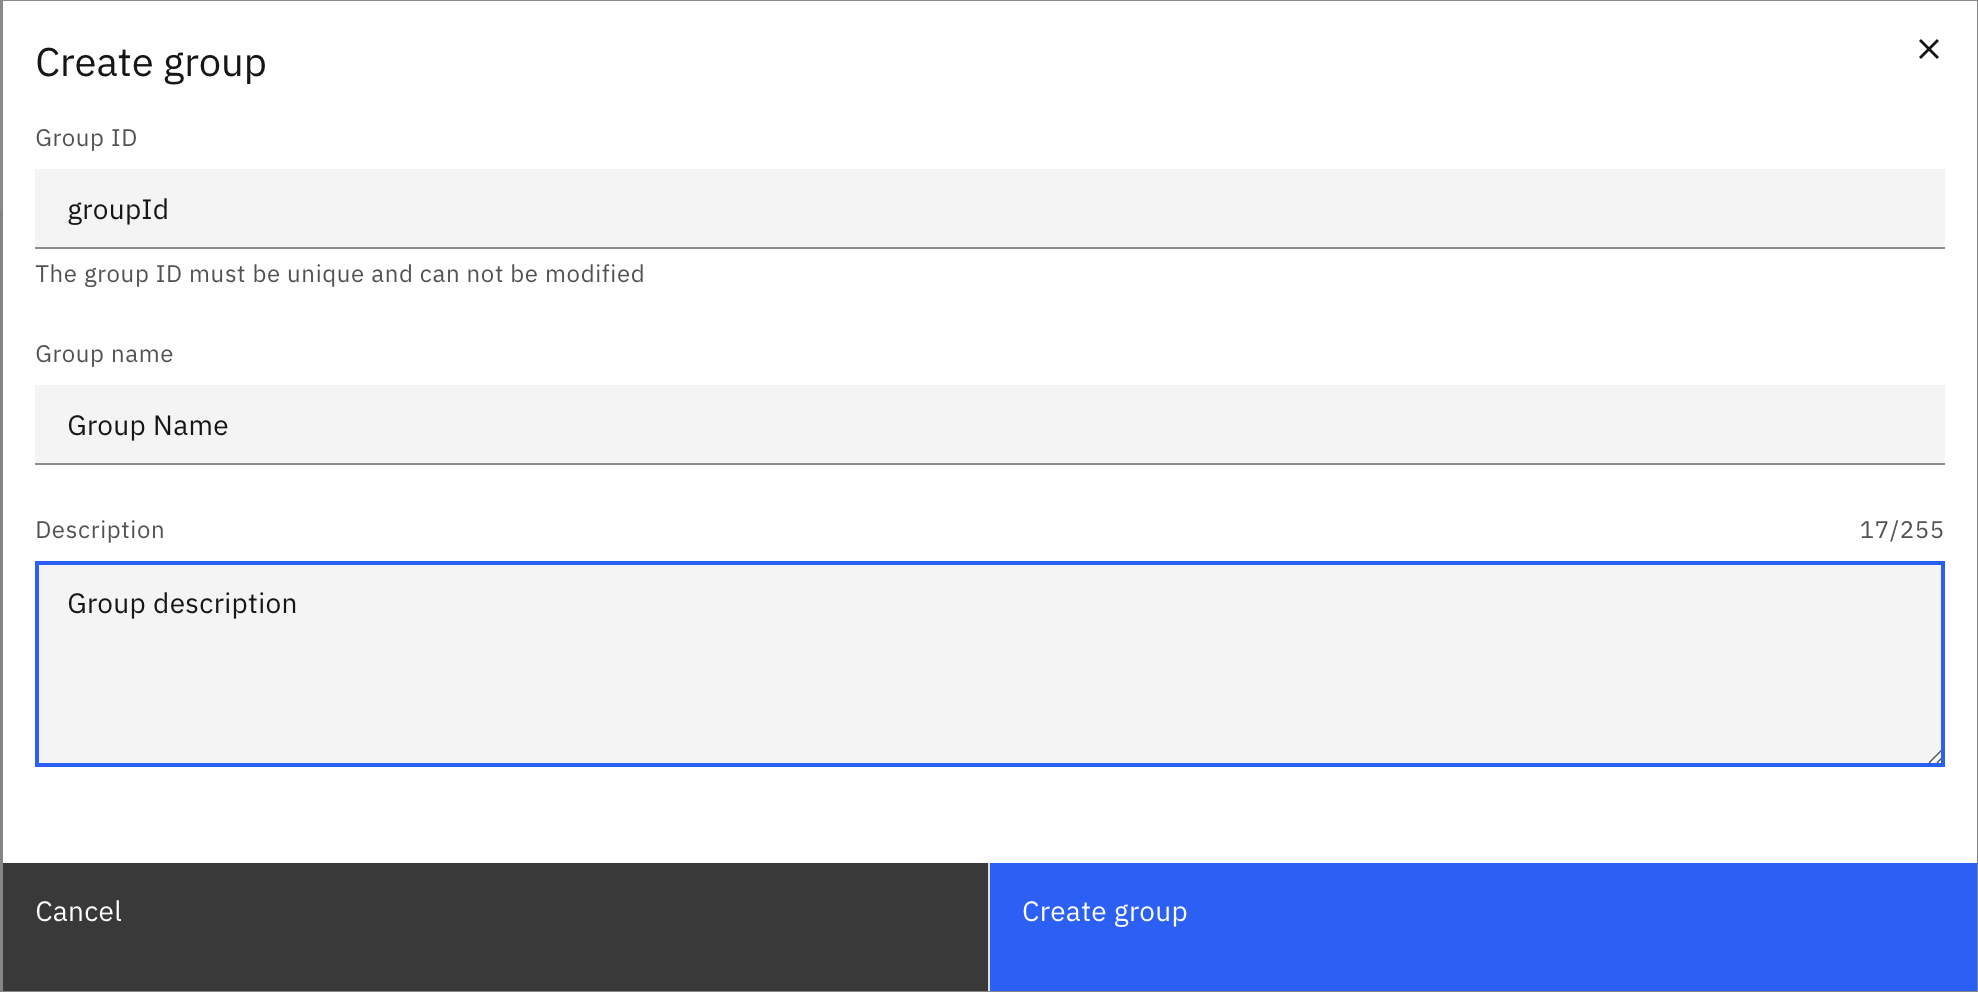
- Click on the Create group button, and provide the following group details:
- Group ID: The unique identifier for the group.
- Name: The name of the group.
- Description: A description of the group.
- Click on the Create group button.
The group is created and can now be assigned to roles or users.
Update a group
To update a group:
- Log in to Identity in your cluster, and click on the Groups tab.
- Click on the pencil icon next to the group you want to update.
- Update the group details:
- Name: The name of the group.
- Description: A description of the group.
- Click on the Save button.
The group details are updated.
Delete a group
- Log in to Identity in your cluster, and click on the Groups tab.
- Click on the Delete button next to the group you want to delete.
- Confirm the deletion by clicking on the Delete button in the confirmation dialog.
The group is deleted. Users and roles that were assigned to the group will not be affected, but they will no longer be part of the group. The authorizations that were granted to the group will also be removed.
Assign authorizations to a group
See the authorization section to learn how to create authorizations for groups.
Manage users
Assign users to a group
To assign users to a group:
- Log in to Identity in your cluster, and click on the Groups tab.
- Click on the group you want to assign users to.
- Click on the Users tab.
- Click on the Assign user button.
- Type the username of the user you want to assign to the group, and click on the Assign user button. For SaaS deployments, the username field refers to the email address of the user. For Self-Managed deployments, the username field has to match the value of the claim configured as
username-claim.
For Self-Managed deployments with basic authentication, you must search for existing users.
The user is assigned to the group and inherits its permissions.
Remove users from a group
To remove users from a group:
- Log in to Identity in your cluster, and click on the Groups tab.
- Click on the group you want to remove users from.
- Click on the Users tab.
- Click on the Remove button next to the user you want to remove from the group.
- Confirm the removal by clicking on the Remove button in the confirmation dialog.
The user is removed from the group and loses any permissions that were granted through the group.
Manage roles
Assign roles to a group
To assign roles to a group:
- Log in to Identity in your cluster, and click on the Groups tab.
- Click on the group you want to assign roles to.
- Click on the Roles tab.
- Click on the Assign role button.
- Search for the ID of the role you want to assign to the group, and click on the Assign role button.
The role is assigned to the group. Users in the group now have the permissions granted by that role.
Remove roles from a group
To remove roles from a group:
- Log in to Identity in your cluster, and click on the Groups tab.
- Click on the group you want to remove roles from.
- Click on the Roles tab.
- Click on the Remove button next to the role you want to remove from the group.
- Confirm the removal by clicking on the Remove button in the confirmation dialog.
The role is removed from the group. Users in the group will lose the permissions that were granted through that role.
Manage clients
In Self-Managed deployment, client management is only available for OIDC authentication.
Assign client to a group
To assign a client to a group:
- Log in to Identity in your cluster, and click on the Groups tab.
- Click on the group you want to assign a client to.
- Click on the Clients tab.
- Click on the Assign client button.
- Type the ID of the client you want to assign to the group, and click on the Assign client button.
The client is assigned to the group.
Remove client from a group
To remove a client from a group:
- Log in to Identity in your cluster, and click on the Groups tab.
- Click on the group you want to remove a client from.
- Click on the Clients tab.
- Click on the Remove button next to the client you want to remove from the group.
- Confirm the removal by clicking on the Remove button in the confirmation dialog.
The client is removed from the group.
Manage mapping rules
Self-Managed onlyMapping rules are only available for OIDC authentication.
Assign mapping rules to a group
To assign a mapping rule to a group:
- Log in to Identity in your cluster, and click on the Groups tab.
- Click on the group you want to assign mapping rules to.
- Click on the Mapping rules tab.
- Click on the Assign mapping rule button.
- Search for the ID of the mapping rule you want to assign to the group, and click on the Assign mapping rule button.
The mapping rule is assigned to the group.
Remove mapping rules from a group
To remove a mapping rule from a group:
- Log in to Identity in your cluster, and click on the Groups tab.
- Click on the group you want to remove mapping rules from.
- Click on the Mapping rules tab.
- Click on the Remove button next to the mapping rule you want to remove from the group.
- Confirm the removal by clicking on the Remove button in the confirmation dialog.
The mapping rule is removed from the group.