Create a project
Create a project work on and deploy a set of related files.
Create a project
To create a project:
- Create a workspace, if you don't already have one.
- In the workspace, select New Project.
Select a default cluster
Camunda 8 SaaS onlyWhen you create a project, you must select a development cluster to deploy to.
- If you have already created a cluster, turn on the toggle next to the cluster name in Select a development cluster.
- If you have not yet created a cluster, or if No Cluster has been created yet is shown, select Create new dev cluster. The Camunda Hub Clusters tab opens so you can create a new cluster.
-
If your modeling plan does not allow you to create more clusters, a
Cluster creation is not available on this modeling planwarning is shown. Contact the administrator or owner of your organization to upgrade your plan. -
If you do not have the proper permissions to create a cluster, a
Missing permissionswarning is shown. Contact the administrator or owner of your organization to create a cluster.
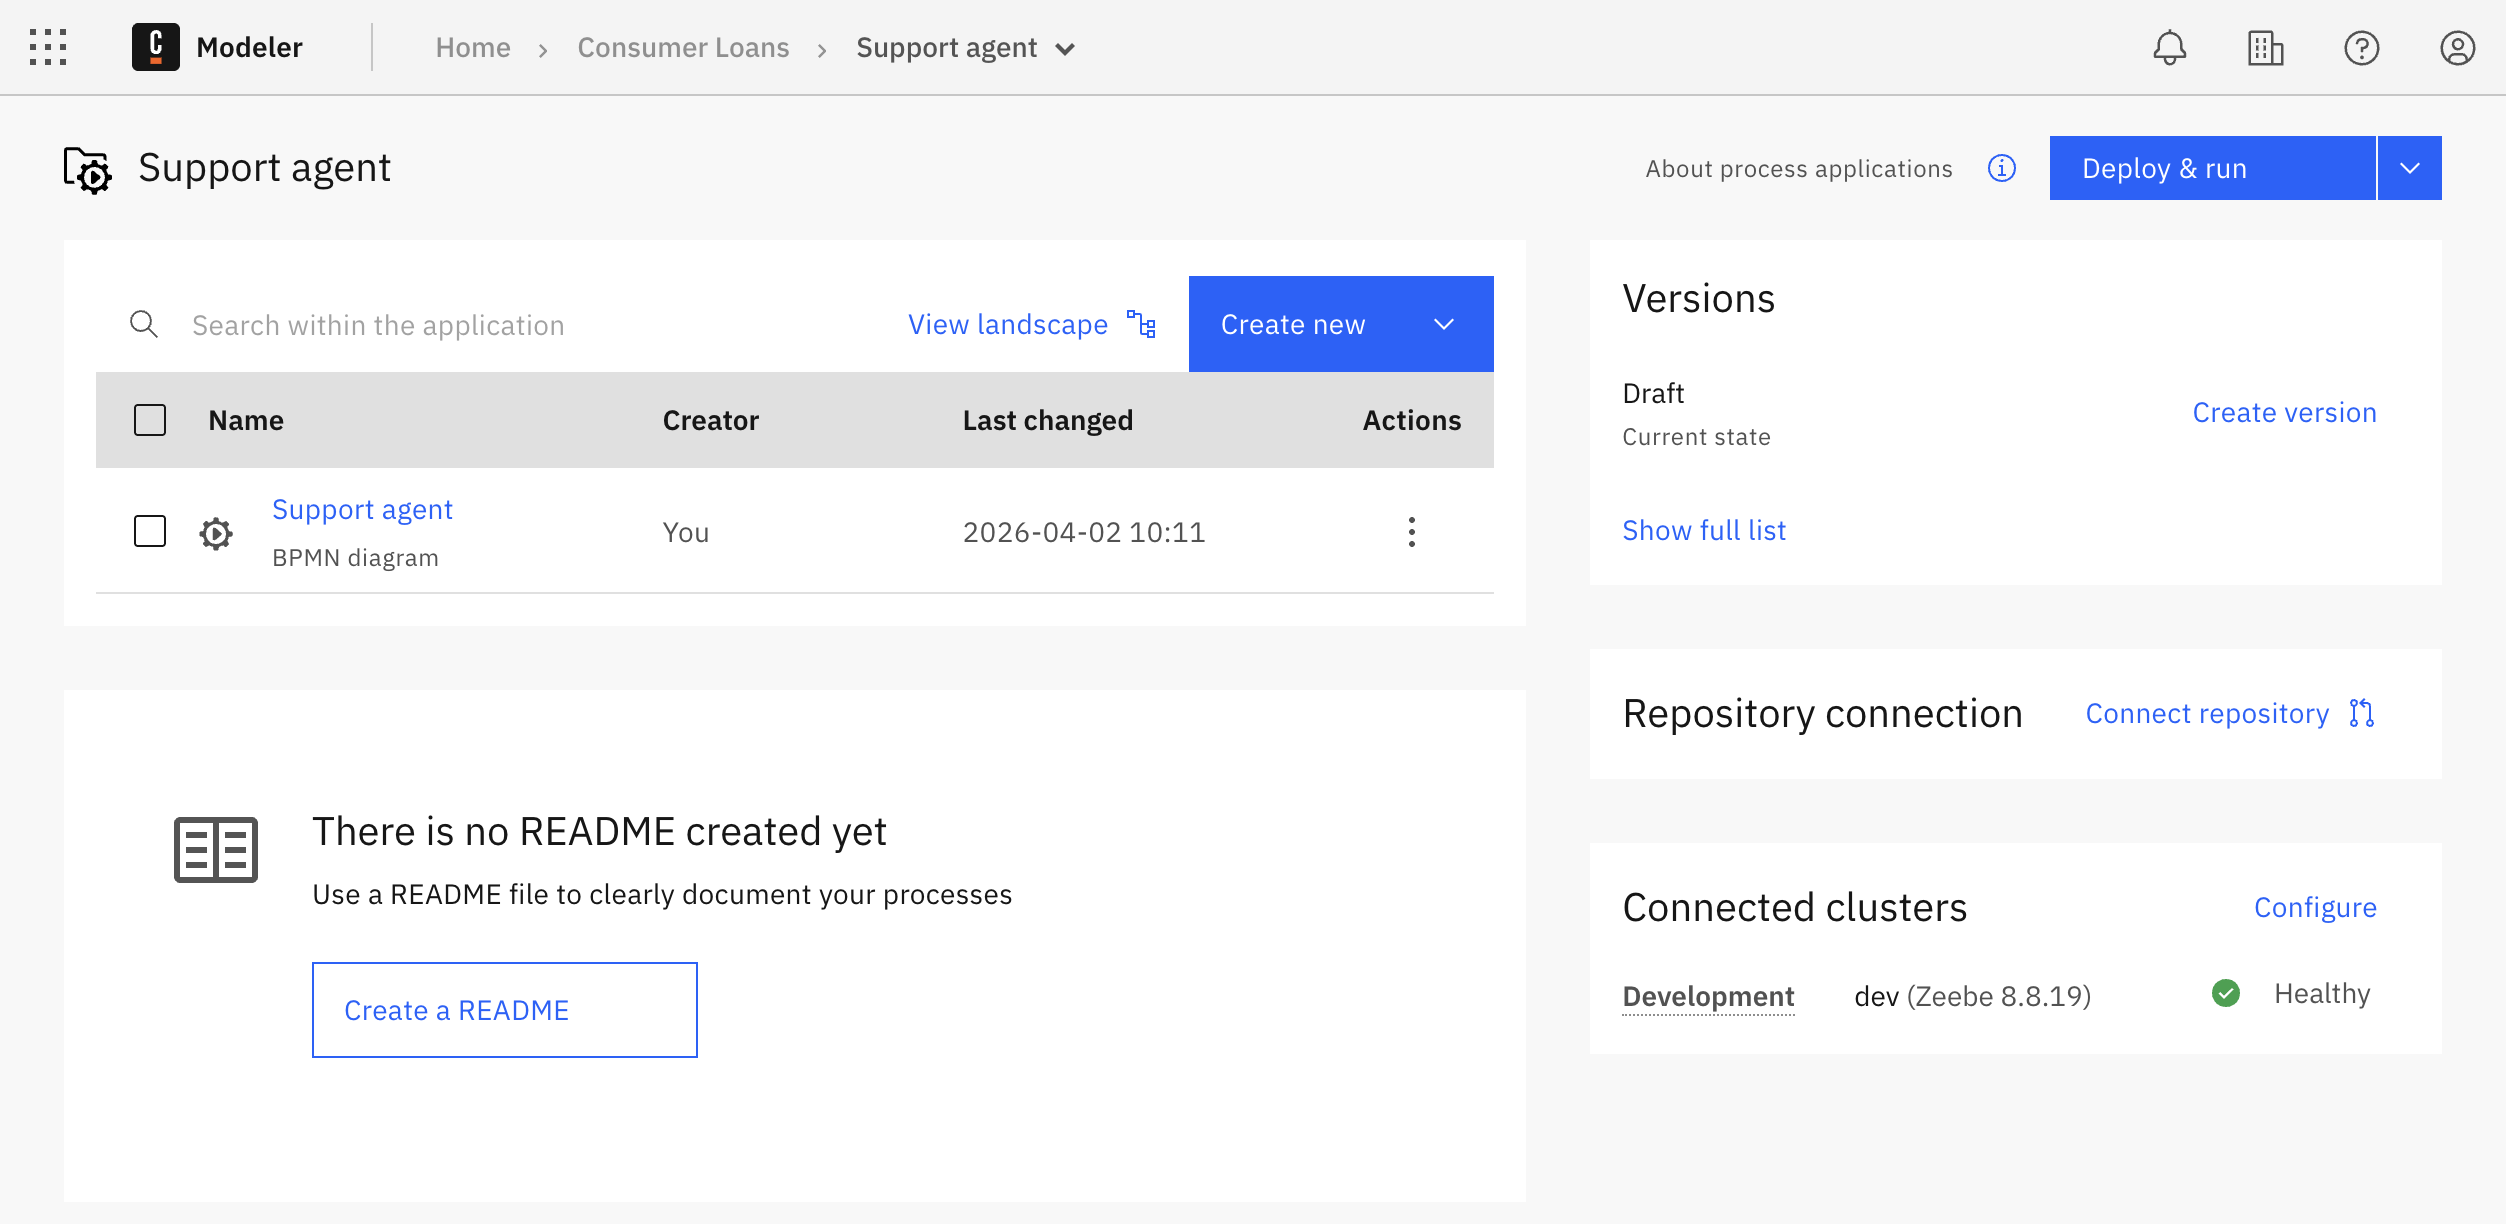
Project homepage
After creating the project, you land on the project homepage. From there, you can manage and explore files, preview the README if it exists, create and manage versions, set up and sync with a Git repository, connect clusters to the project, and deploy or run the project.
You may not see some of these options depending on your project permissions.
Add files to a project
When you create a project, a new BPMN diagram is automatically created. To add more files to the project, either:
- Select the Create new dropdown on the project page to create and add a new file.
- Drag and drop files from your local computer.
- Move an existing file into the project from a different location in Web Modeler.
You can also create subfolders to organize files within the project.
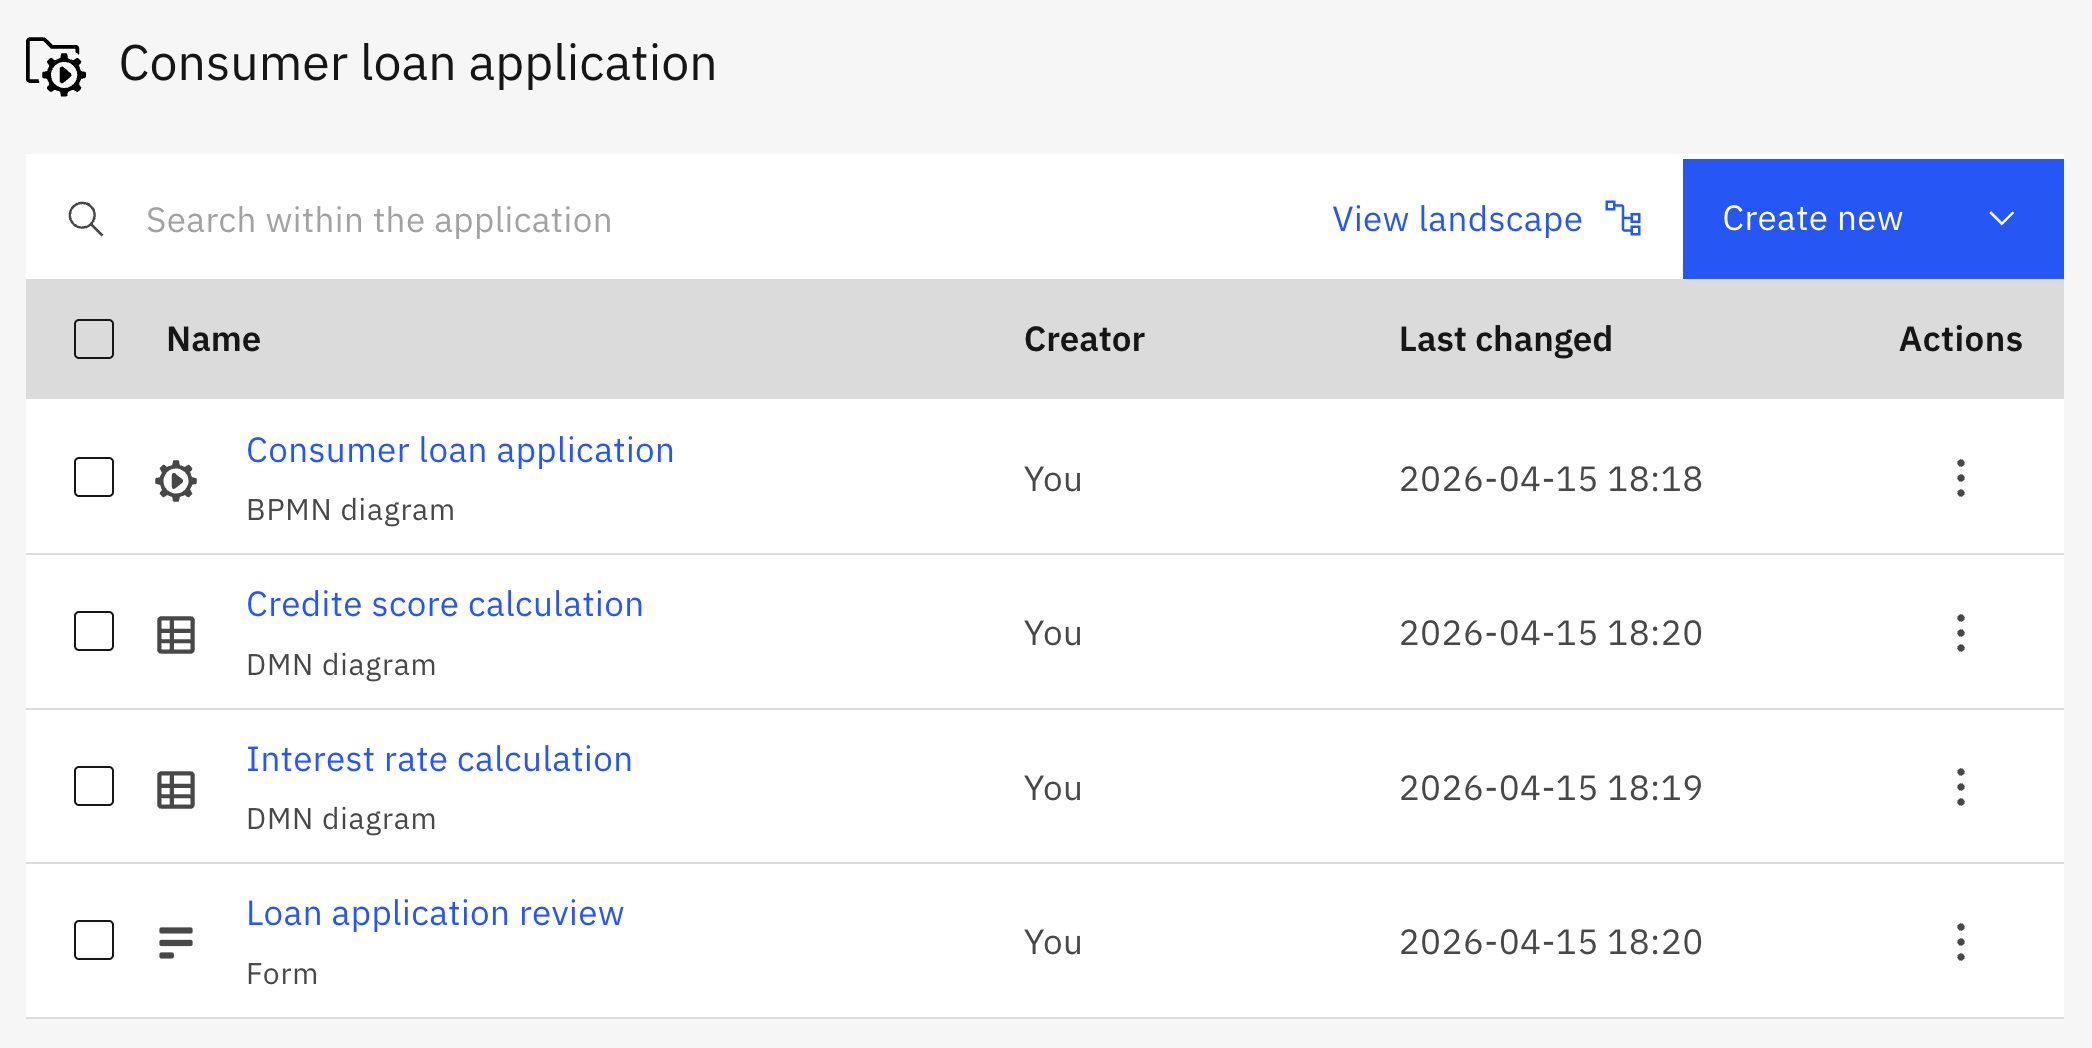
Process IDs, decision IDs, and form IDs must be unique across all files within a project. This avoids ambiguity and conflicts when you link resources and deploy the project.