WhatsApp connector
The WhatsApp connector is an outbound connector that allows you to send messages to users from your BPMN process.
Prerequisites
To start using the WhatsApp connector, you must have an approved Meta WhatsApp application; follow the official guide to obtain one.
WhatsApp webhooks are currently not supported by Camunda.
Create a WhatsApp connector task
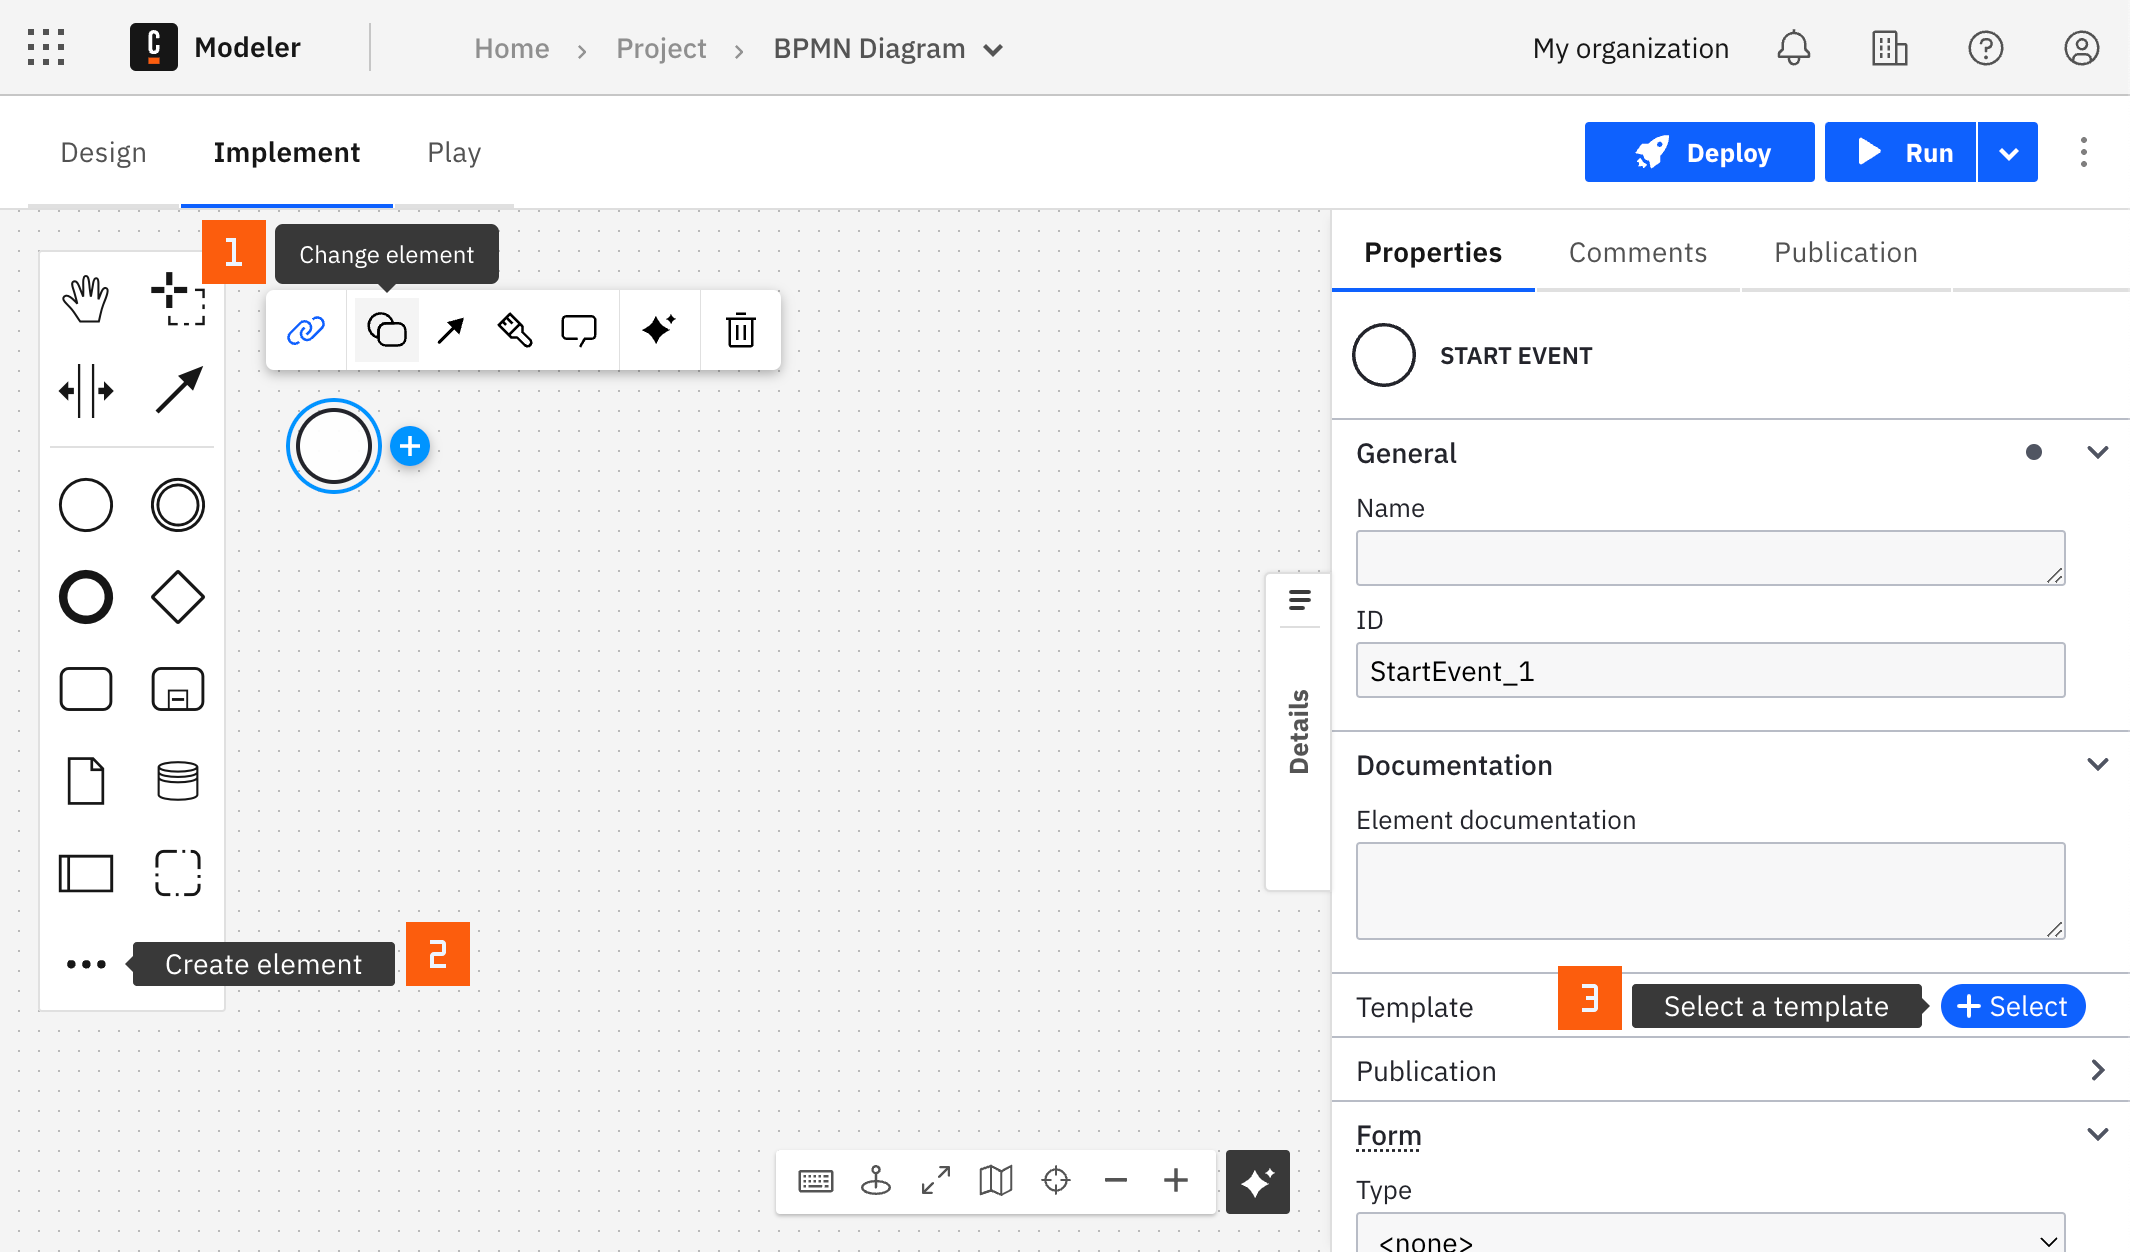
You can apply a connector to a task or event via the append menu. For example:
- From the canvas: Select an element and click the Change element icon to change an existing element, or use the append feature to add a new element to the diagram.
- From the properties panel: Navigate to the Template section and click Select.
- From the side palette: Click the Create element icon.

After you have applied a connector to your element, follow the configuration steps or see using connectors to learn more.
Authentication
The WhatsApp connector supports authentication through Meta access tokens. Take a look at this blog post to learn more on how to obtain one for yourself.
Once the token is obtained, put it in the Access token field of the Authentication section.
Use Camunda secrets to avoid exposing your WhatsApp access token credentials as plain text. See our documentation on managing secrets to learn more.
Sender and recipient
Your WhatsApp application can have multiple phone numbers registered. Set your phone number ID in the Sender phone number ID field of the Payload section. You can find the phone number ID at the Meta developer portal.
In the Recipient phone number field, enter a phone number you wish to send message to.
Select operation to execute
You can select one of the following operations from the Message type dropdown.
Plain text
When this option is selected, write any arbitrary text in the Message text field. This message will be sent to the target recipient.
Message template
When this option is selected, it is implied that you already have an approved WhatsApp message template. Read more bout message templates at the official page.
- In the field Template name, set the name of your WhatsApp template. For example, my_delivery_scheduled_template.
- In the field Template language code, specify the language code of your template. For example, en_US.
- In the field Header variables, set the values for your variables only if the header has any. For example,
{"type": "text","text": "My header param"}. - In the field Body variables, set the values for your variables only if the body has any. For example,
{"type": "text","text": "My body param"}.
See the official Meta guide for more information and examples.
Handle connector response
The WhatsApp connector is a protocol connector, meaning it is built on top of the HTTP REST connector. Therefore, handling response is still applicable as described.