Automation Anywhere connector
Add work items to an Automation Anywhere queue and get their results from your BPMN process.
About this connector
The Automation Anywhere connector orchestrates an Automation Anywhere queue from your BPMN process with Automation Anywhere RPA. Use it to hand work to your bots by adding work items to a queue, and to check the state and result of a work item after a bot processes it.
Prerequisites
| Prerequisite | Description |
|---|---|
| Automation Anywhere instance | An instance with a license, configured via an API service. Refer to the official documentation to learn how to install and configure the API service. |
User account with the AAE_Queue Admin role | A user account that can query and manage workload queues and work items in the Control Room. Learn more about roles. |
Create an Automation Anywhere connector task
You can apply a connector to a task or event via the append menu. For example:
- From the canvas: Select an element and click the Change element icon to change an existing element, or use the append feature to add a new element to the diagram.
- From the properties panel: Navigate to the Template section and click Select.
- From the side palette: Click the Create element icon.
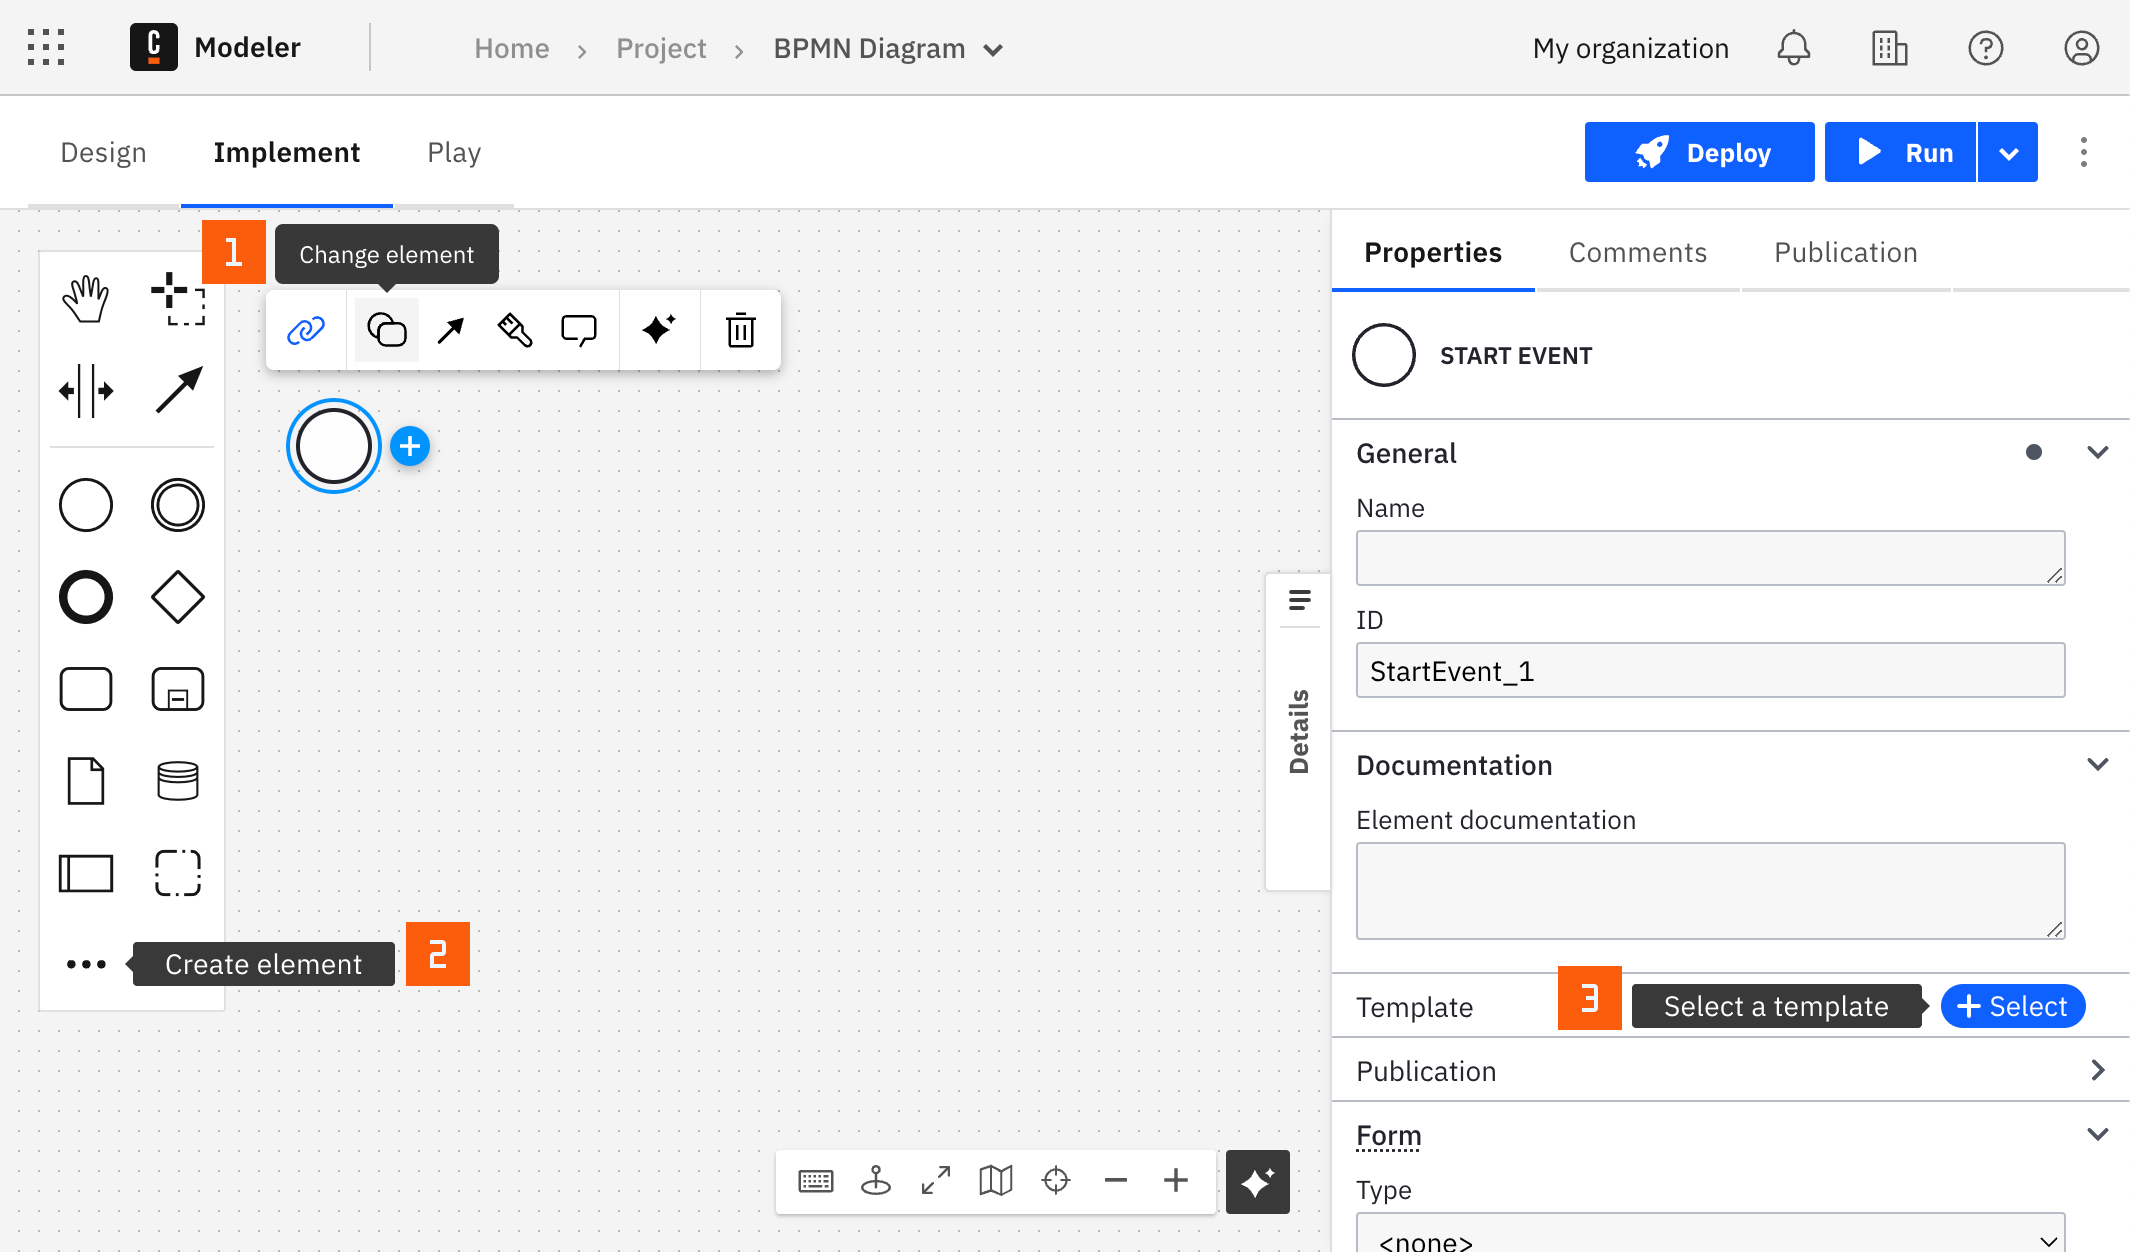
After you have applied a connector to your element, follow the configuration steps or see using connectors to learn more.
After you apply the connector to your element, set the properties described in the following sections.
Configuration
Connection
| Property | Type | Required | Description | Example |
|---|---|---|---|---|
| Control room URL | String | Yes | The URL you use to access the Automation Anywhere Control Room. Your Automation Anywhere administrator provides it, and it is specific to your organization's instance of the platform. | https://domainname.myautomationanywhere.digital |
Authentication
Select an authentication type from the Type dropdown in the Authentication section.
Store passwords, API keys, and tokens as secrets to avoid exposing them in the BPMN XML file. Follow the guide for creating secrets, then reference the secret in the property, for example {{secrets.AUTOMATION_ANYWHERE_PASSWORD}}.
Authenticate (username and password)
| Property | Type | Required | Description | Example |
|---|---|---|---|---|
| Username | String | Yes | The username of the Control Room user. | {{secrets.AUTOMATION_ANYWHERE_USERNAME}} |
| Password | String | Yes | The password of the Control Room user. | {{secrets.AUTOMATION_ANYWHERE_PASSWORD}} |
| Multiple login | Dropdown | Yes | Select TRUE to allow multiple API sessions for the user. Learn more about multi-login users. |
Authenticate (username and API key)
| Property | Type | Required | Description | Example |
|---|---|---|---|---|
| Username | String | Yes | The username of the Control Room user. | {{secrets.AUTOMATION_ANYWHERE_USERNAME}} |
| API key | String | Yes | The API key of the Control Room user. The API key is a 40-character string generated in the Control Room. Learn how to create and assign an API key generation role. | {{secrets.AUTOMATION_ANYWHERE_API_KEY}} |
Authentication (refresh) token
| Property | Type | Required | Description | Example |
|---|---|---|---|---|
| Token | String | Yes | An authentication token or a refresh token. Learn how to generate an authentication token in the authentication API documentation, or a refresh token in the refresh token API documentation. | {{secrets.AUTOMATION_ANYWHERE_TOKEN}} |
Timeout
| Property | Type | Required | Description | Example |
|---|---|---|---|---|
| Connection timeout in seconds | Number | No | The timeout in seconds to establish a connection. Set 0 for an infinite timeout. The default is 20. | 30 |
Operations
Select an operation from the Type dropdown in the Operation section. The connector supports two operations.
Add work item to the queue
Add a work item to a queue. This operation corresponds to the Automation Anywhere Add work items to the queue API.
Input parameters
| Property | Type | Required | Description | Example |
|---|---|---|---|---|
| Work queue ID | String | Yes | The identifier of the queue to add the work item to. | 20 |
| Work item json data | Text | Yes | JSON data for the work item, mapping queue column names to values. The data must comply with the Automation Anywhere API. Supports FEEL. | See below. |
Example for Work item json data:
{
  "coll_name": "your value",
  "last_name": "Doe",
  "email": "jane.doe@example.com"
}
Output
The connector returns the HTTP response of the Control Room, with the response data in response.body. The response contains information about the newly created work item:
{
  "list": [
    {
      "id": "40957",
      "createdBy": "25",
      "createdOn": "2021-11-24T01:53:10.175335900Z",
      "updatedBy": "25",
      "updatedOn": "2021-11-24T01:53:10.175335900Z",
      "version": "0",
      "json": {
        "TRN_ID": "A11",
        "DATA": "mydata"
      },
      "result": "",
      "deviceId": "0",
      "status": "NEW",
      "col1": "A11",
      "col2": "",
      "deviceUserId": "0",
      "queueId": "0",
      "comment": "",
      "automationId": "0",
      "totalPausedTime": "0",
      "error": "",
      "col6": "",
      "jobExecutionId": ""
    }
  ]
}
To use the Get work item result from queue by ID operation later, you need the ID of the new work item. Use a Result expression to store it in a process variable:
= {
  itemId: response.body.list[1].id
}
Get work item result from queue by ID
Get the details of a work item from a queue. This operation corresponds to the Automation Anywhere List work items in queue with filter by work item ID API.
Input parameters
| Property | Type | Required | Description | Example |
|---|---|---|---|---|
| Work queue ID | String | Yes | The identifier of the queue the work item is in. | 20 |
| Work item ID | Number | Yes | The identifier of the work item to fetch, for example the one you stored after adding the work item. | 40957 |
Output
The connector returns the HTTP response of the Control Room, with the response data in response.body. The response contains information about the work item:
{
  "page": {
    "offset": 0,
    "total": 5,
    "totalFilter": 1
  },
  "list": [
    {
      "id": "11804",
      "createdBy": "24",
      "createdOn": "2020-05-26T10:19:34.786711300Z",
      "updatedBy": "24",
      "updatedOn": "2020-05-26T10:19:34.786711300Z",
      "version": "1",
      "json": {},
      "result": "",
      "deviceId": "0",
      "status": "NEW",
      "col1": "Brian",
      "col2": "Matthews",
      "col3": "bmatthews0@example.com",
      "deviceUserId": "0",
      "queueId": "20",
      "comment": "",
      "automationId": "0",
      "totalPausedTime": "0",
      "error": "",
      "col6": "",
      "col10": ""
    }
  ]
}
To check whether a bot processed the work item, store its status in a process variable with a Result expression. The itemState variable then tells you whether the item was processed:
= {
  itemState: response.body.list[1].status
}
Wait for a work item to be processed
Automation Anywhere does not guarantee that a bot processes a work item right away. Model your BPMN diagram to poll periodically, for example with a timer and a loop. To learn more, refer to the entry Solution with Timer and Loop on the Camunda BPMN examples page.
To avoid performance issues, limit the number of loop retries.